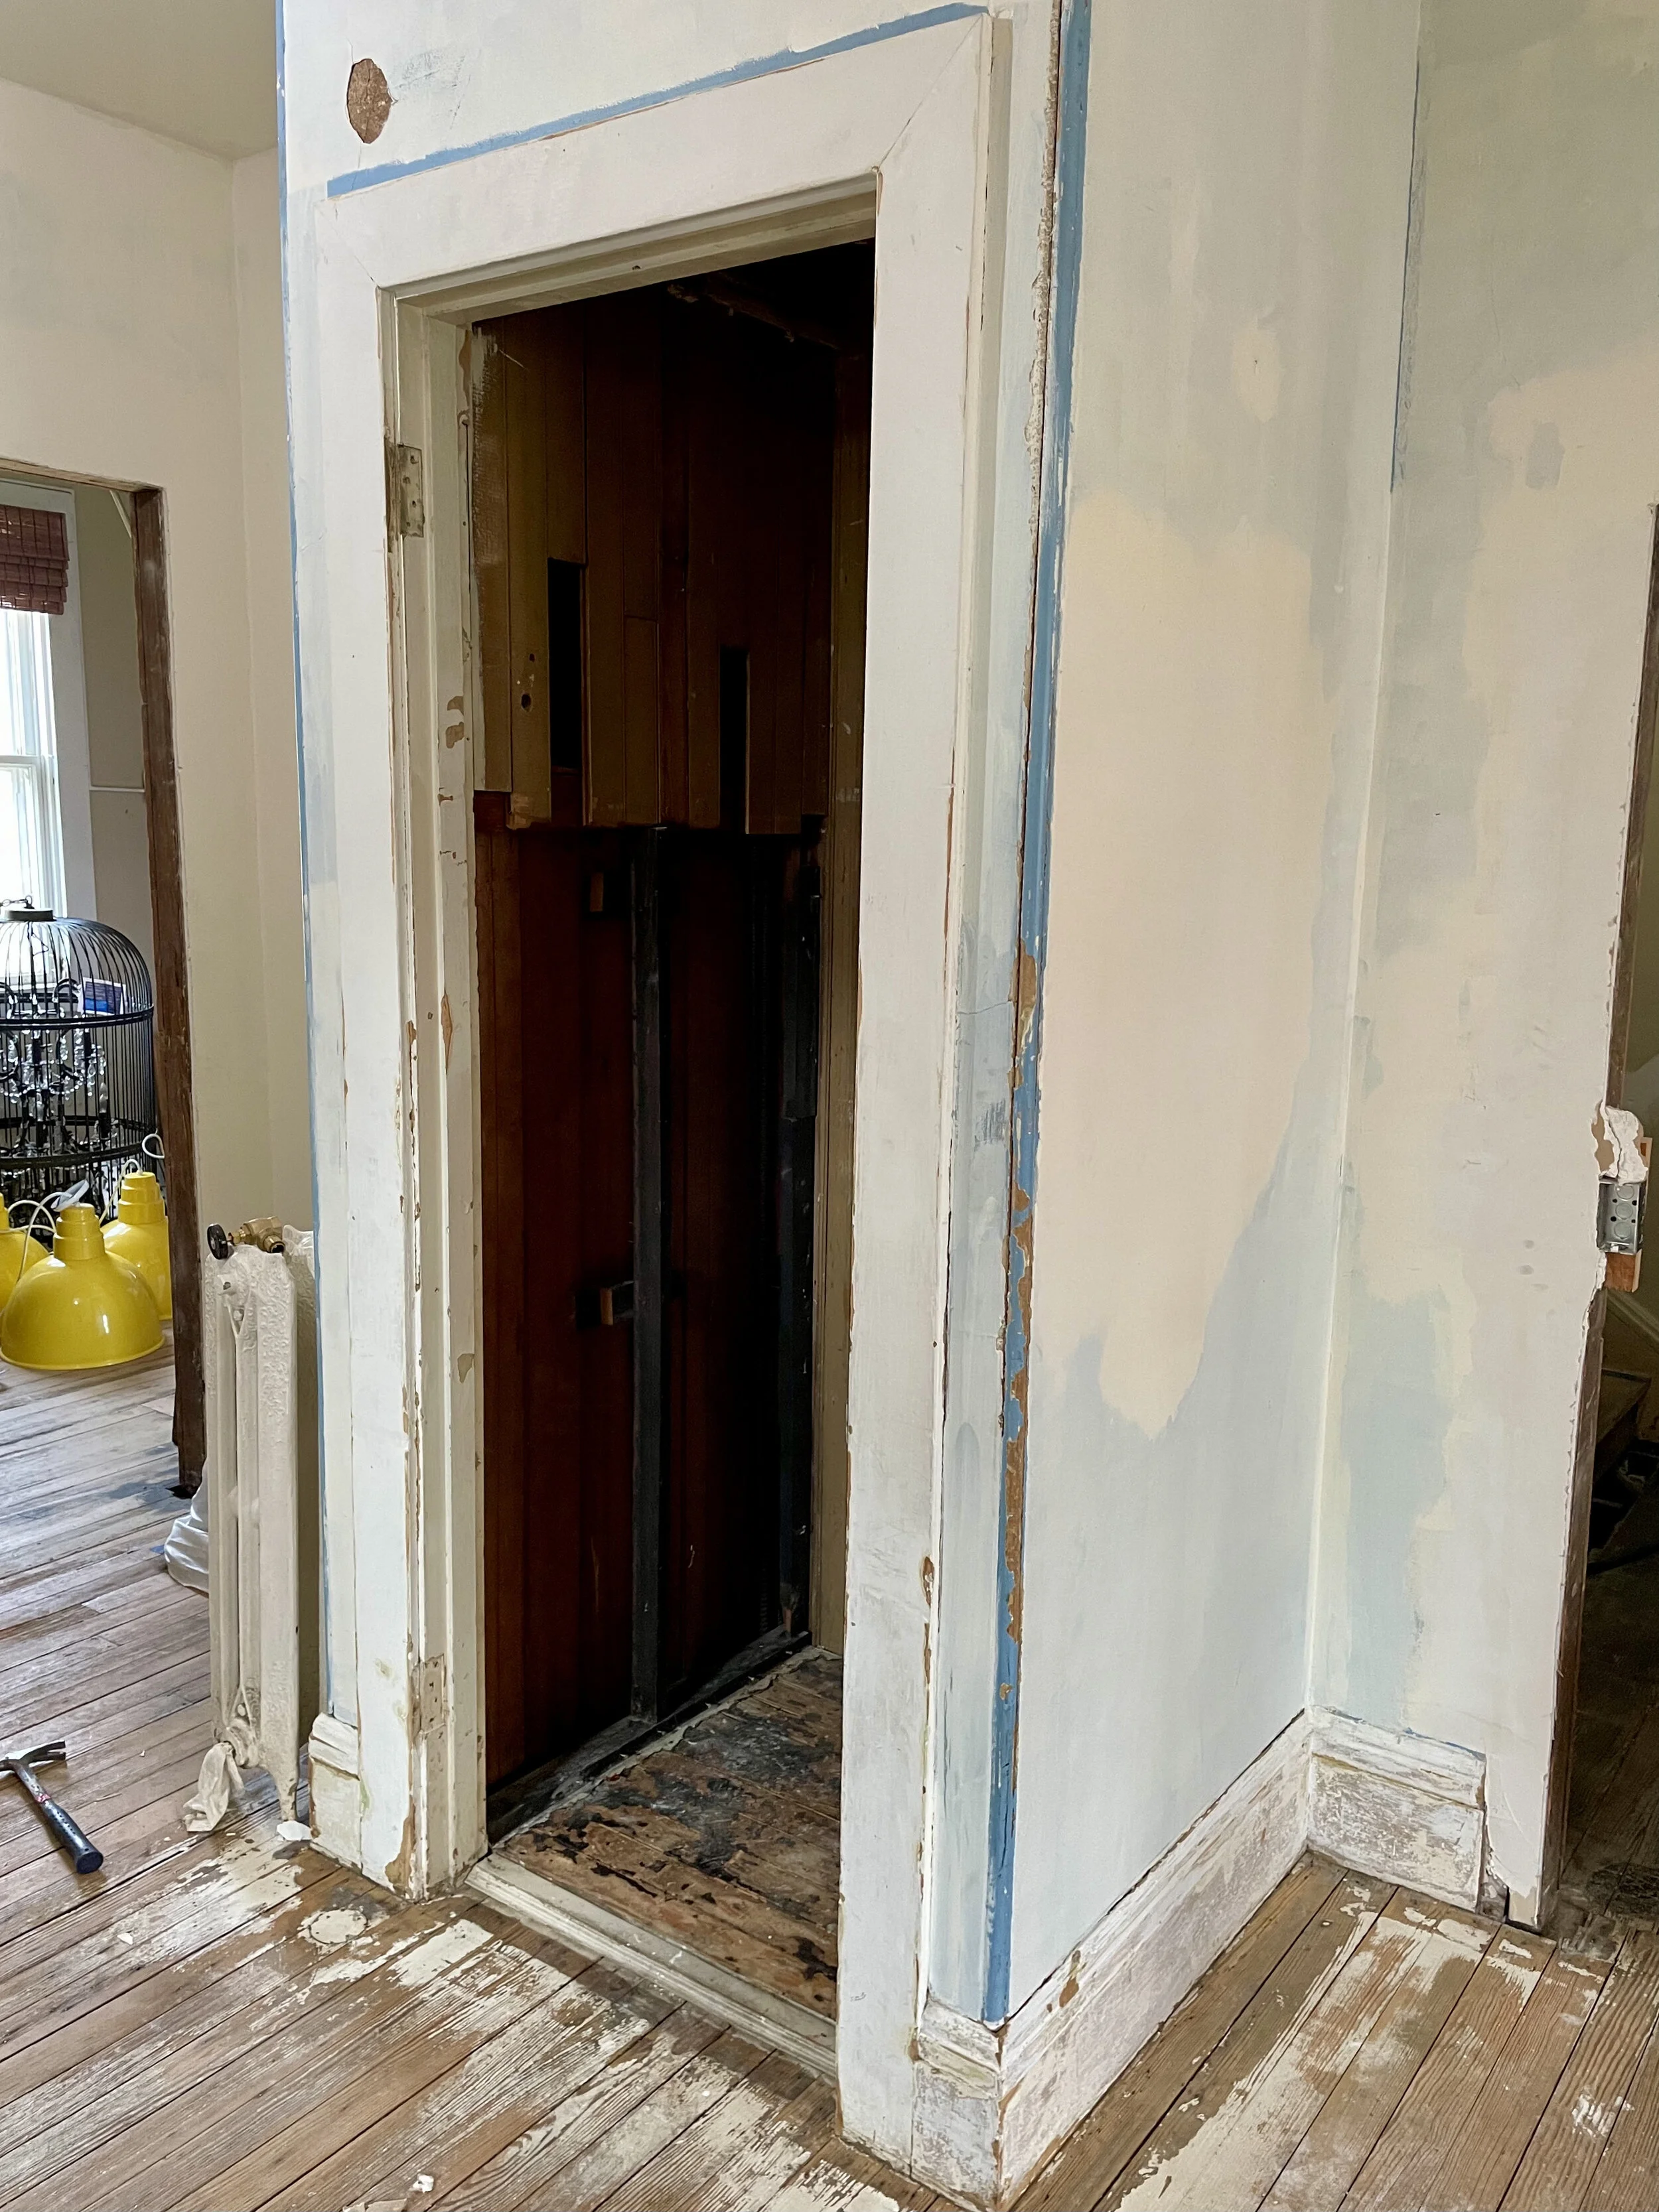
Puzzle: 19th C. Elevator Shaft in a Family Kitchen
The philosophy for my personal home renovation: work with what you’ve got. Maximize all original features still extant. Look through a lense of opportunity rather than hinderance when it comes to existing character. This applies to the elevator shaft that is situated in the middle of the once servant’s quarters that will now serve as a family kitchen. When designing the kitchen I initially wanted to leave the elevator shaft unobstructed so that it could become a unique pantry for storage however it became clear that it would be better used as a nook for the refrigerator.
I ordered a refrigerator column that is counter depth, tall and narrow and that will fit in the shaft with room to spare. I plan use the extra space for broom storage with cast-iron hooks and narrow wooden shelves for cleaning supplies. I already have a full upright freezer that I have made a home for in a connecting room which will someday become a wet bar and which also leads into the dining room (exciting future projects!).
The refrigerator that I ordered in July is scheduled to arrive this Friday! I’m very excited but have been scrambling to prepare its home so that it will feel welcome and cared for.
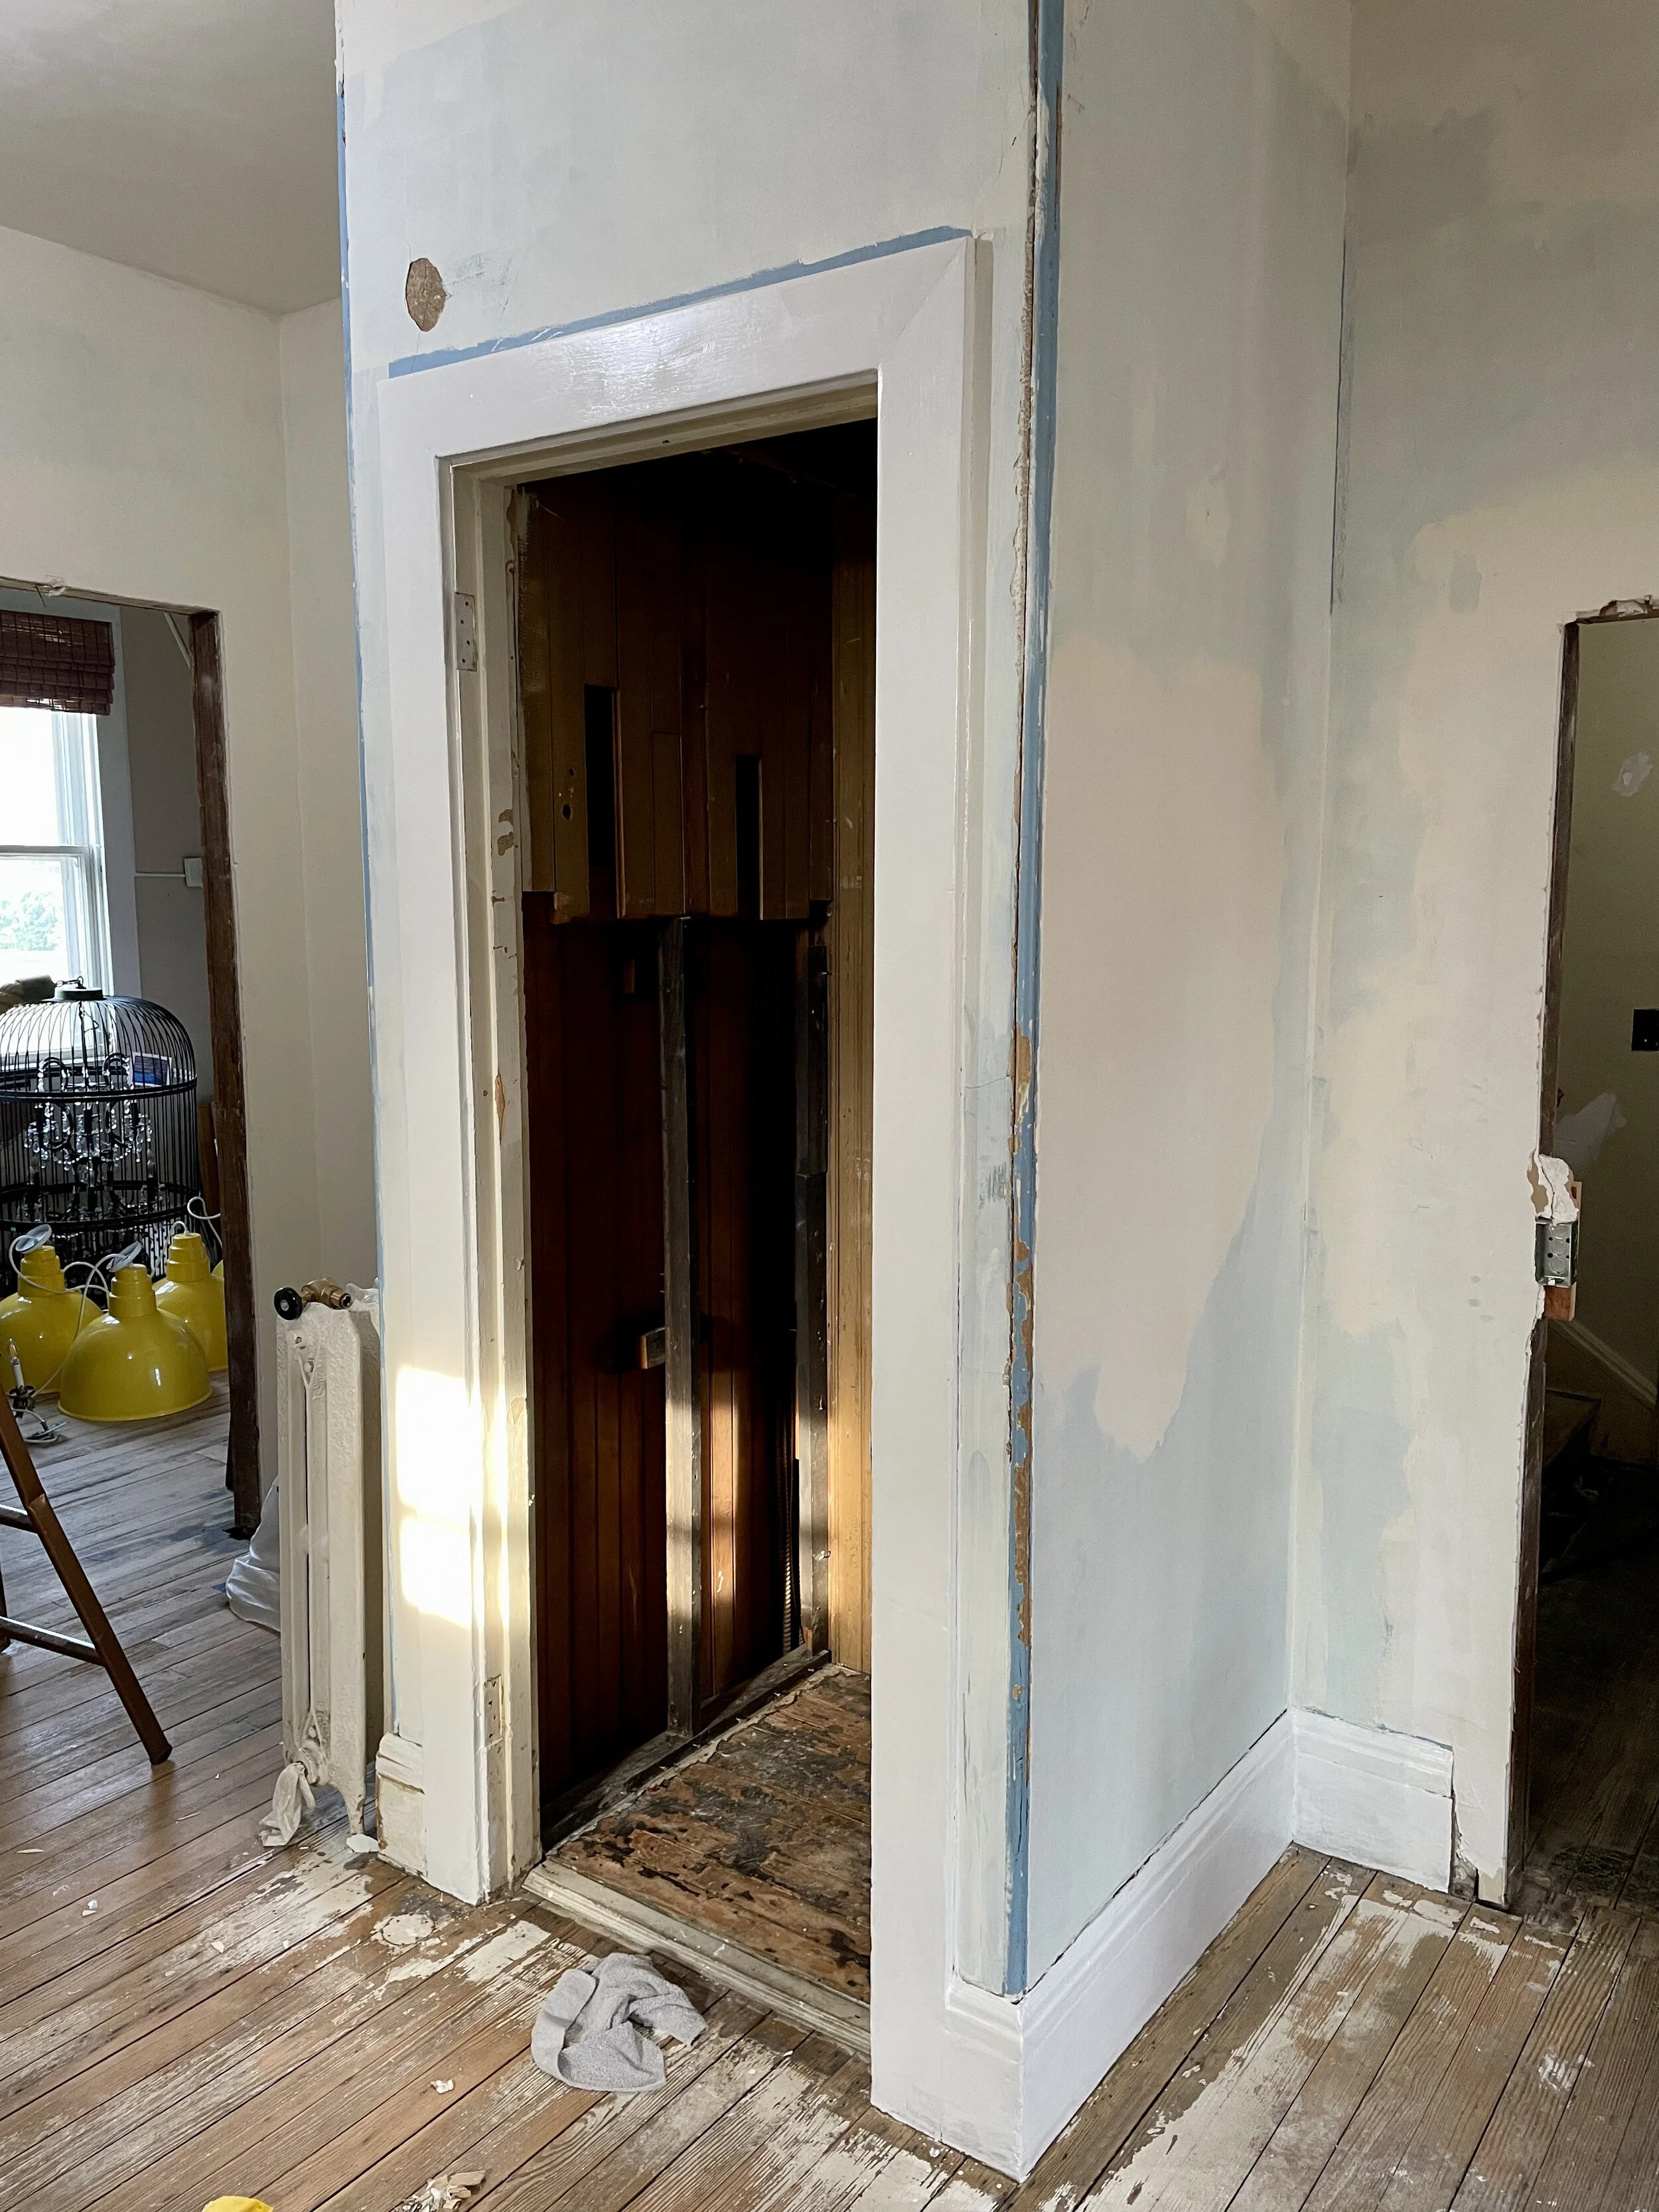
The state of things a few days ago.
I sanded and primed the baseboard and moulding. I tried not to go overboard with sanding while striving for a mostly smooth base for paint: that liminal space between perfection and pleasing enough to keep moving onward.
Baseboard and moulding with first coat of primer.
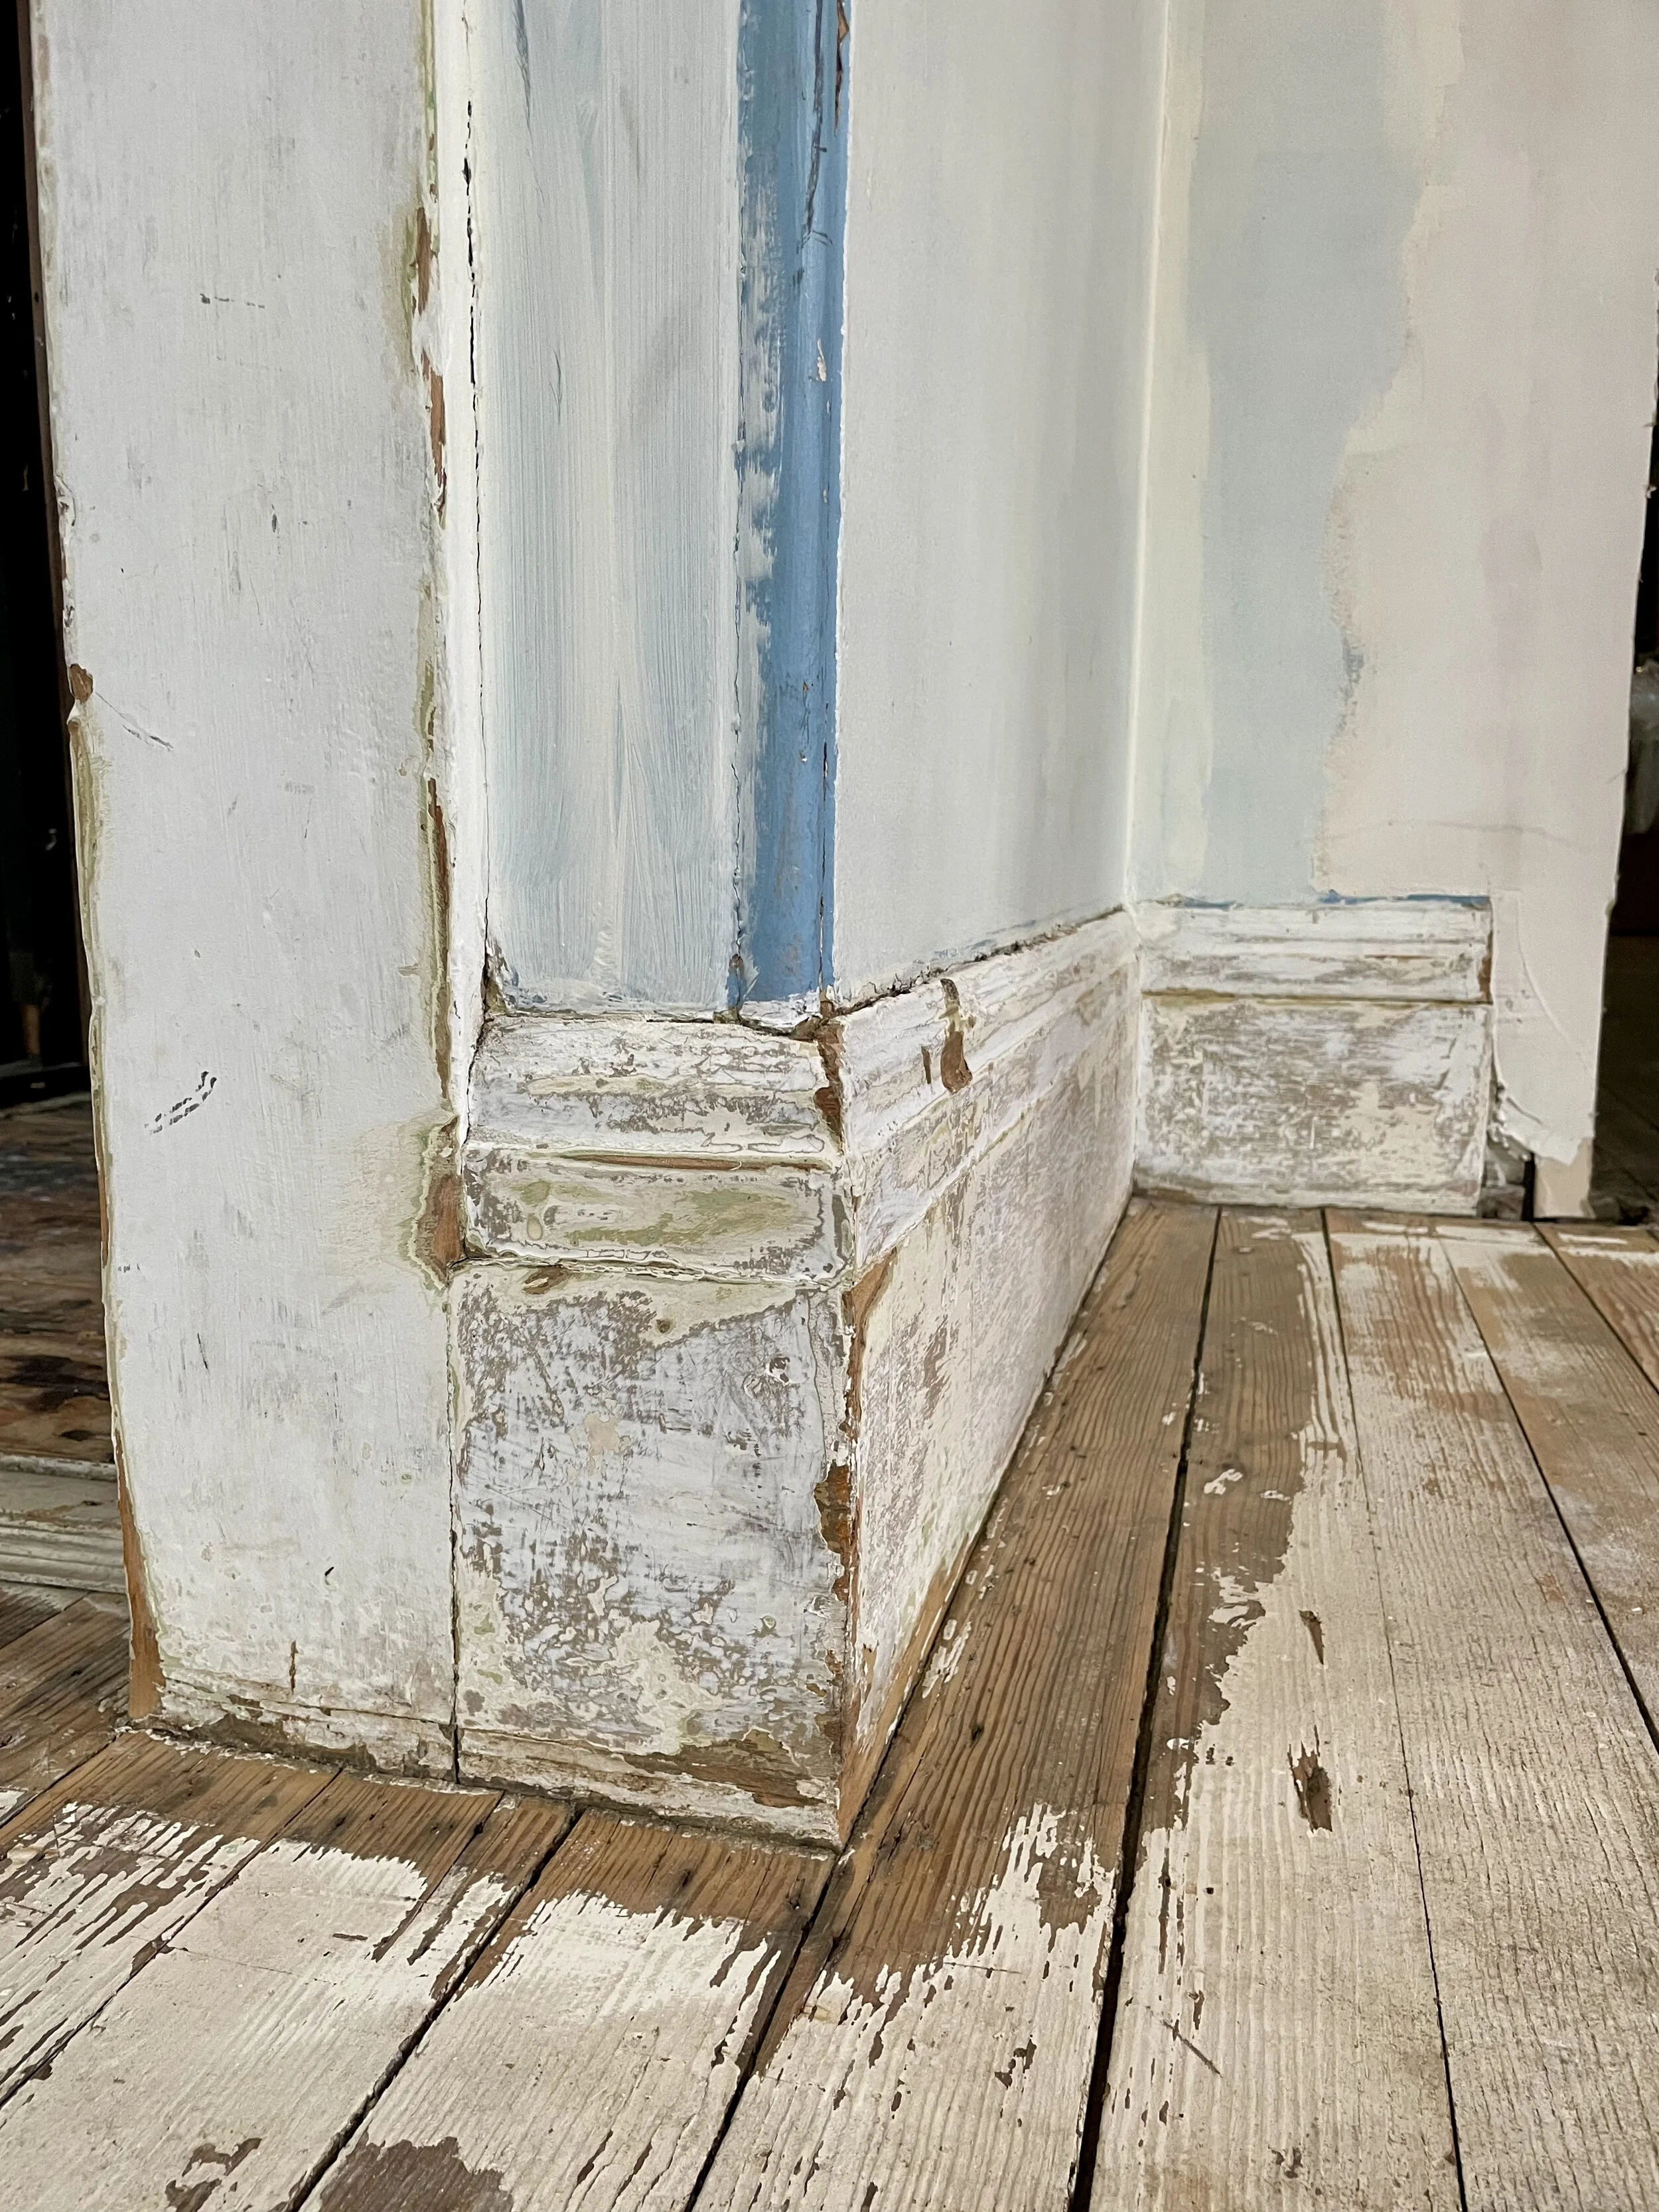
Closeup of baseboard and moulding before.
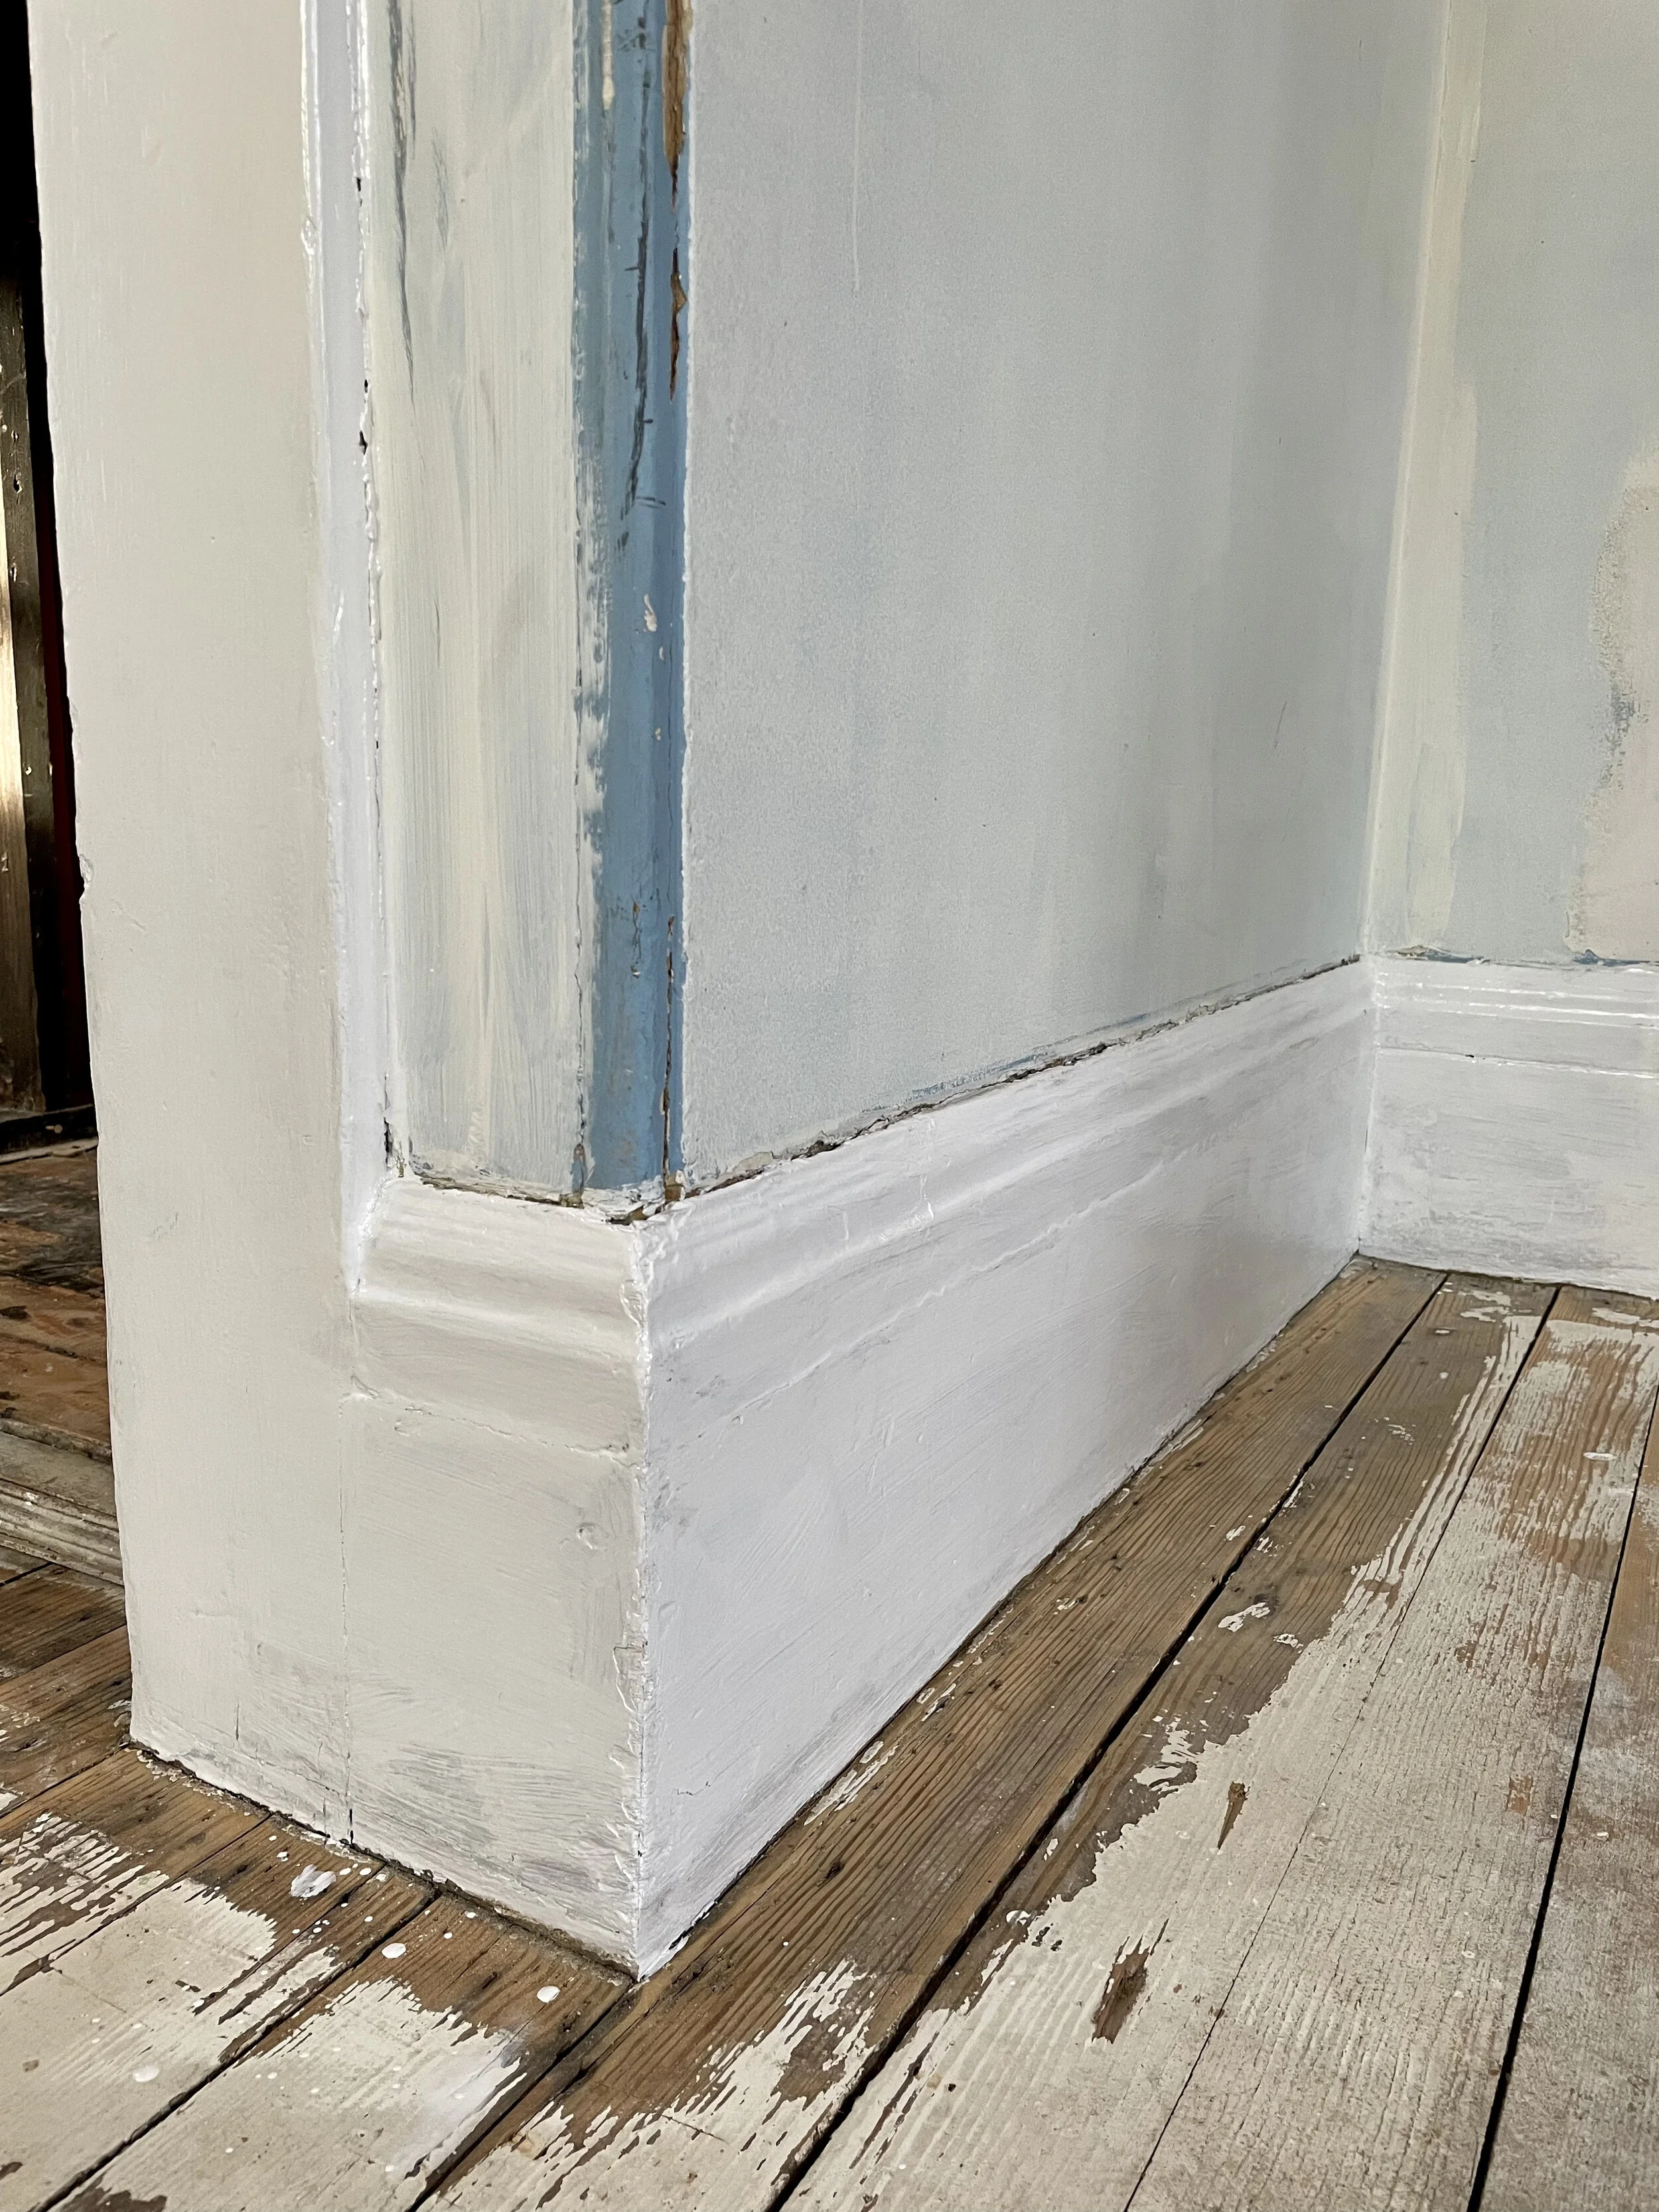
Closeup after sanding, cleaning and applying first coat of primer.
The floor of the elevator shaft: comprised of beadboard harvested from the walls and made into flooring with remnants of quite old (early 20th C.?) linoleum atop. I like the blue colouring on the linoleum and saved a few larger swatches that came out intact to add to the scrapbook of the material history of the home. Despite the pleasing blue hues in the linoleum it took me an entire work day to separate the remains of it from the beadboard.
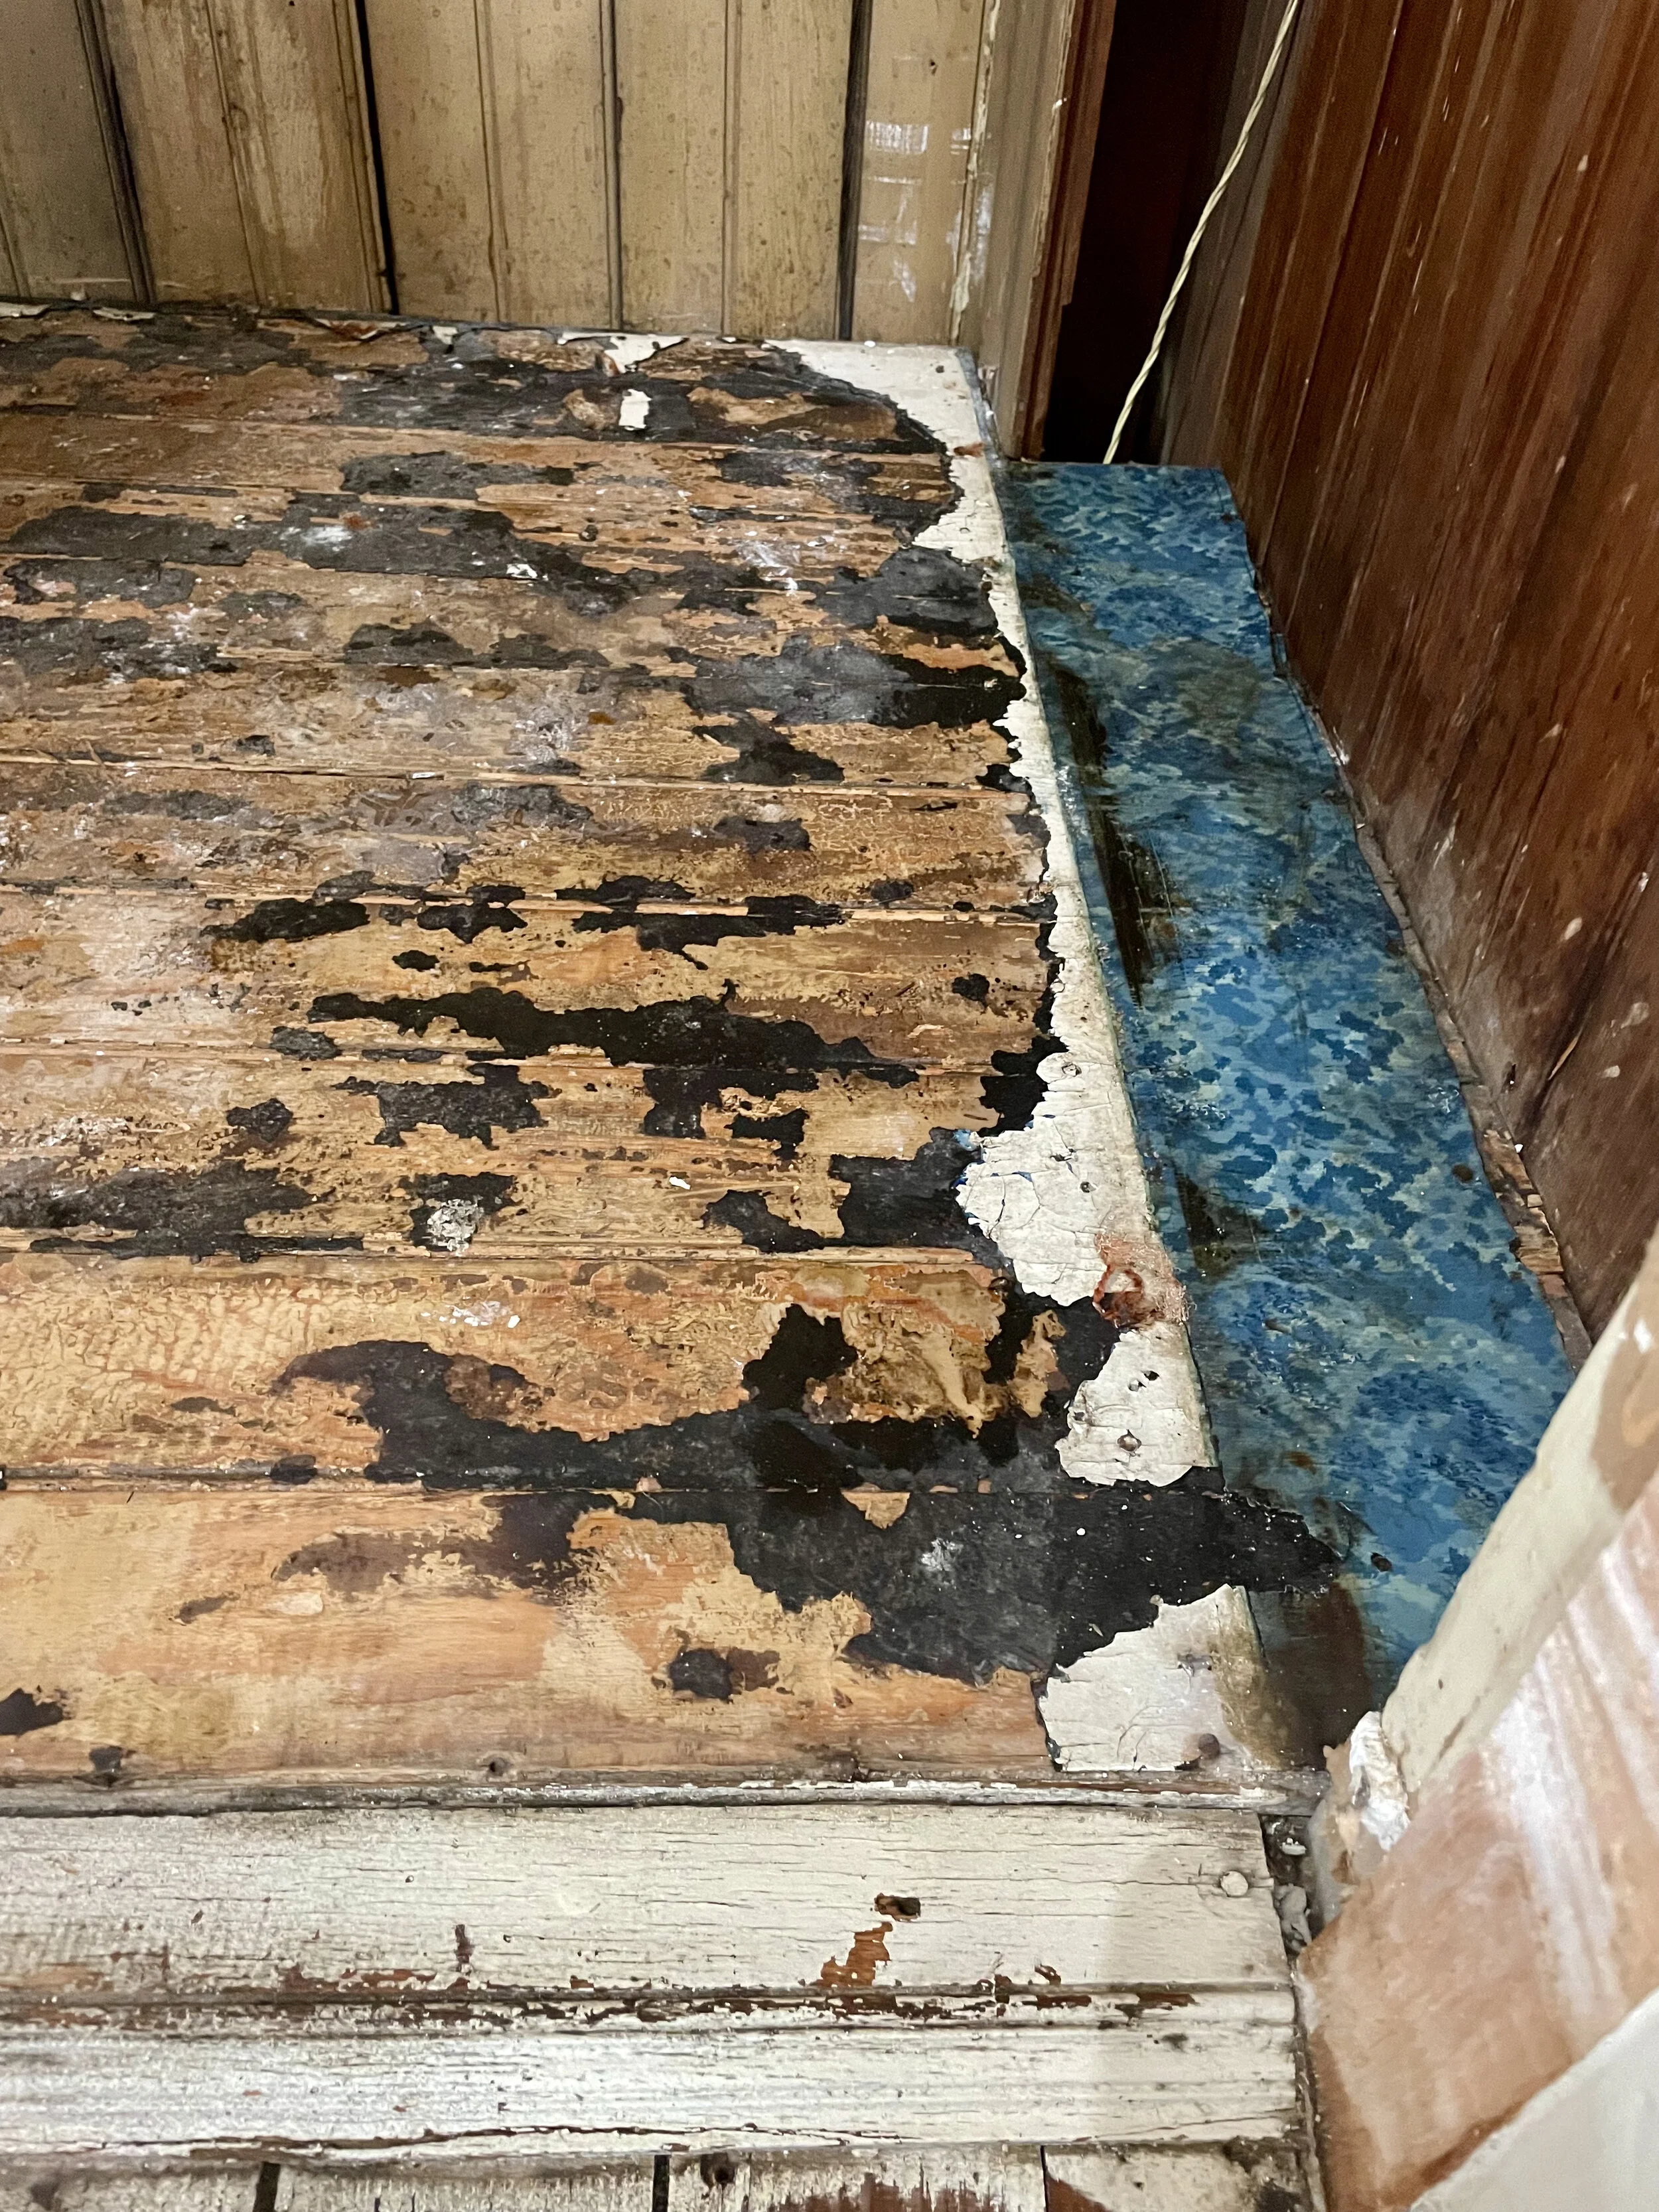
I employed a convoluted method of water, sponge, an electric multitool, hand scrapers, and wet sanding to fully liberate the beadboard floor. I must have dumped 20 buckets of black and muddy brown water. I used water to help loosen the material and clean throughout the entirety of the removal process.
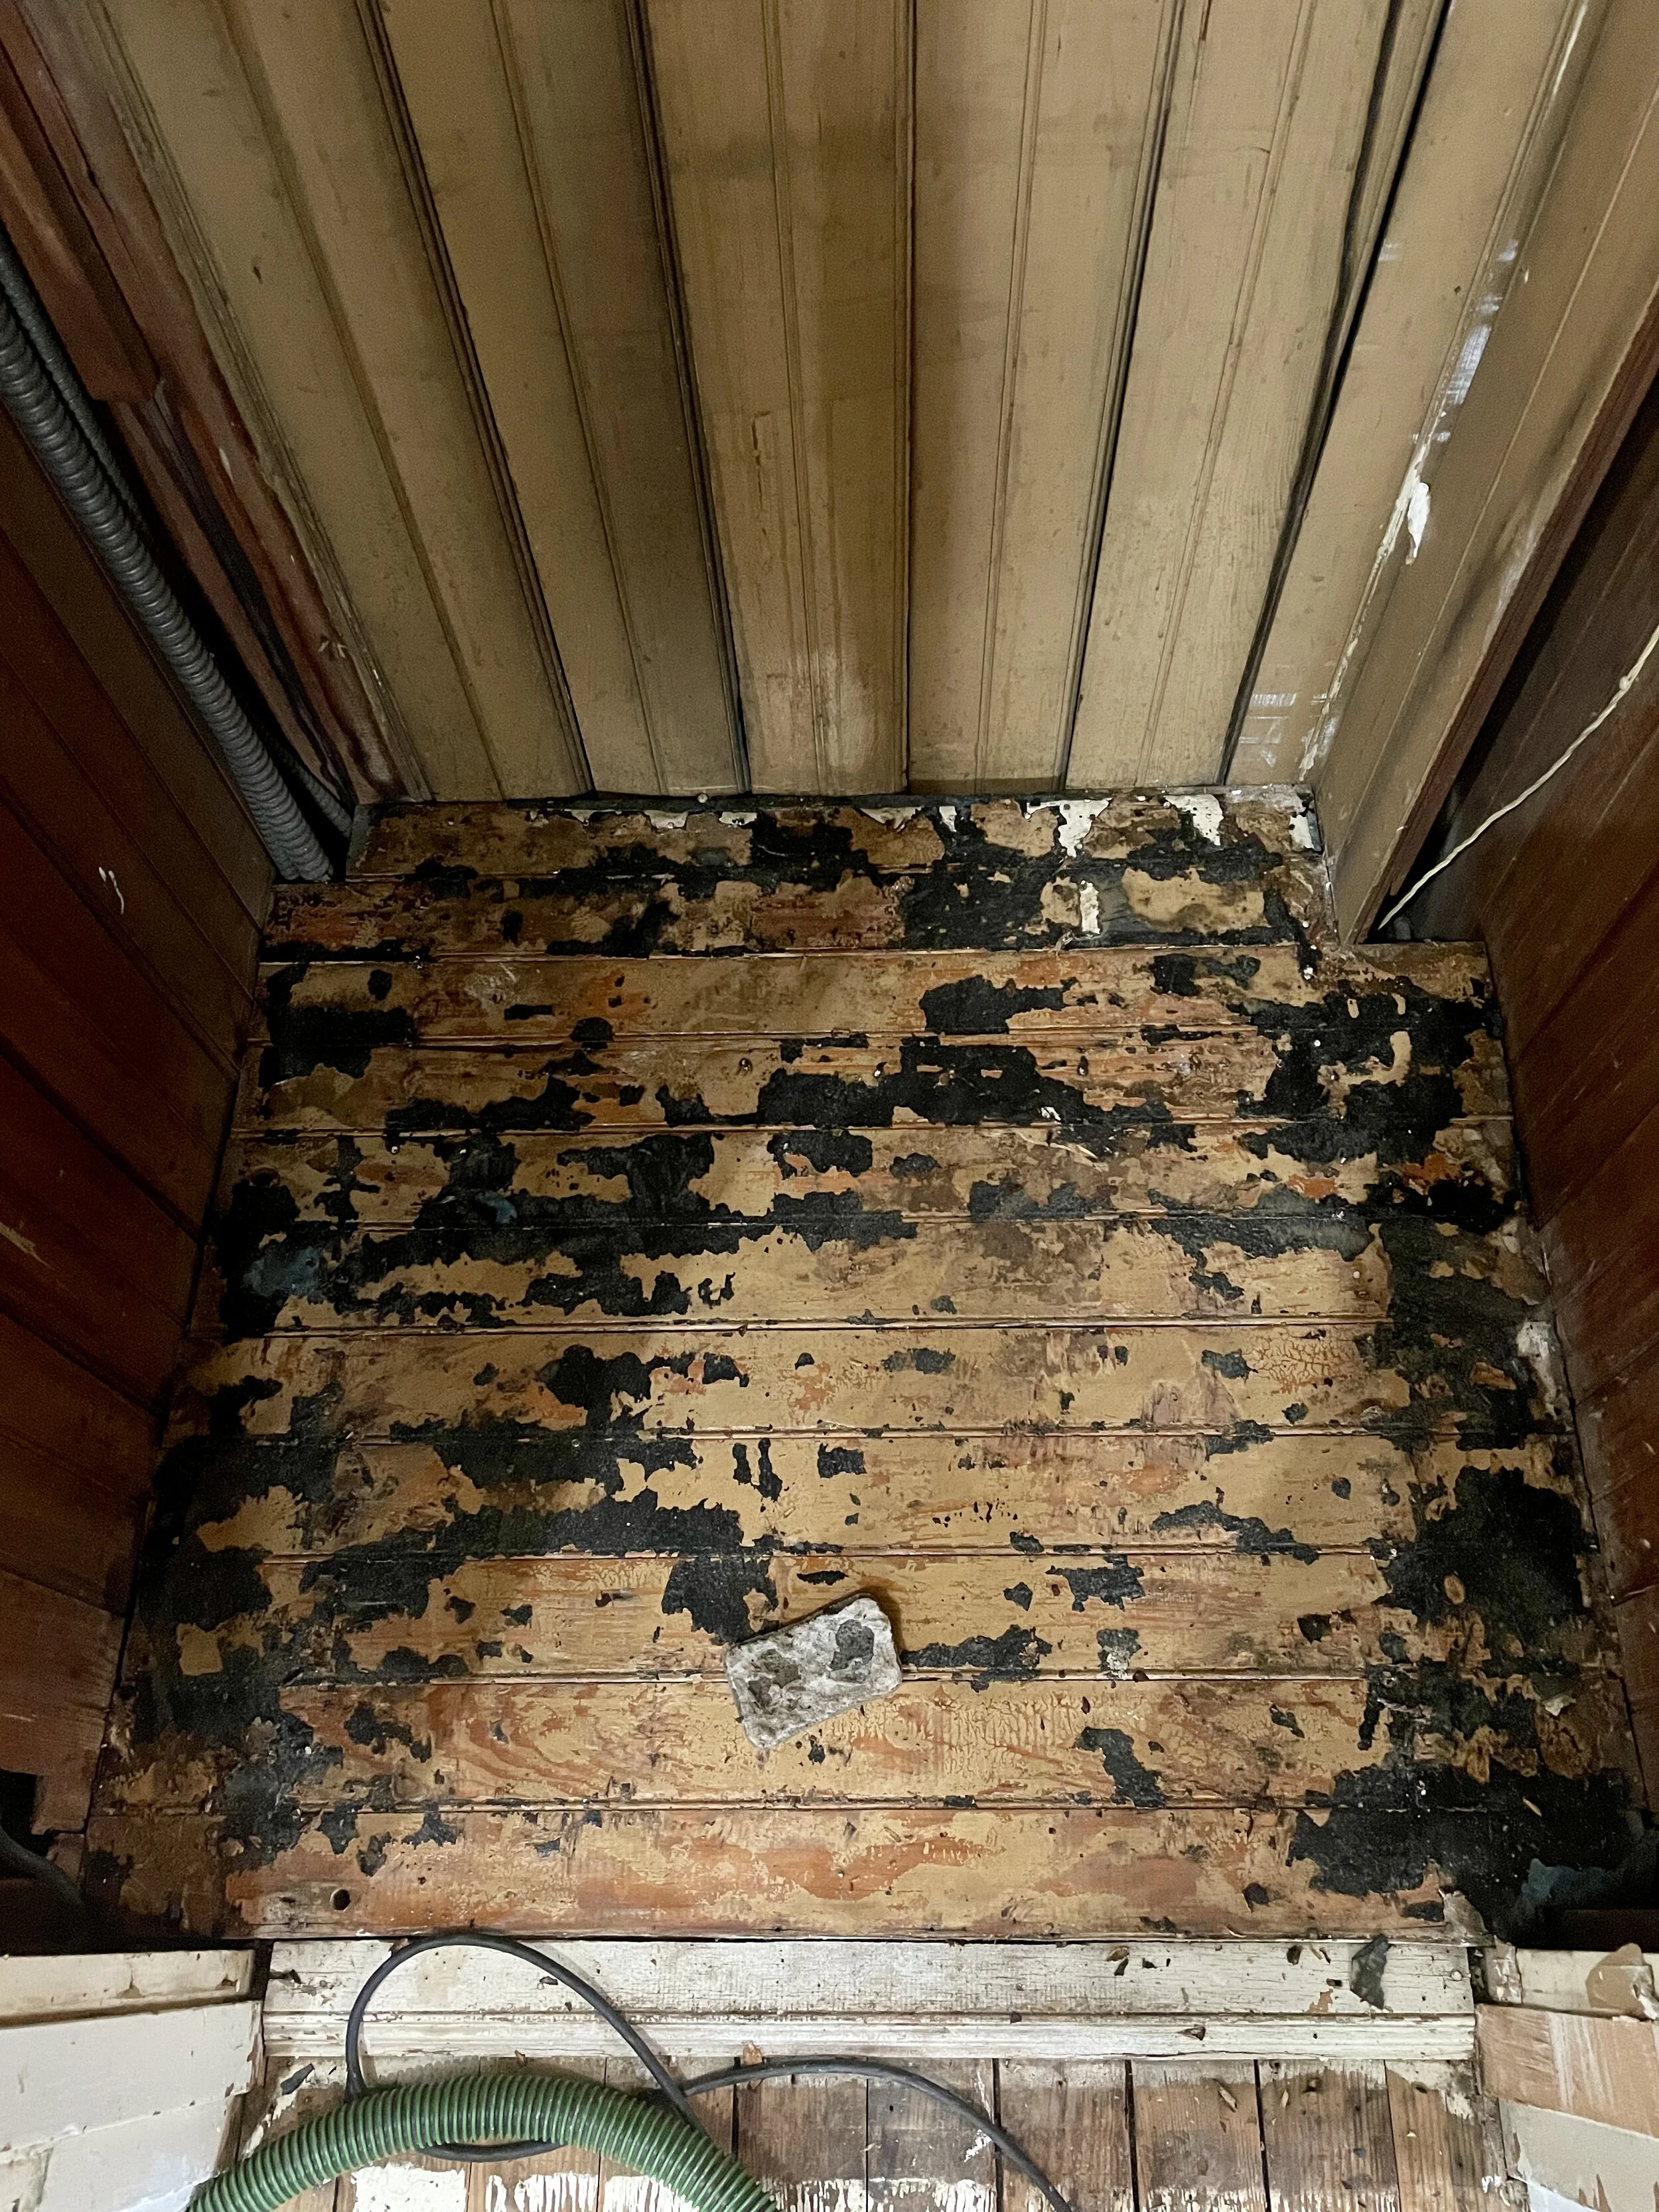
The results after 8 hours of scrubbing and scraping.
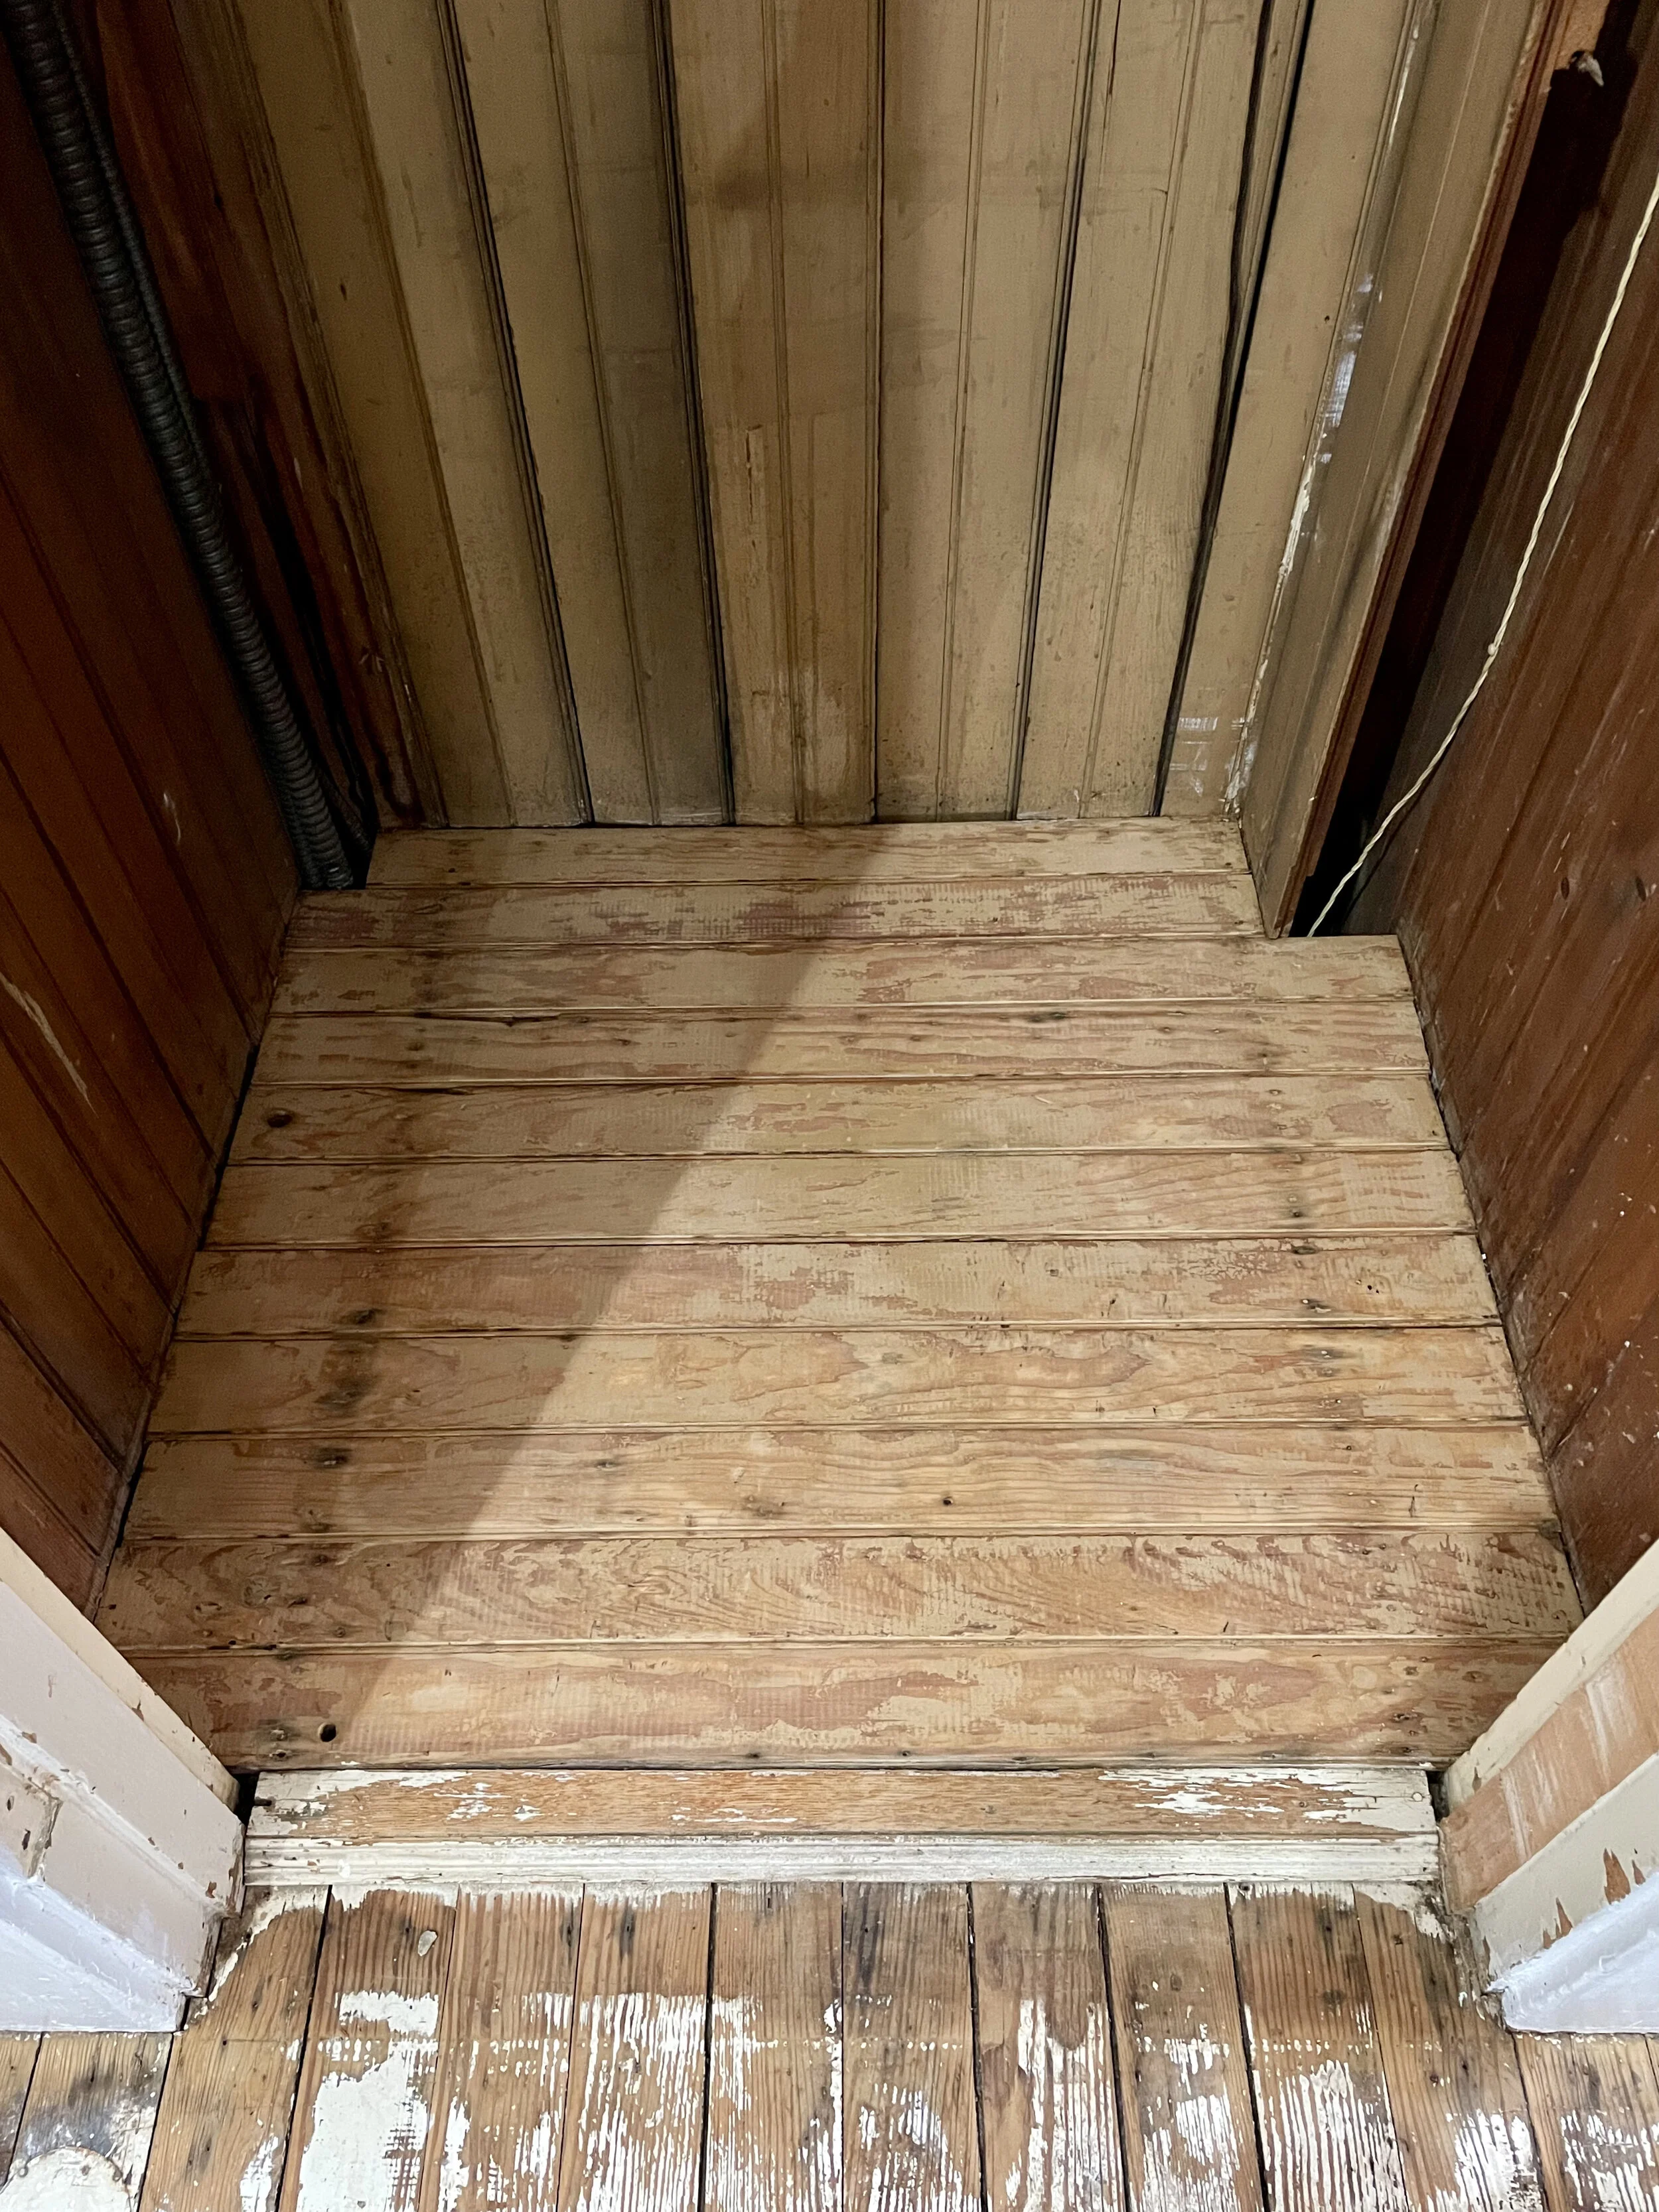
A welcome view. The space actually seems expansive without the black mastic bits littering up the aesthetics. I have plans for this lovely exposed pine beadboard. I will share them with you as they take shape.
Over and out Emma