1886 Parlour Before and After
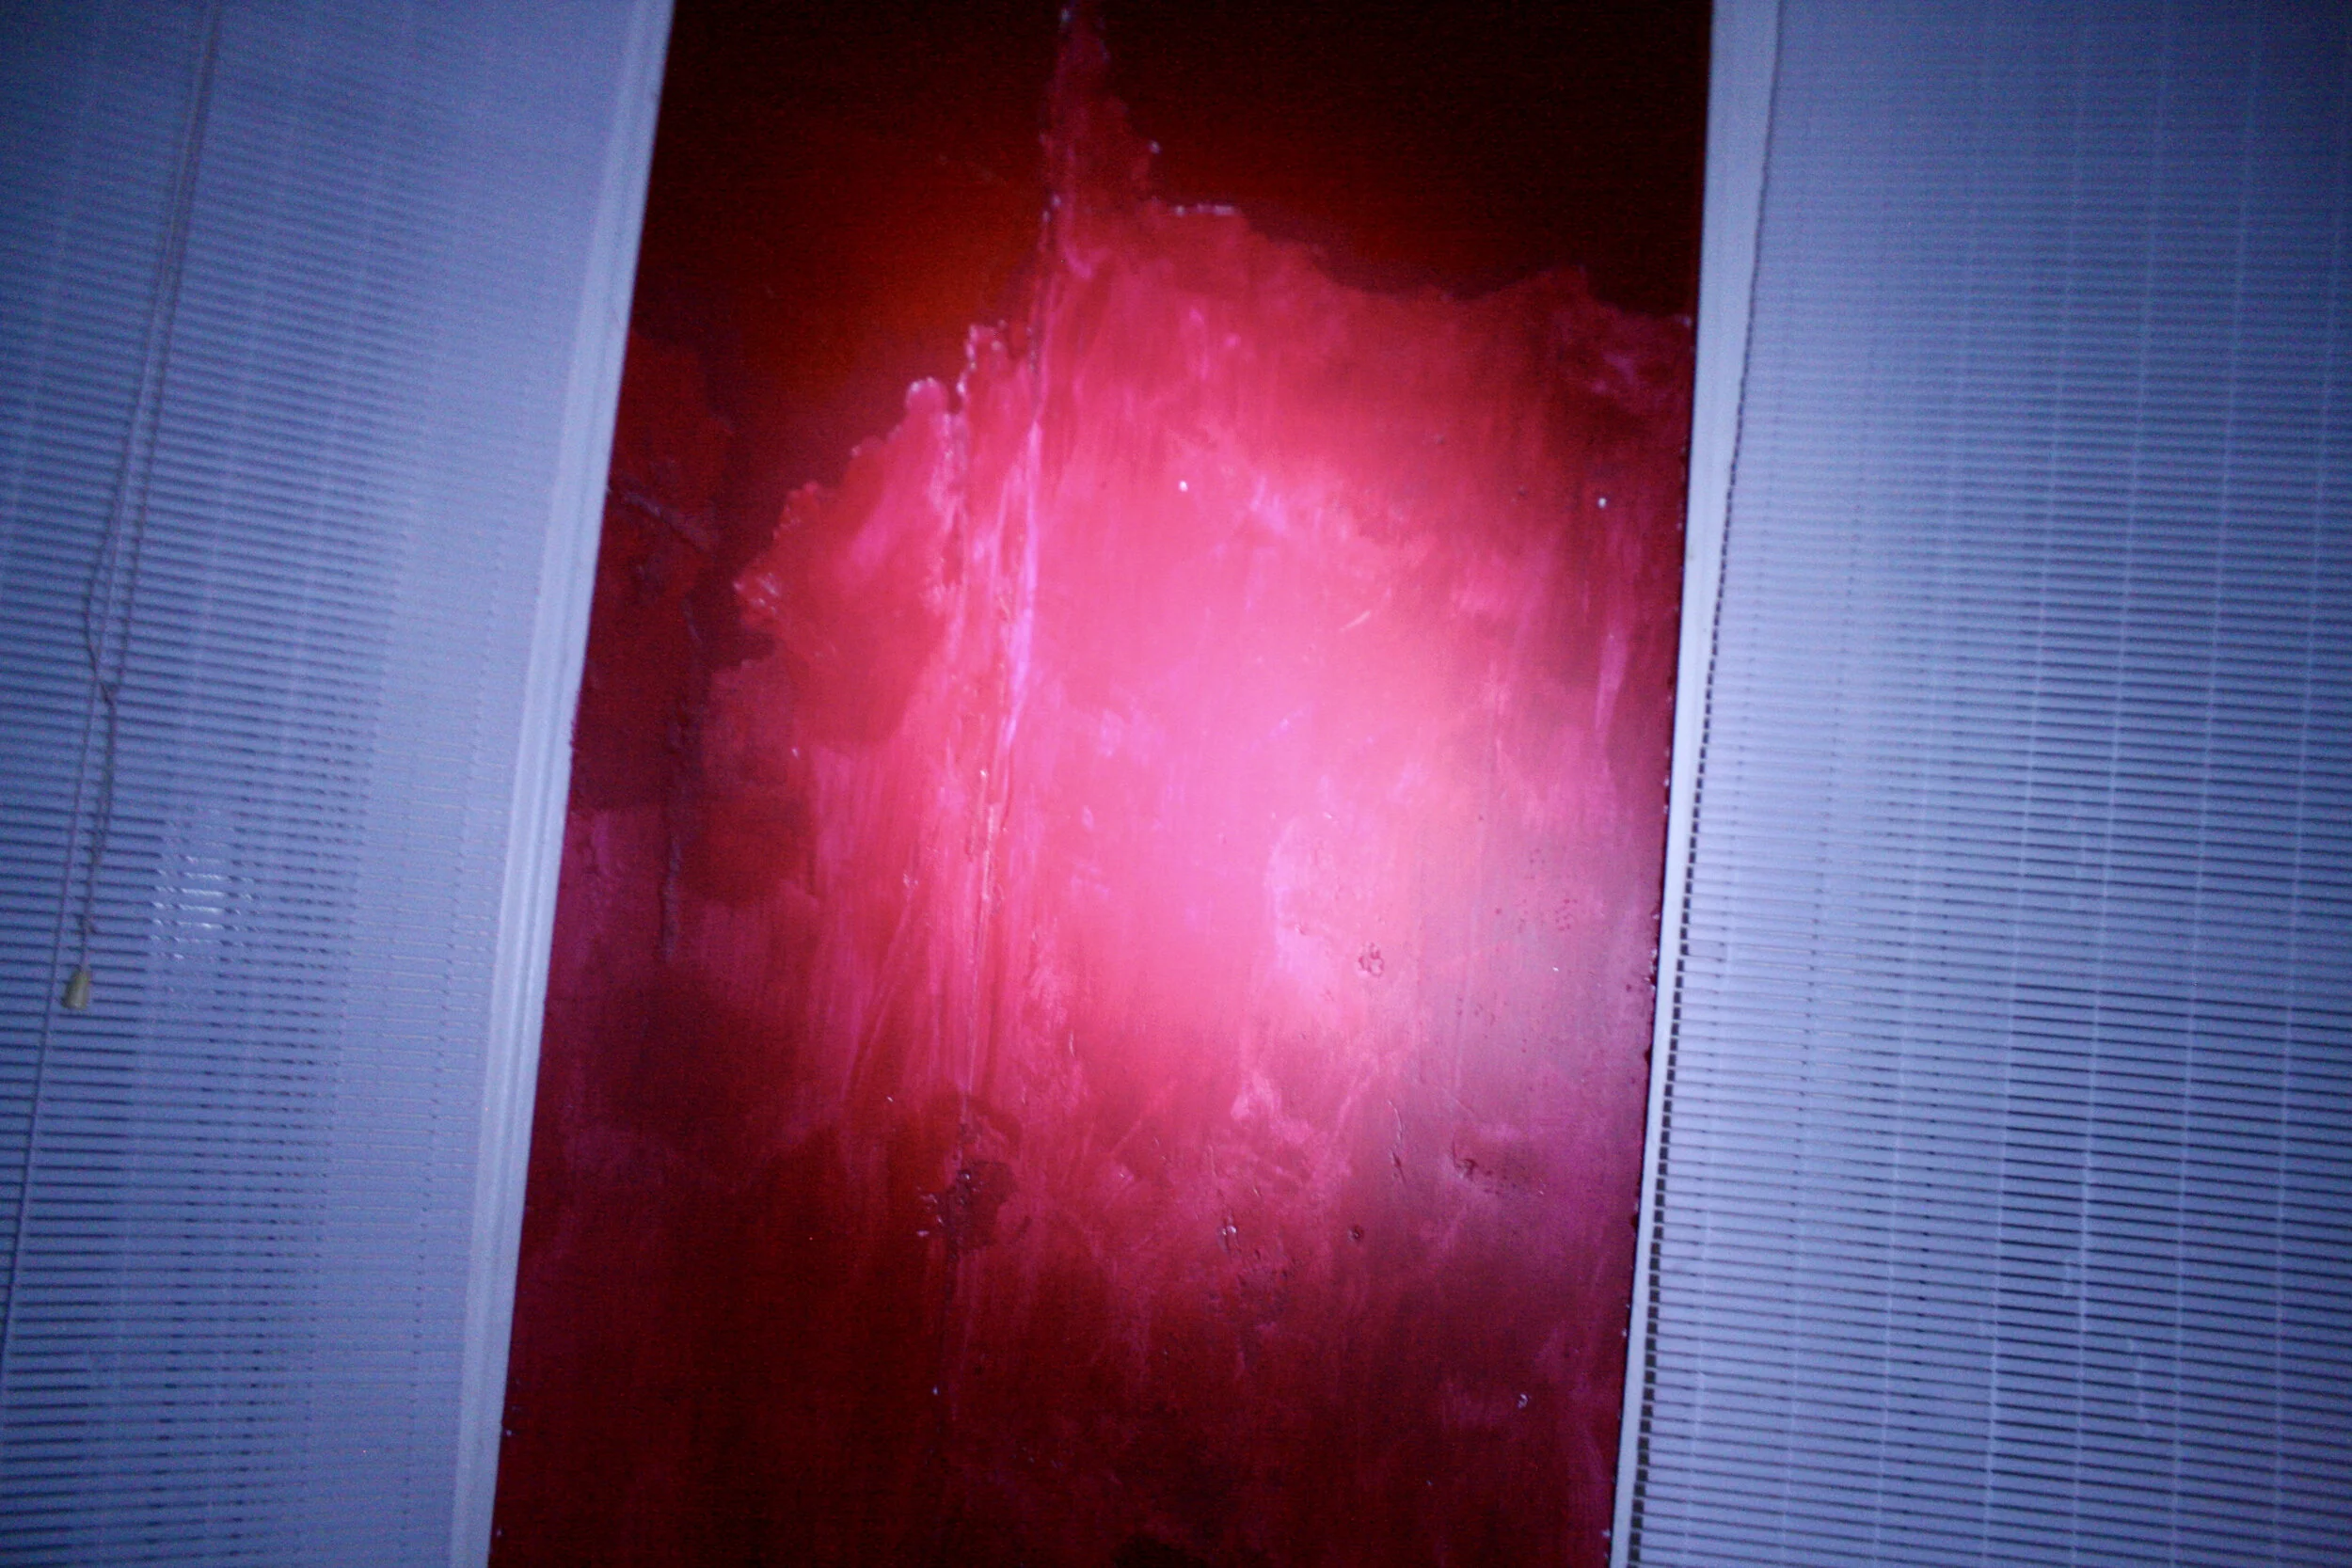
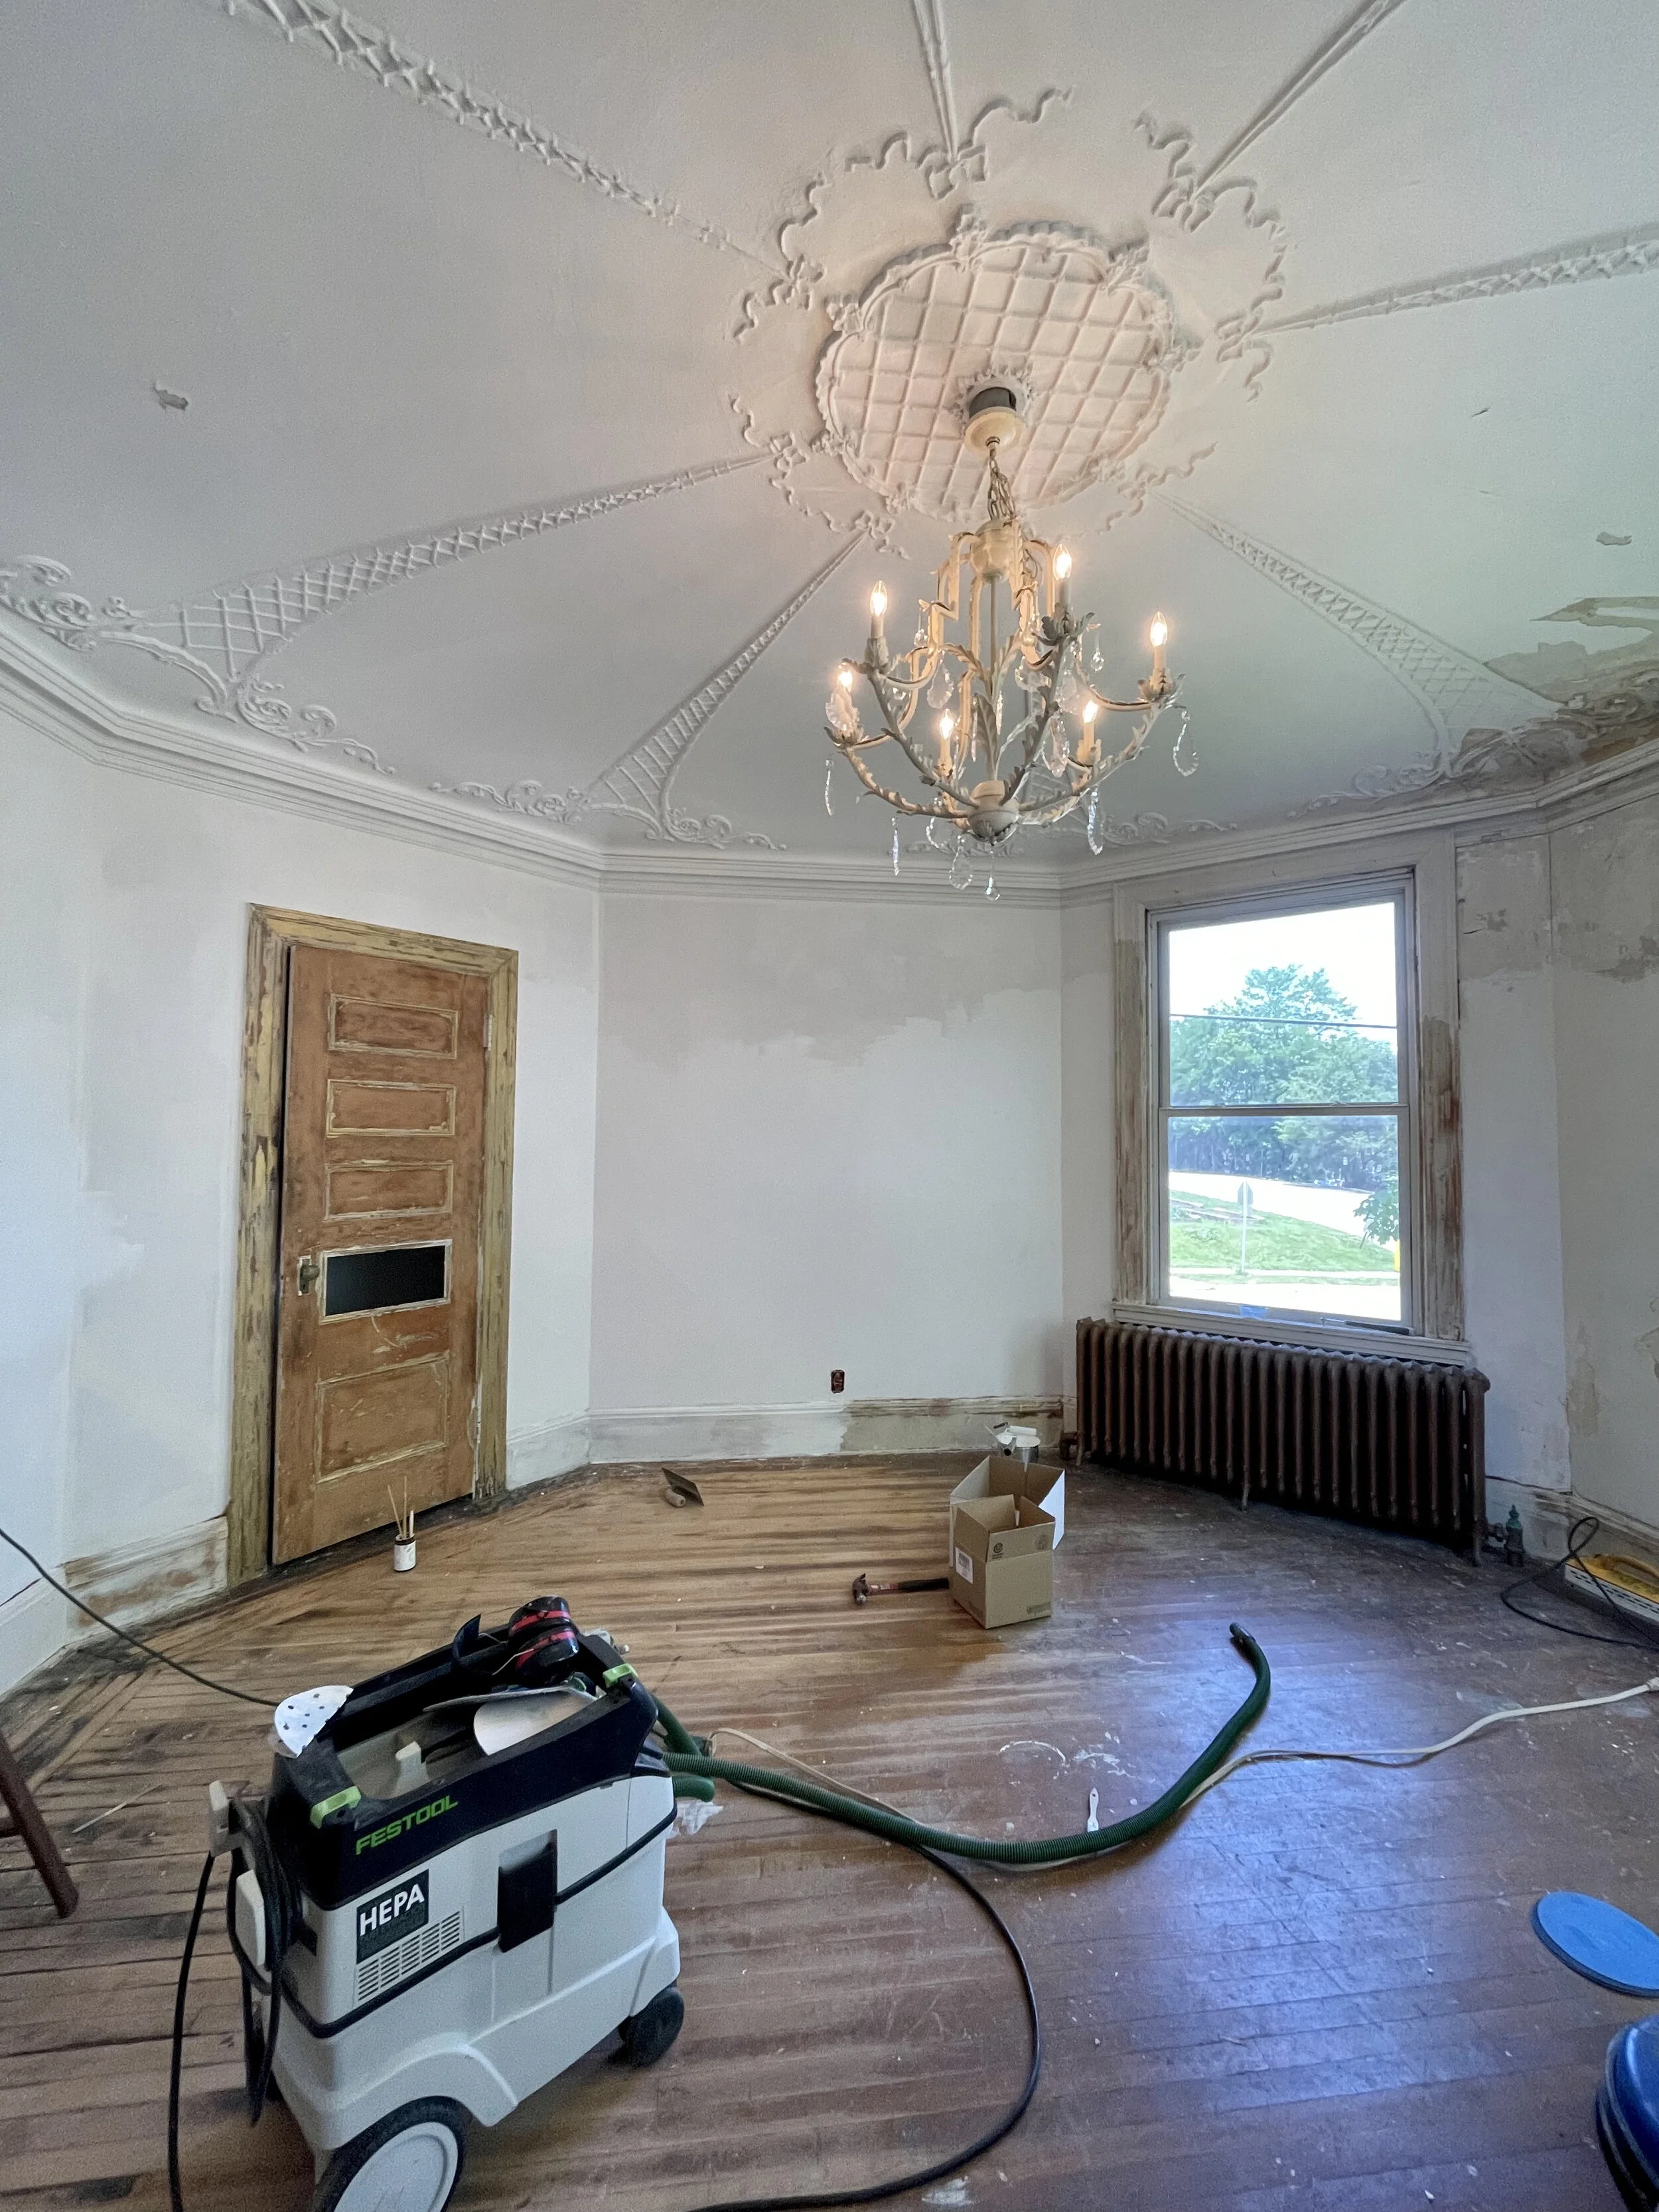
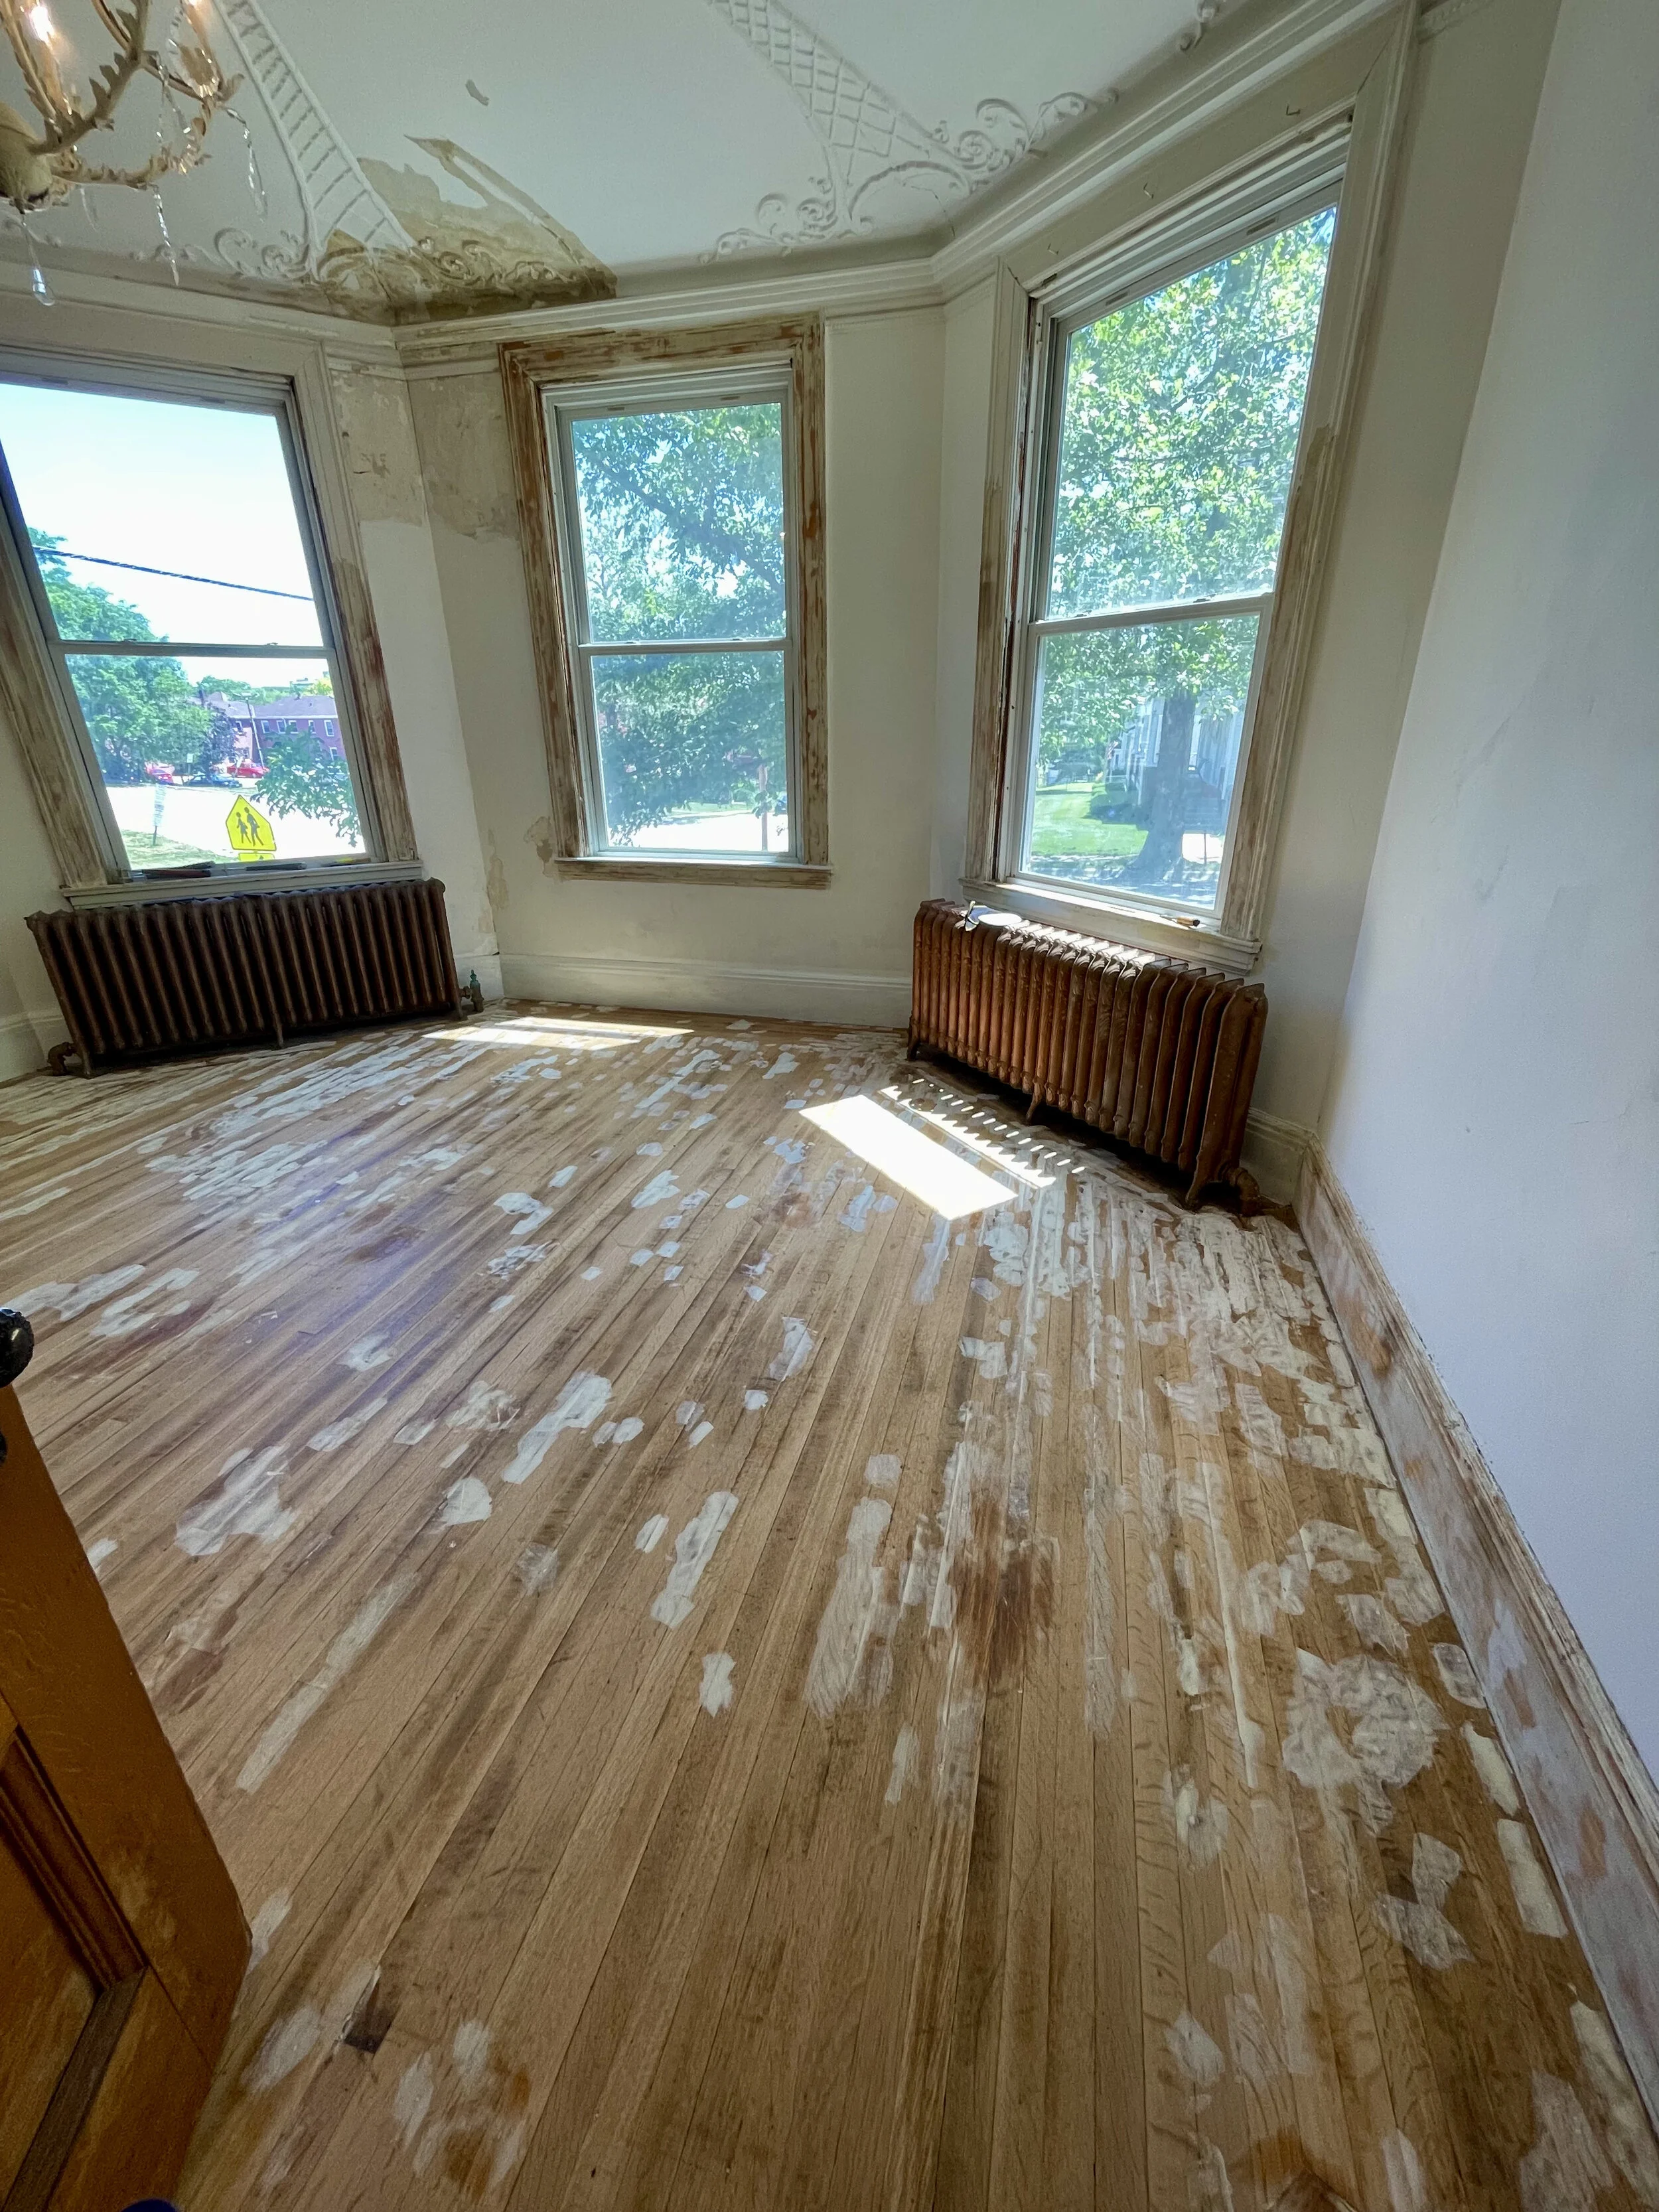
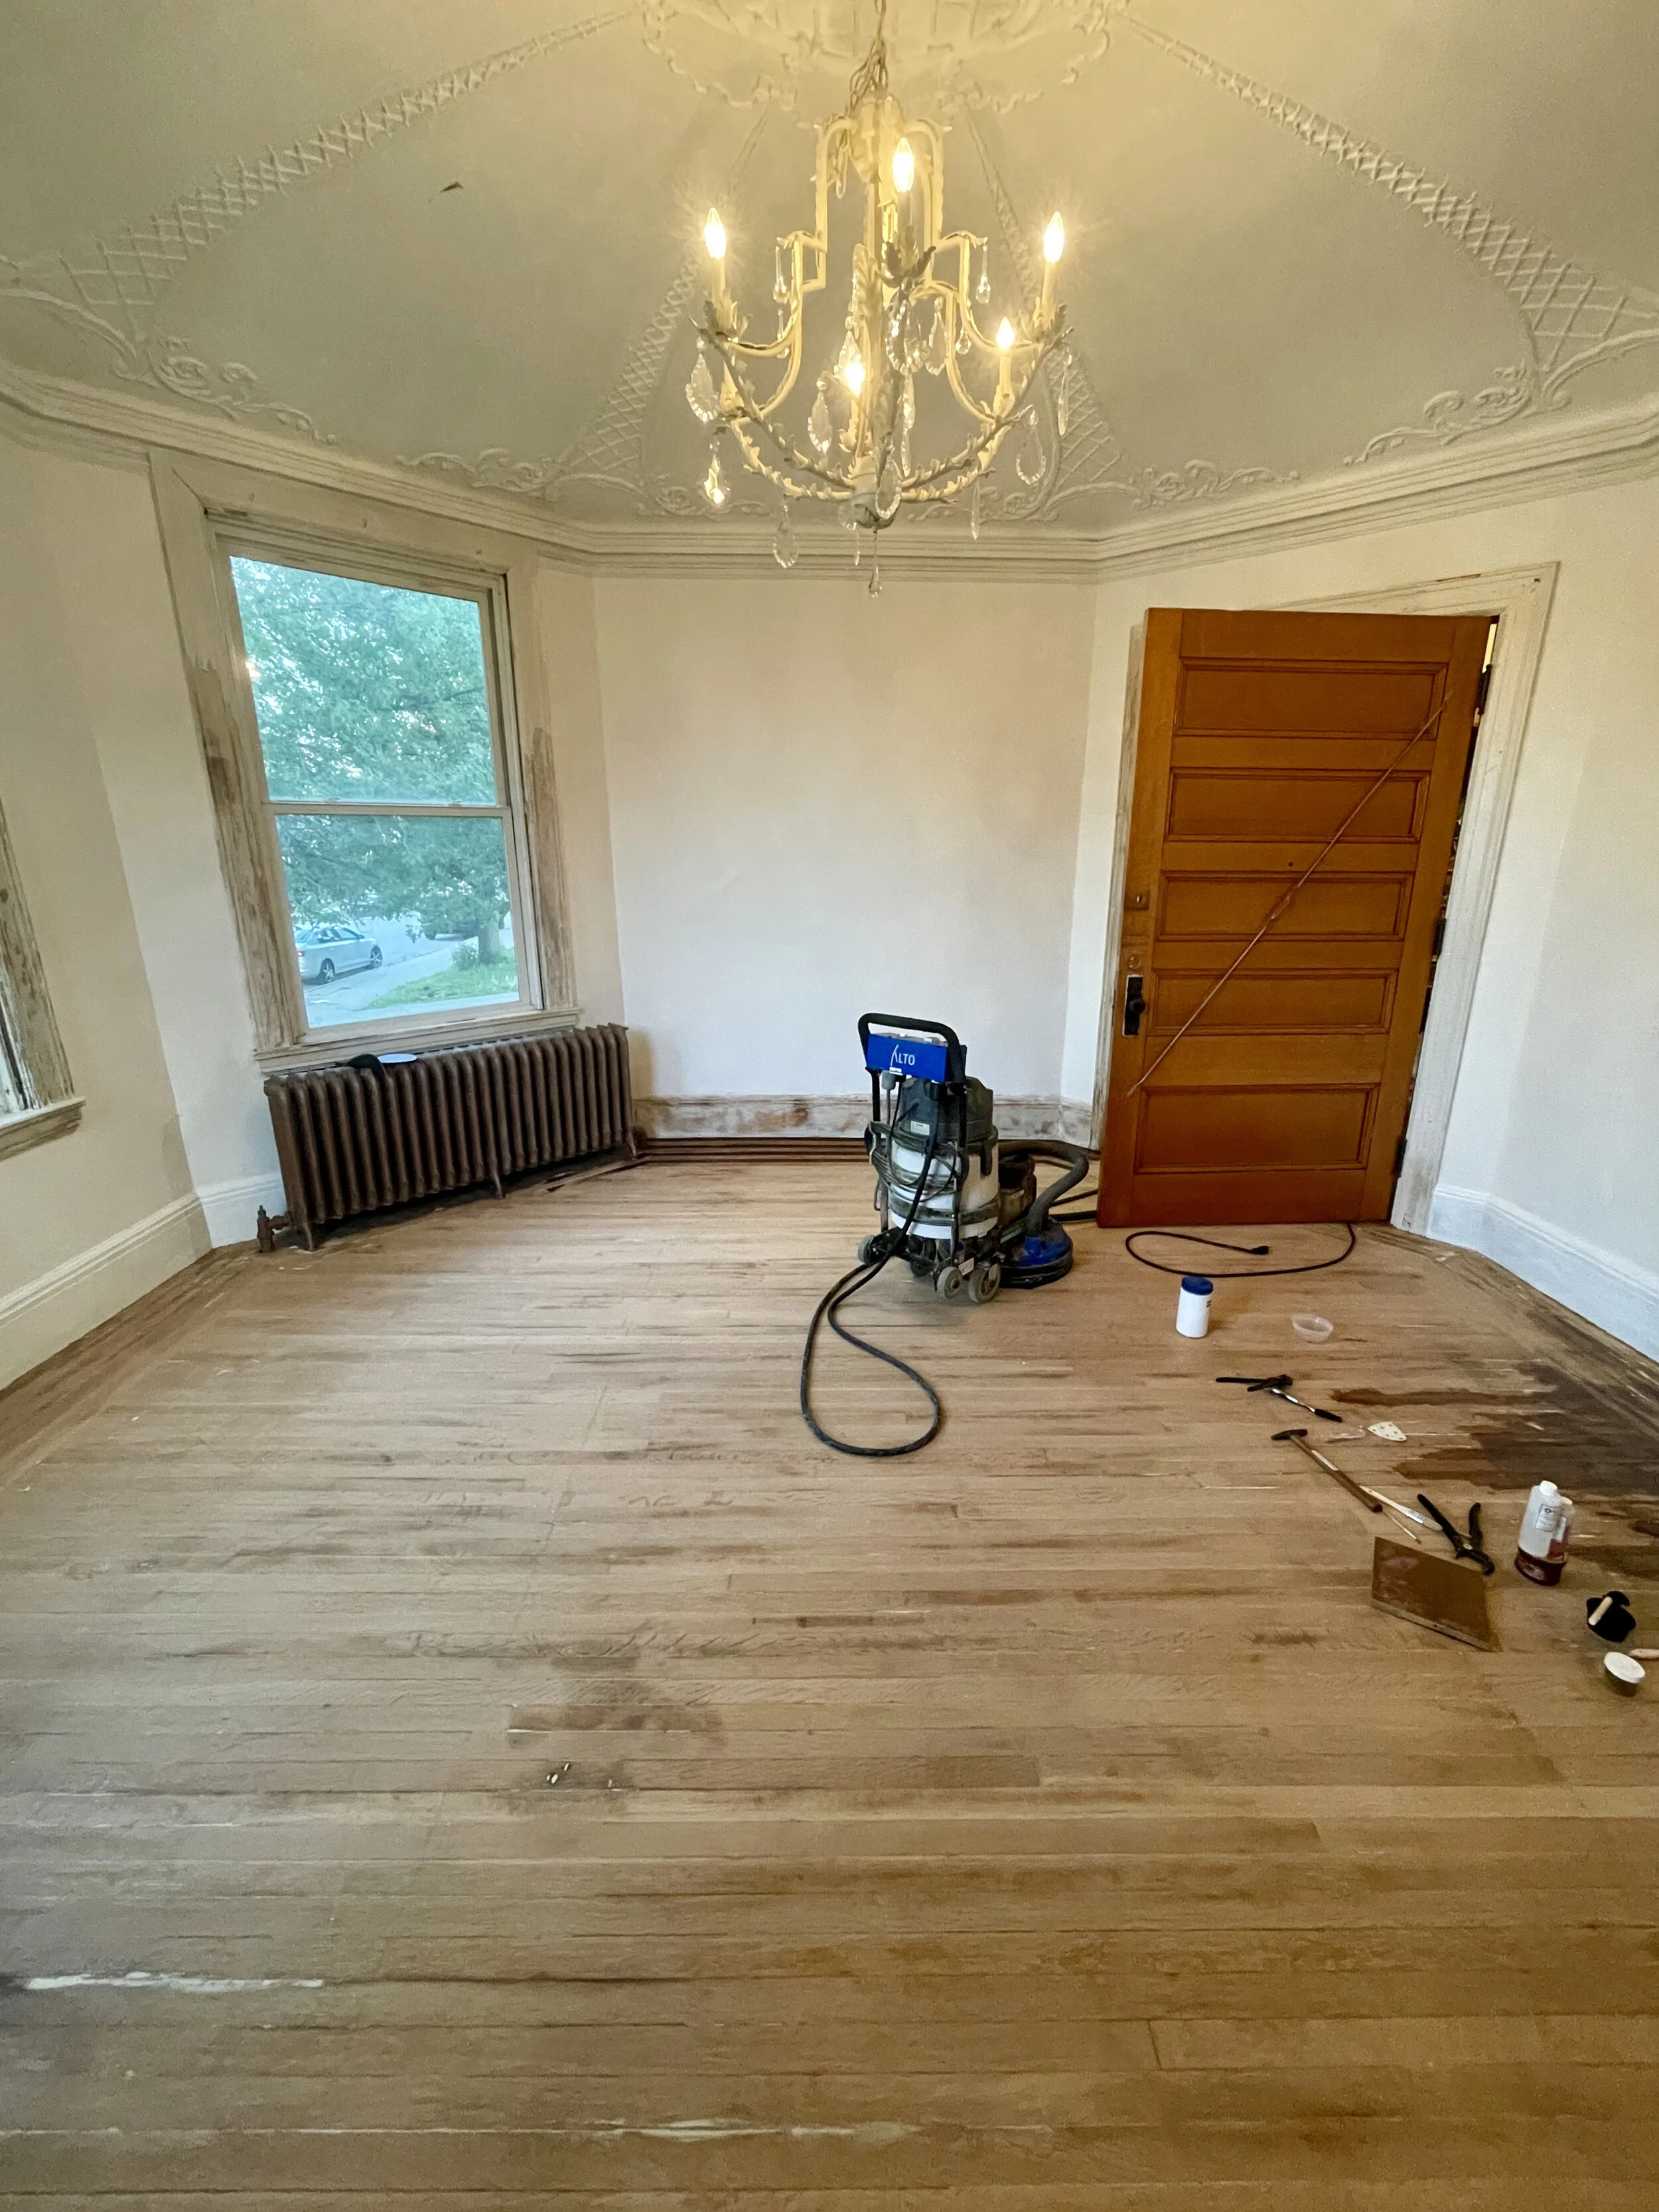
This is a photographic journey documenting the endeavor to restore the parlour in an 1886 manse. To begin I have included the photos snapped during the first walkthrough of the home before even putting in an offer on the property. All the windows in the home were boarded-up and most of the lightbulbs were blown out and as such I used my flashlight and iPhone-of-the-time to snap photos in rooms that were black as pitch, as was the case for this room. I was pleased and shocked by the beauty and grandeur of the concave moulded plaster ceiling. Ne’er did I think I might own a home with a ceiling conceived of such expert craft and singular beauty.

It seems strange looking back that it took me several years even to apply white paint to the walls in this room but there were many other emergencies on the property and for several years I used the eight sided room to store a few sewing machines and eastlake antiques.
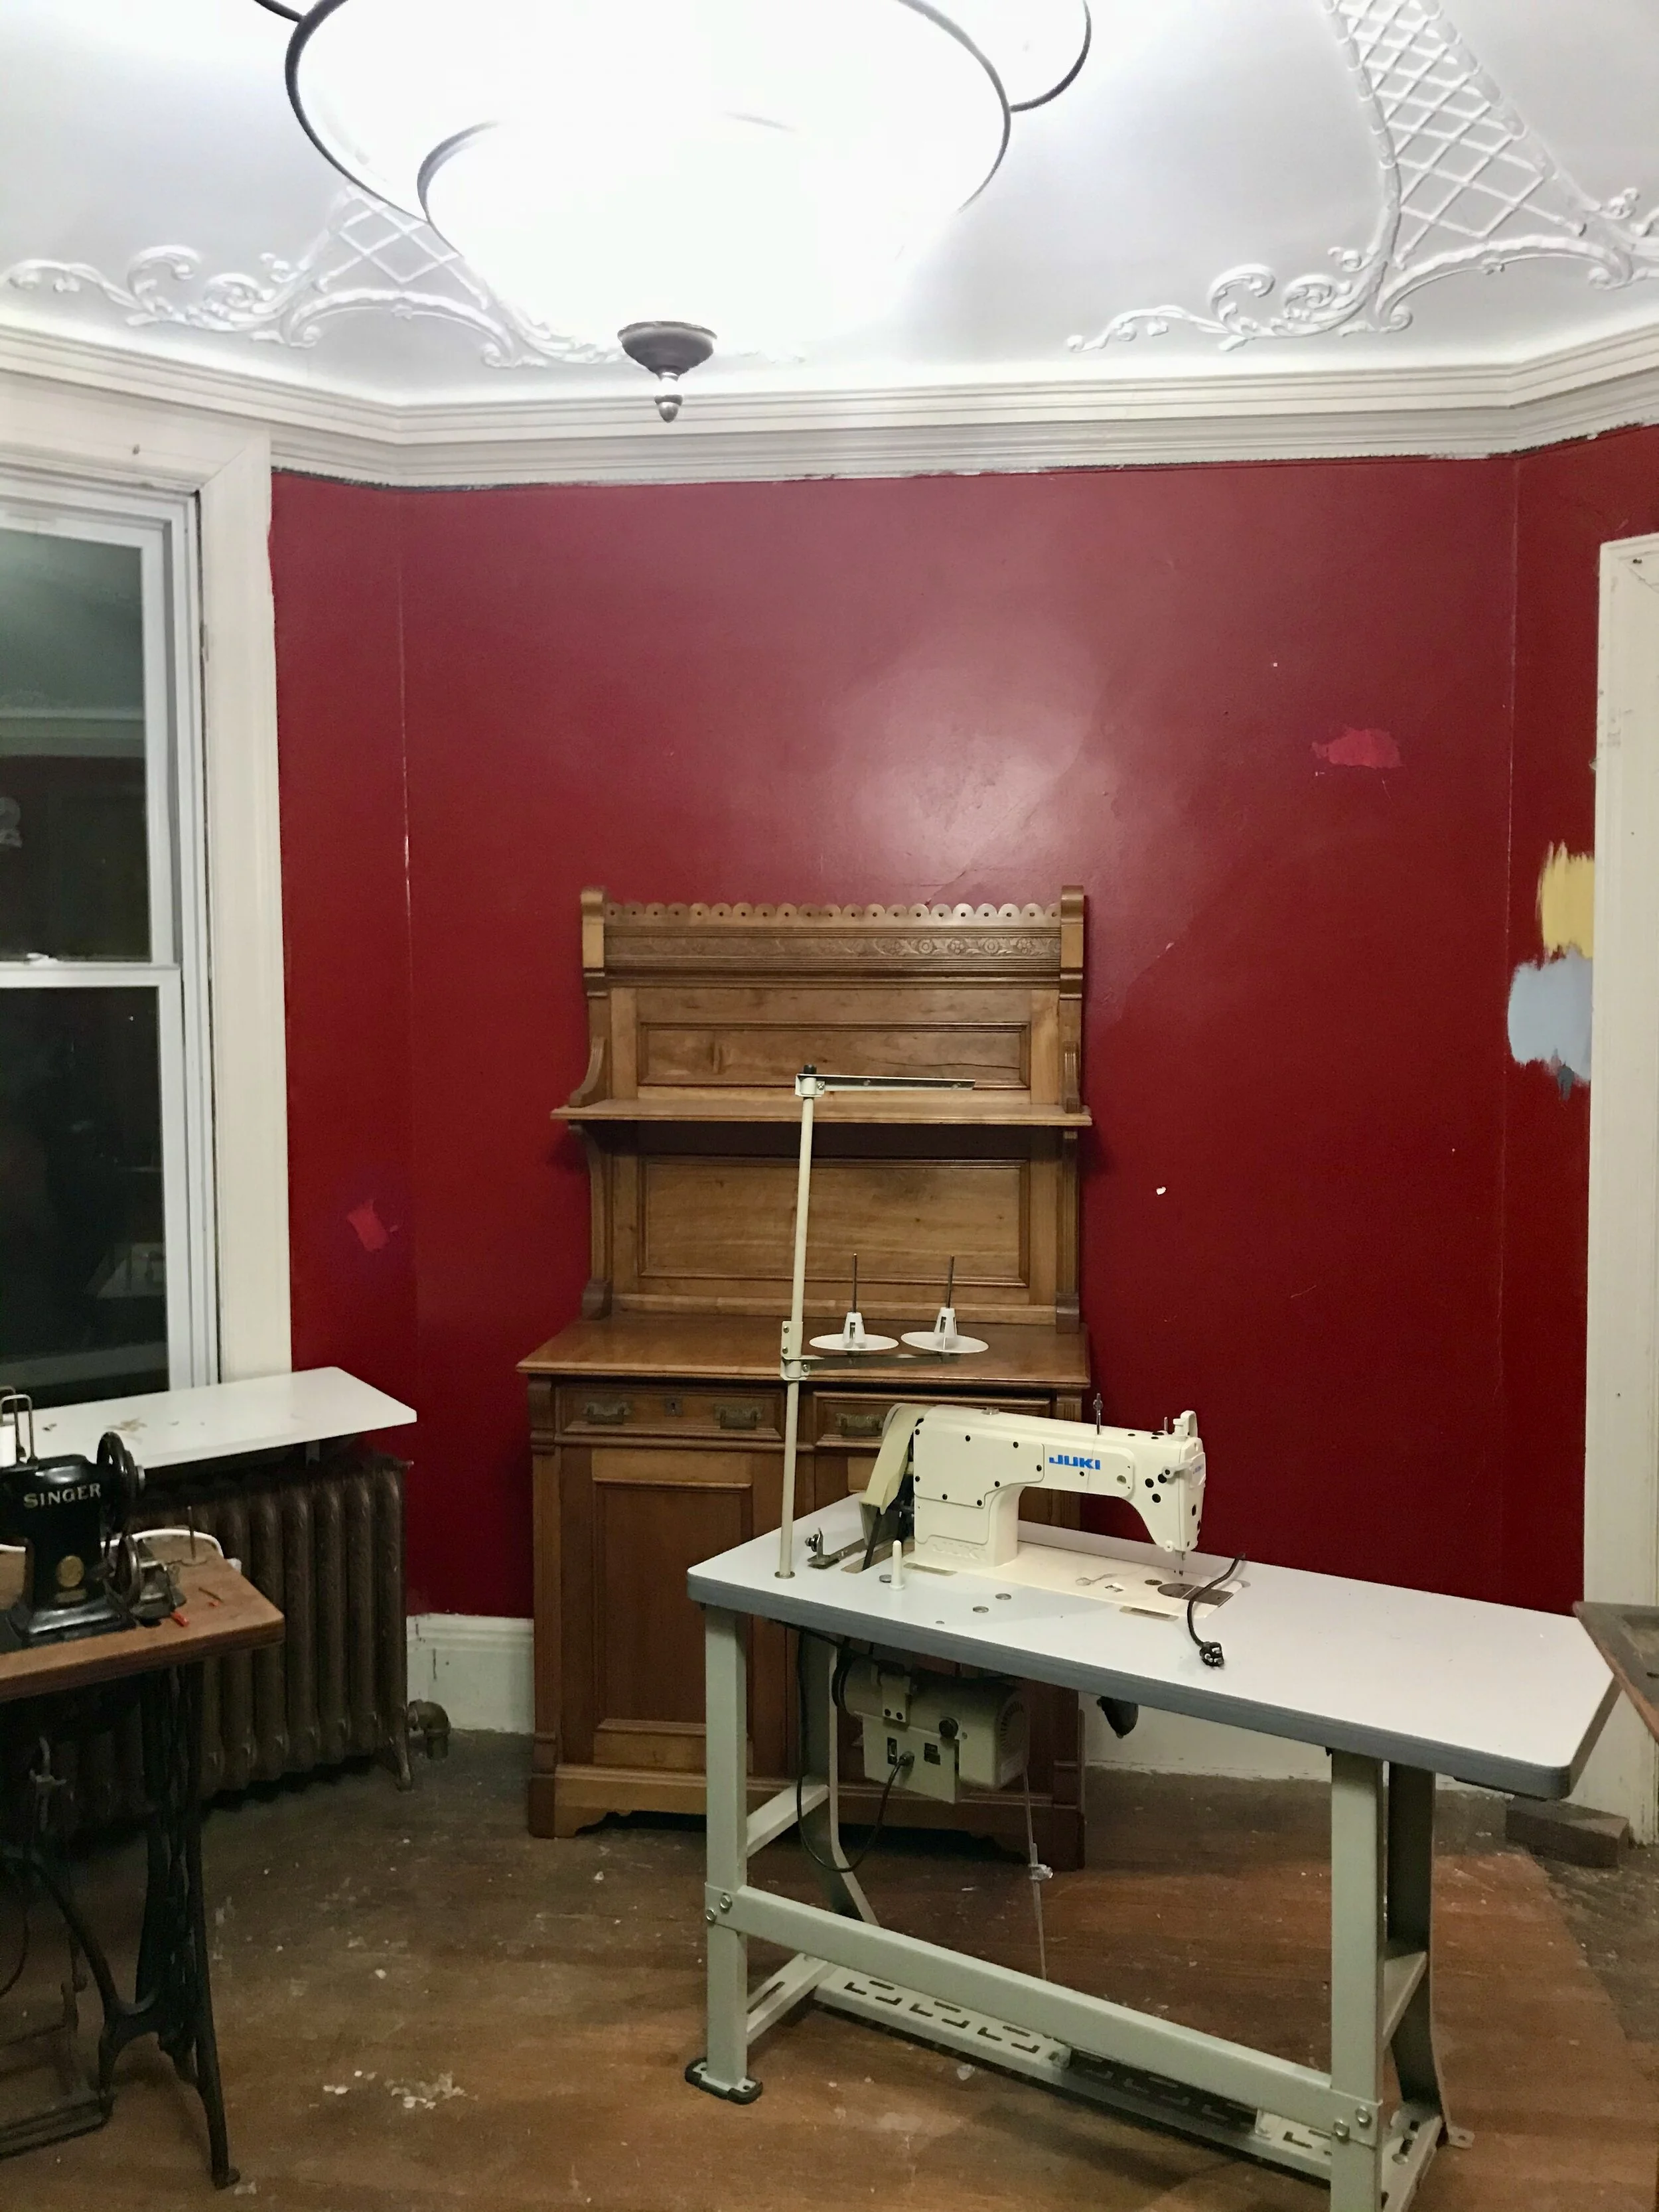
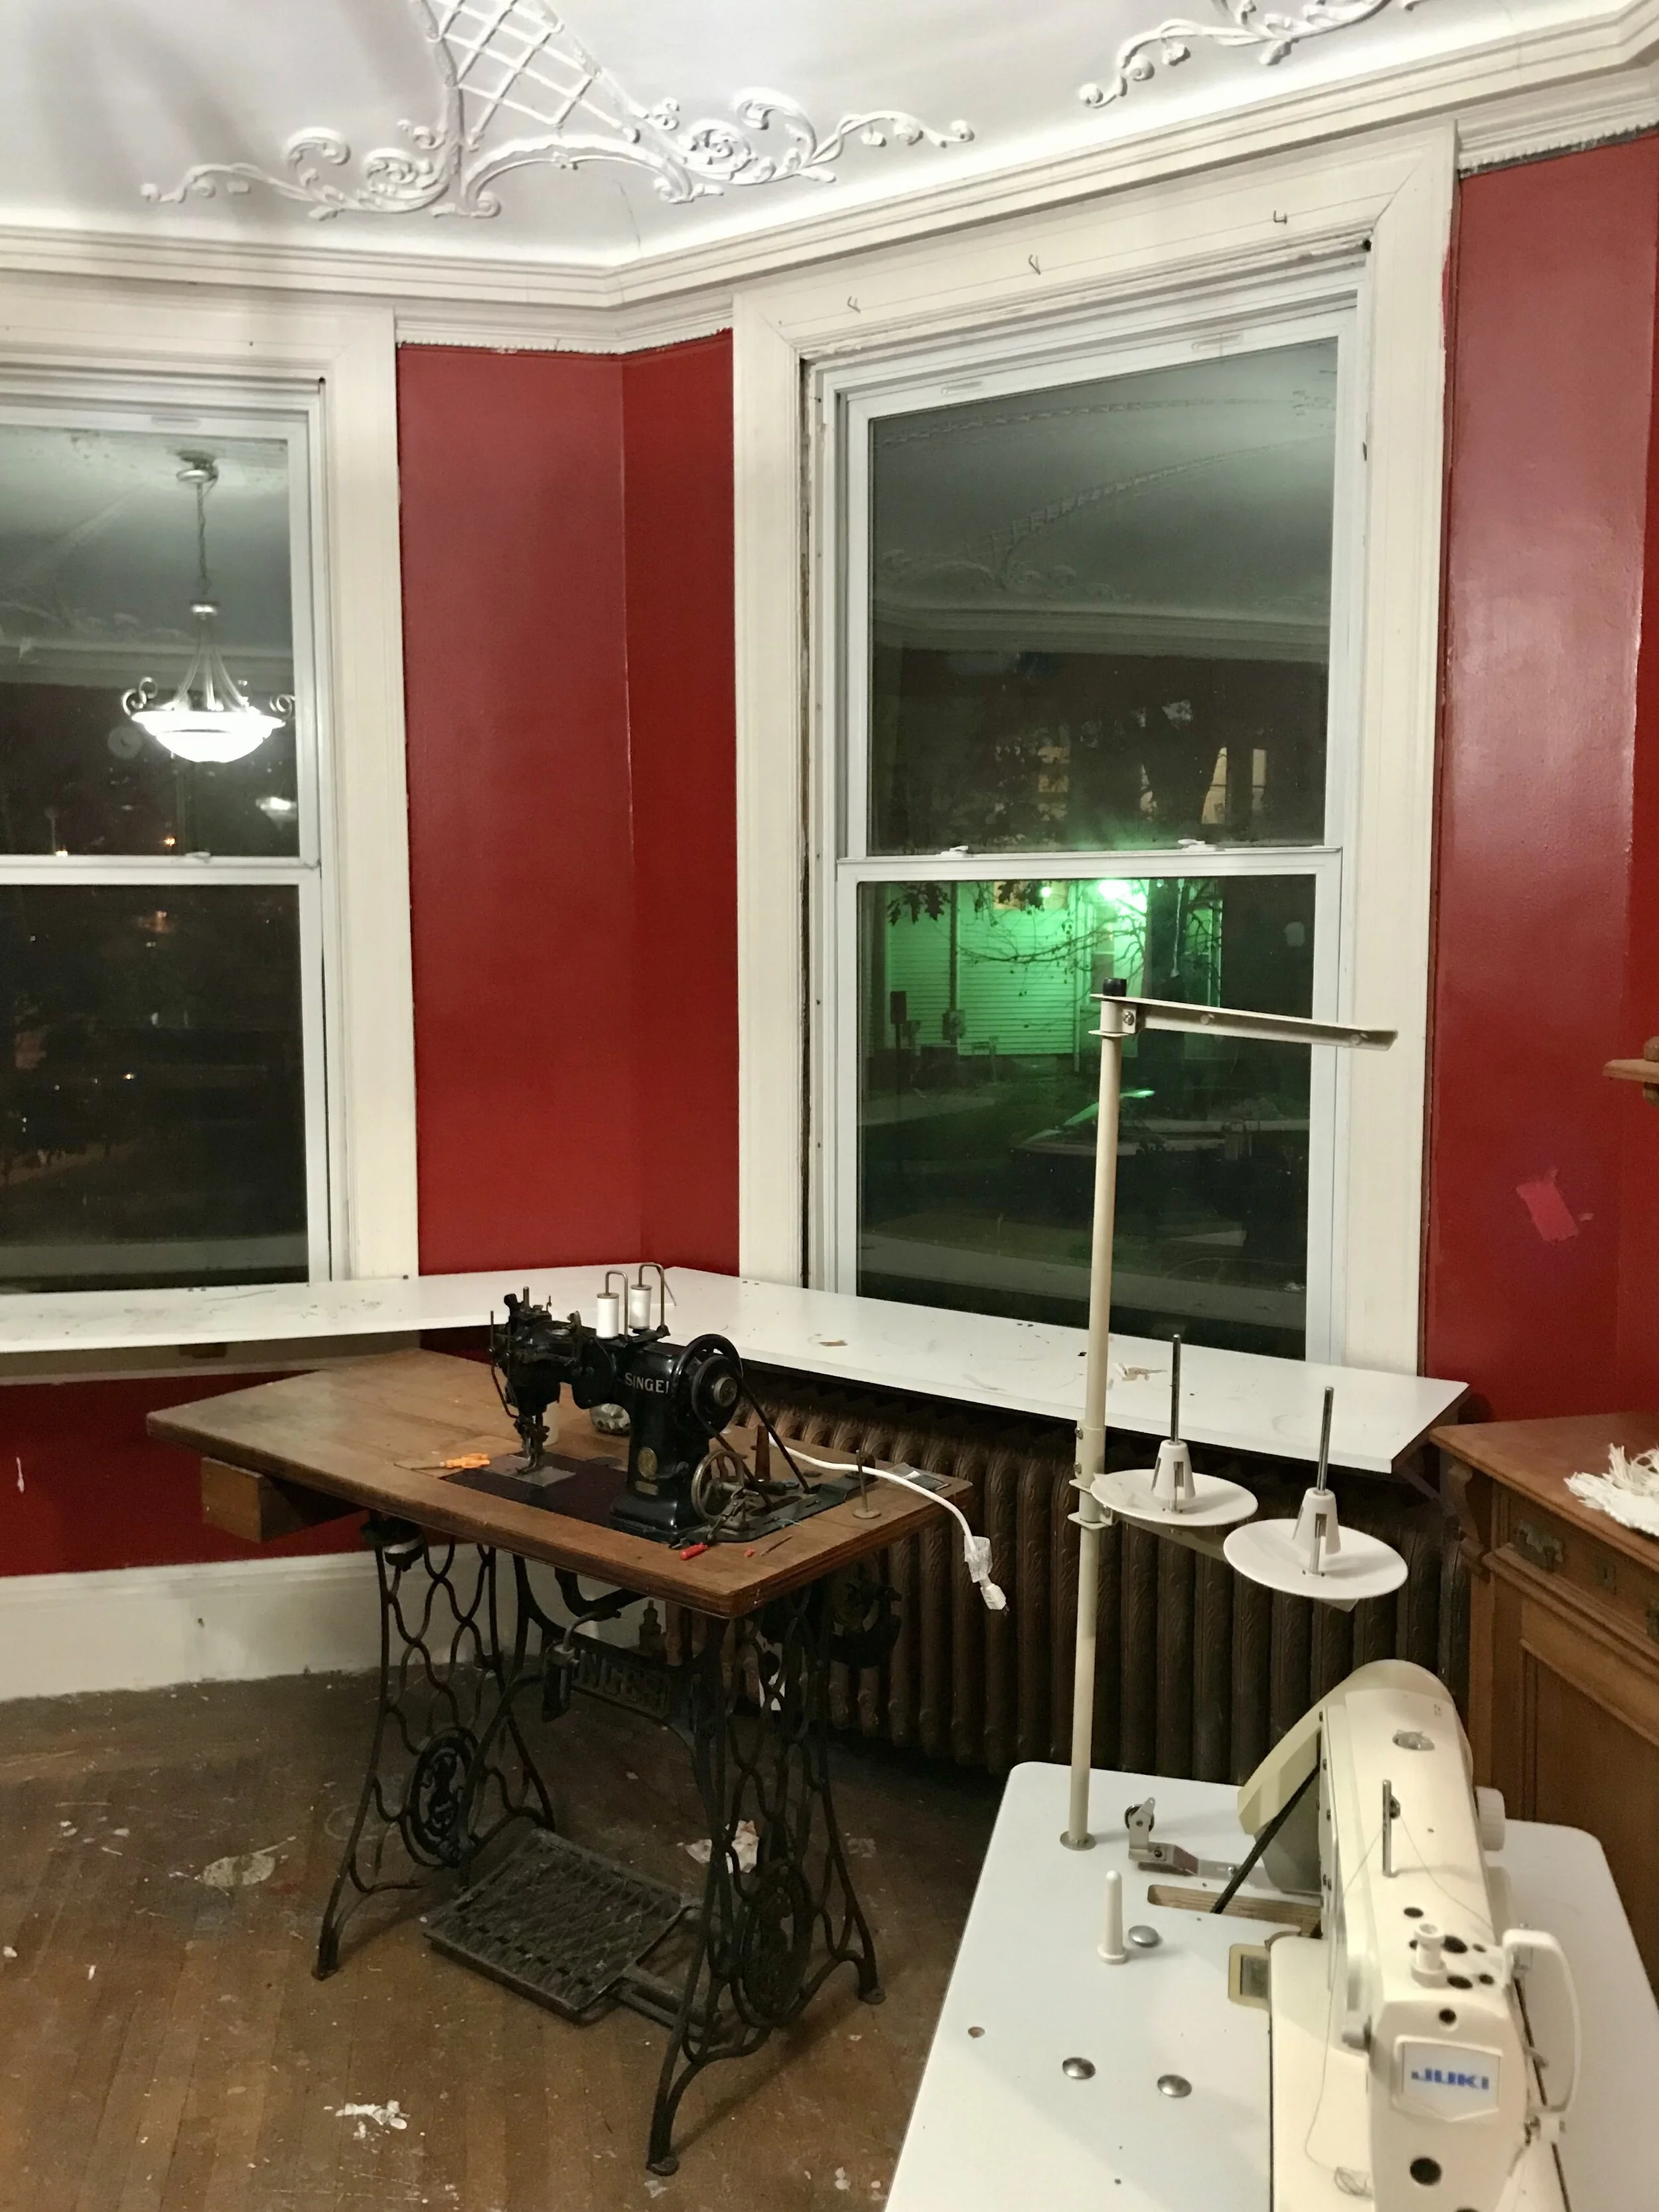
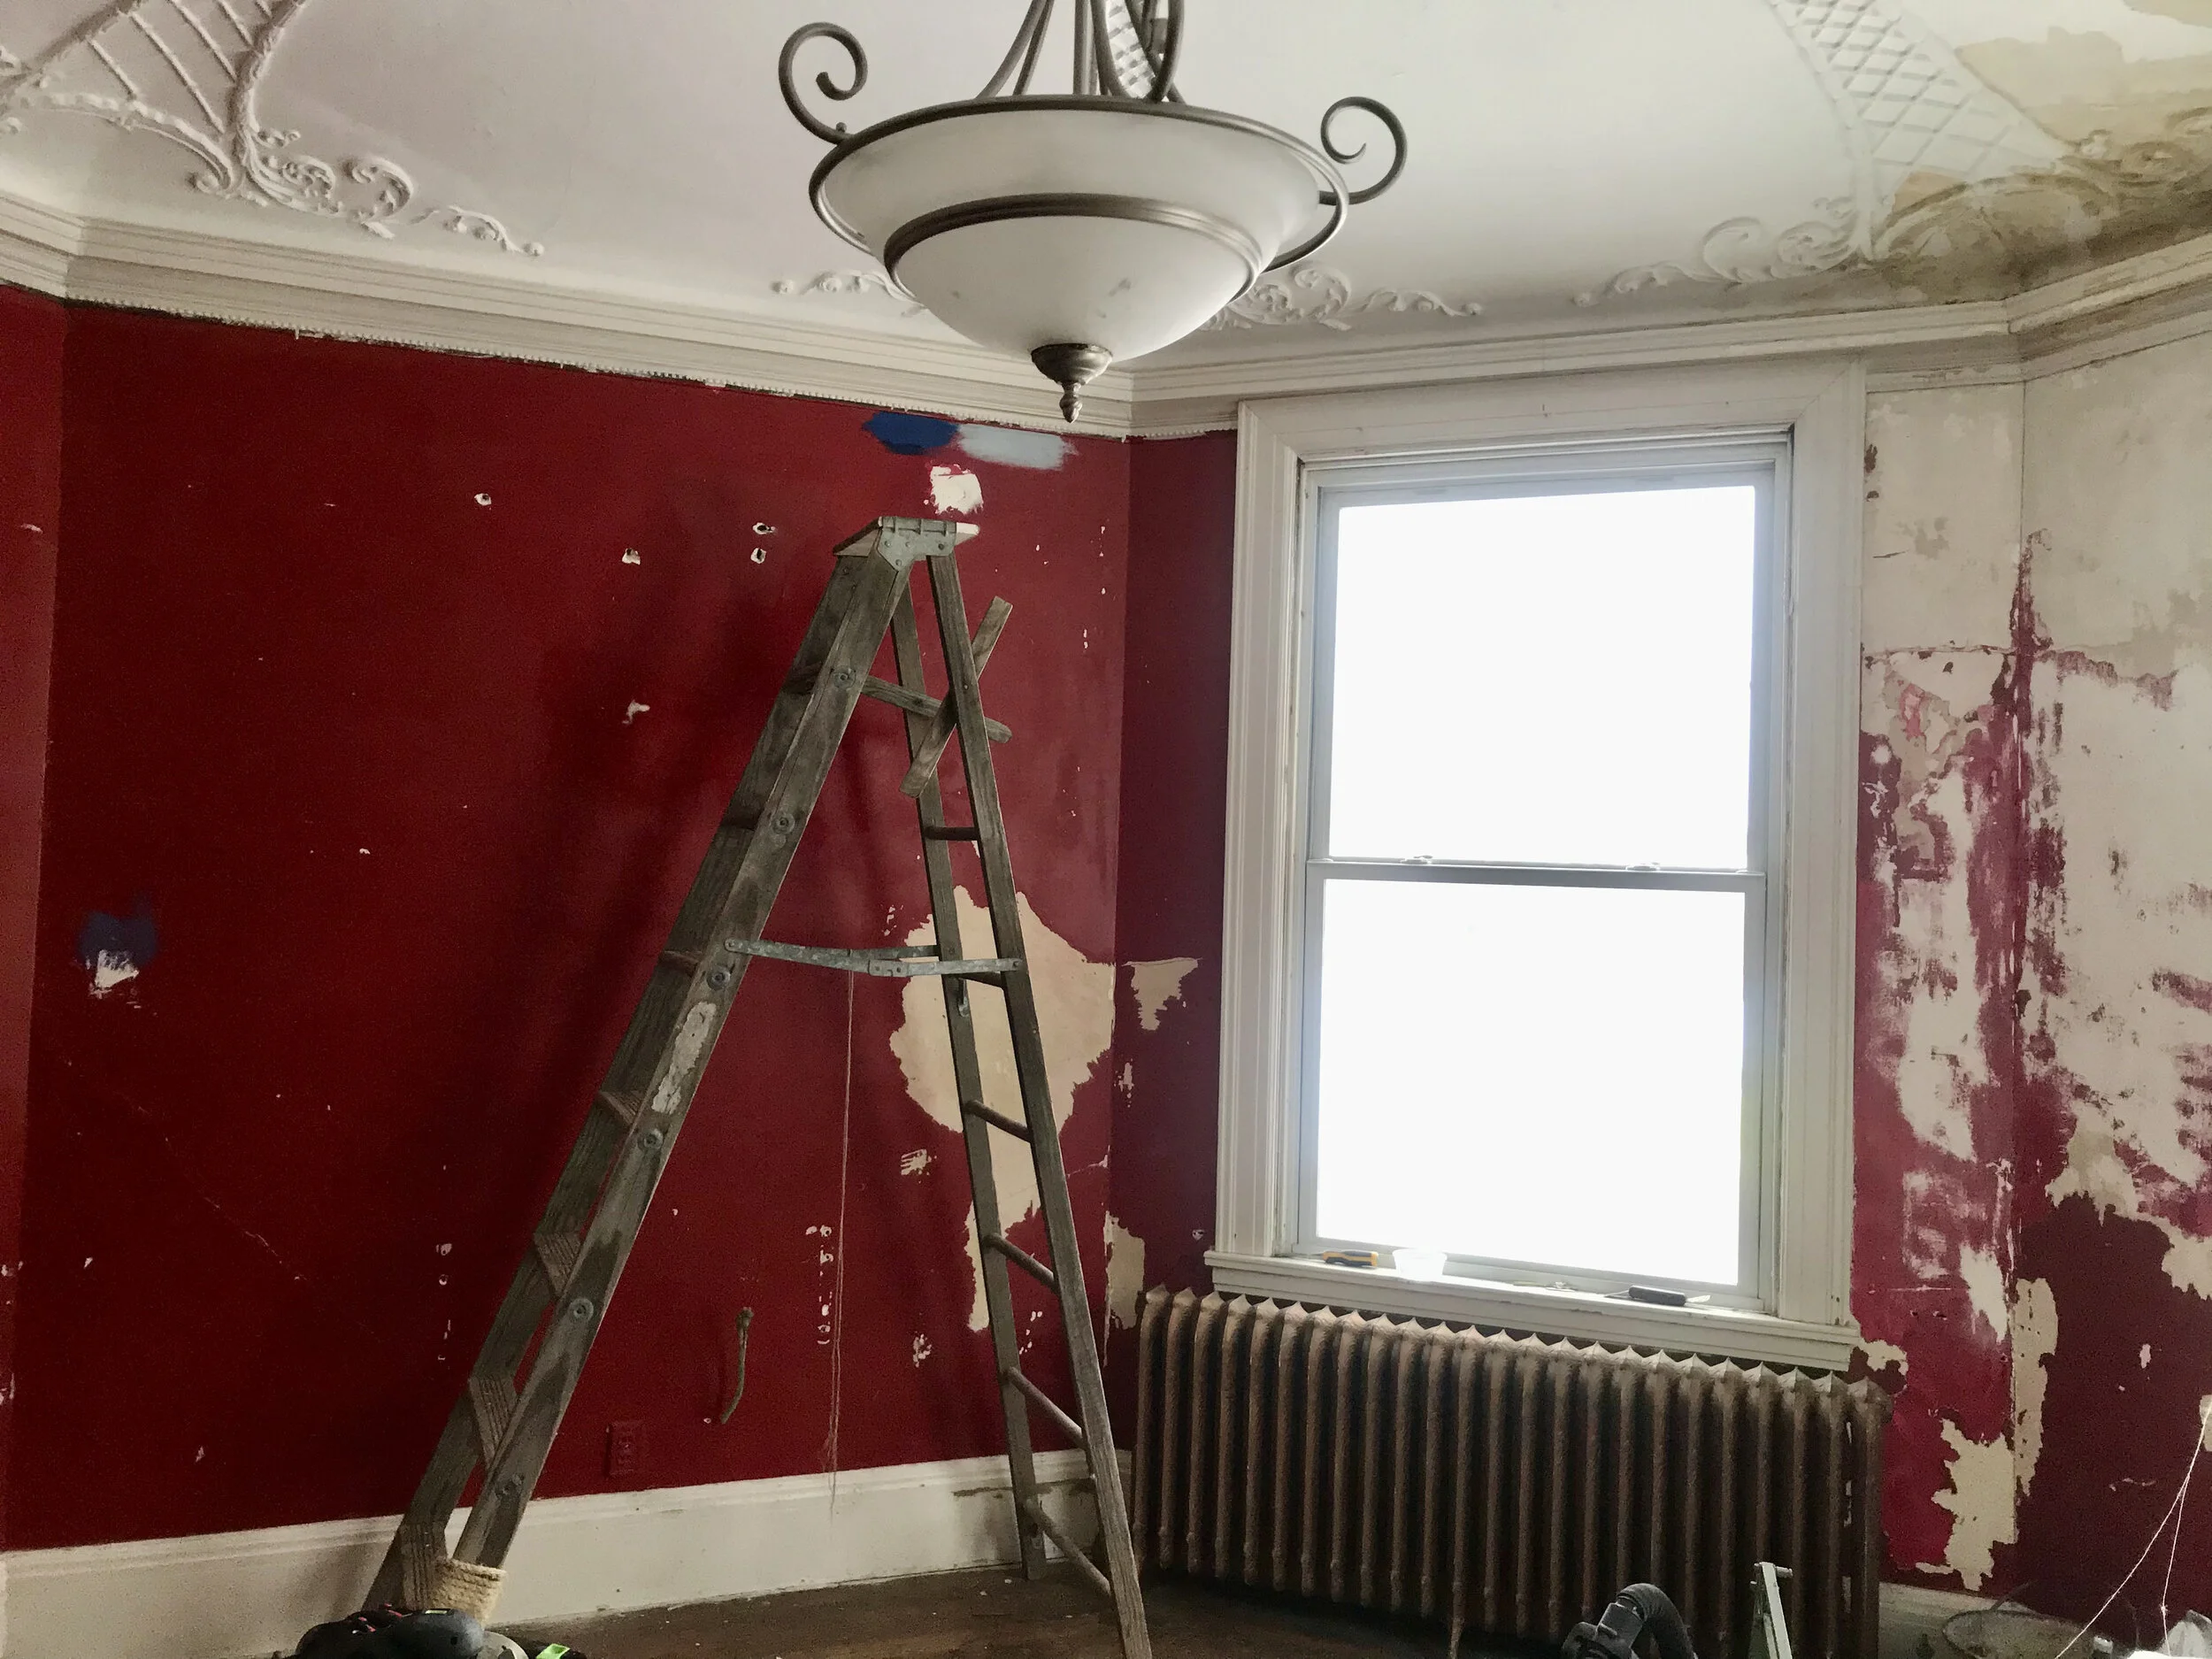
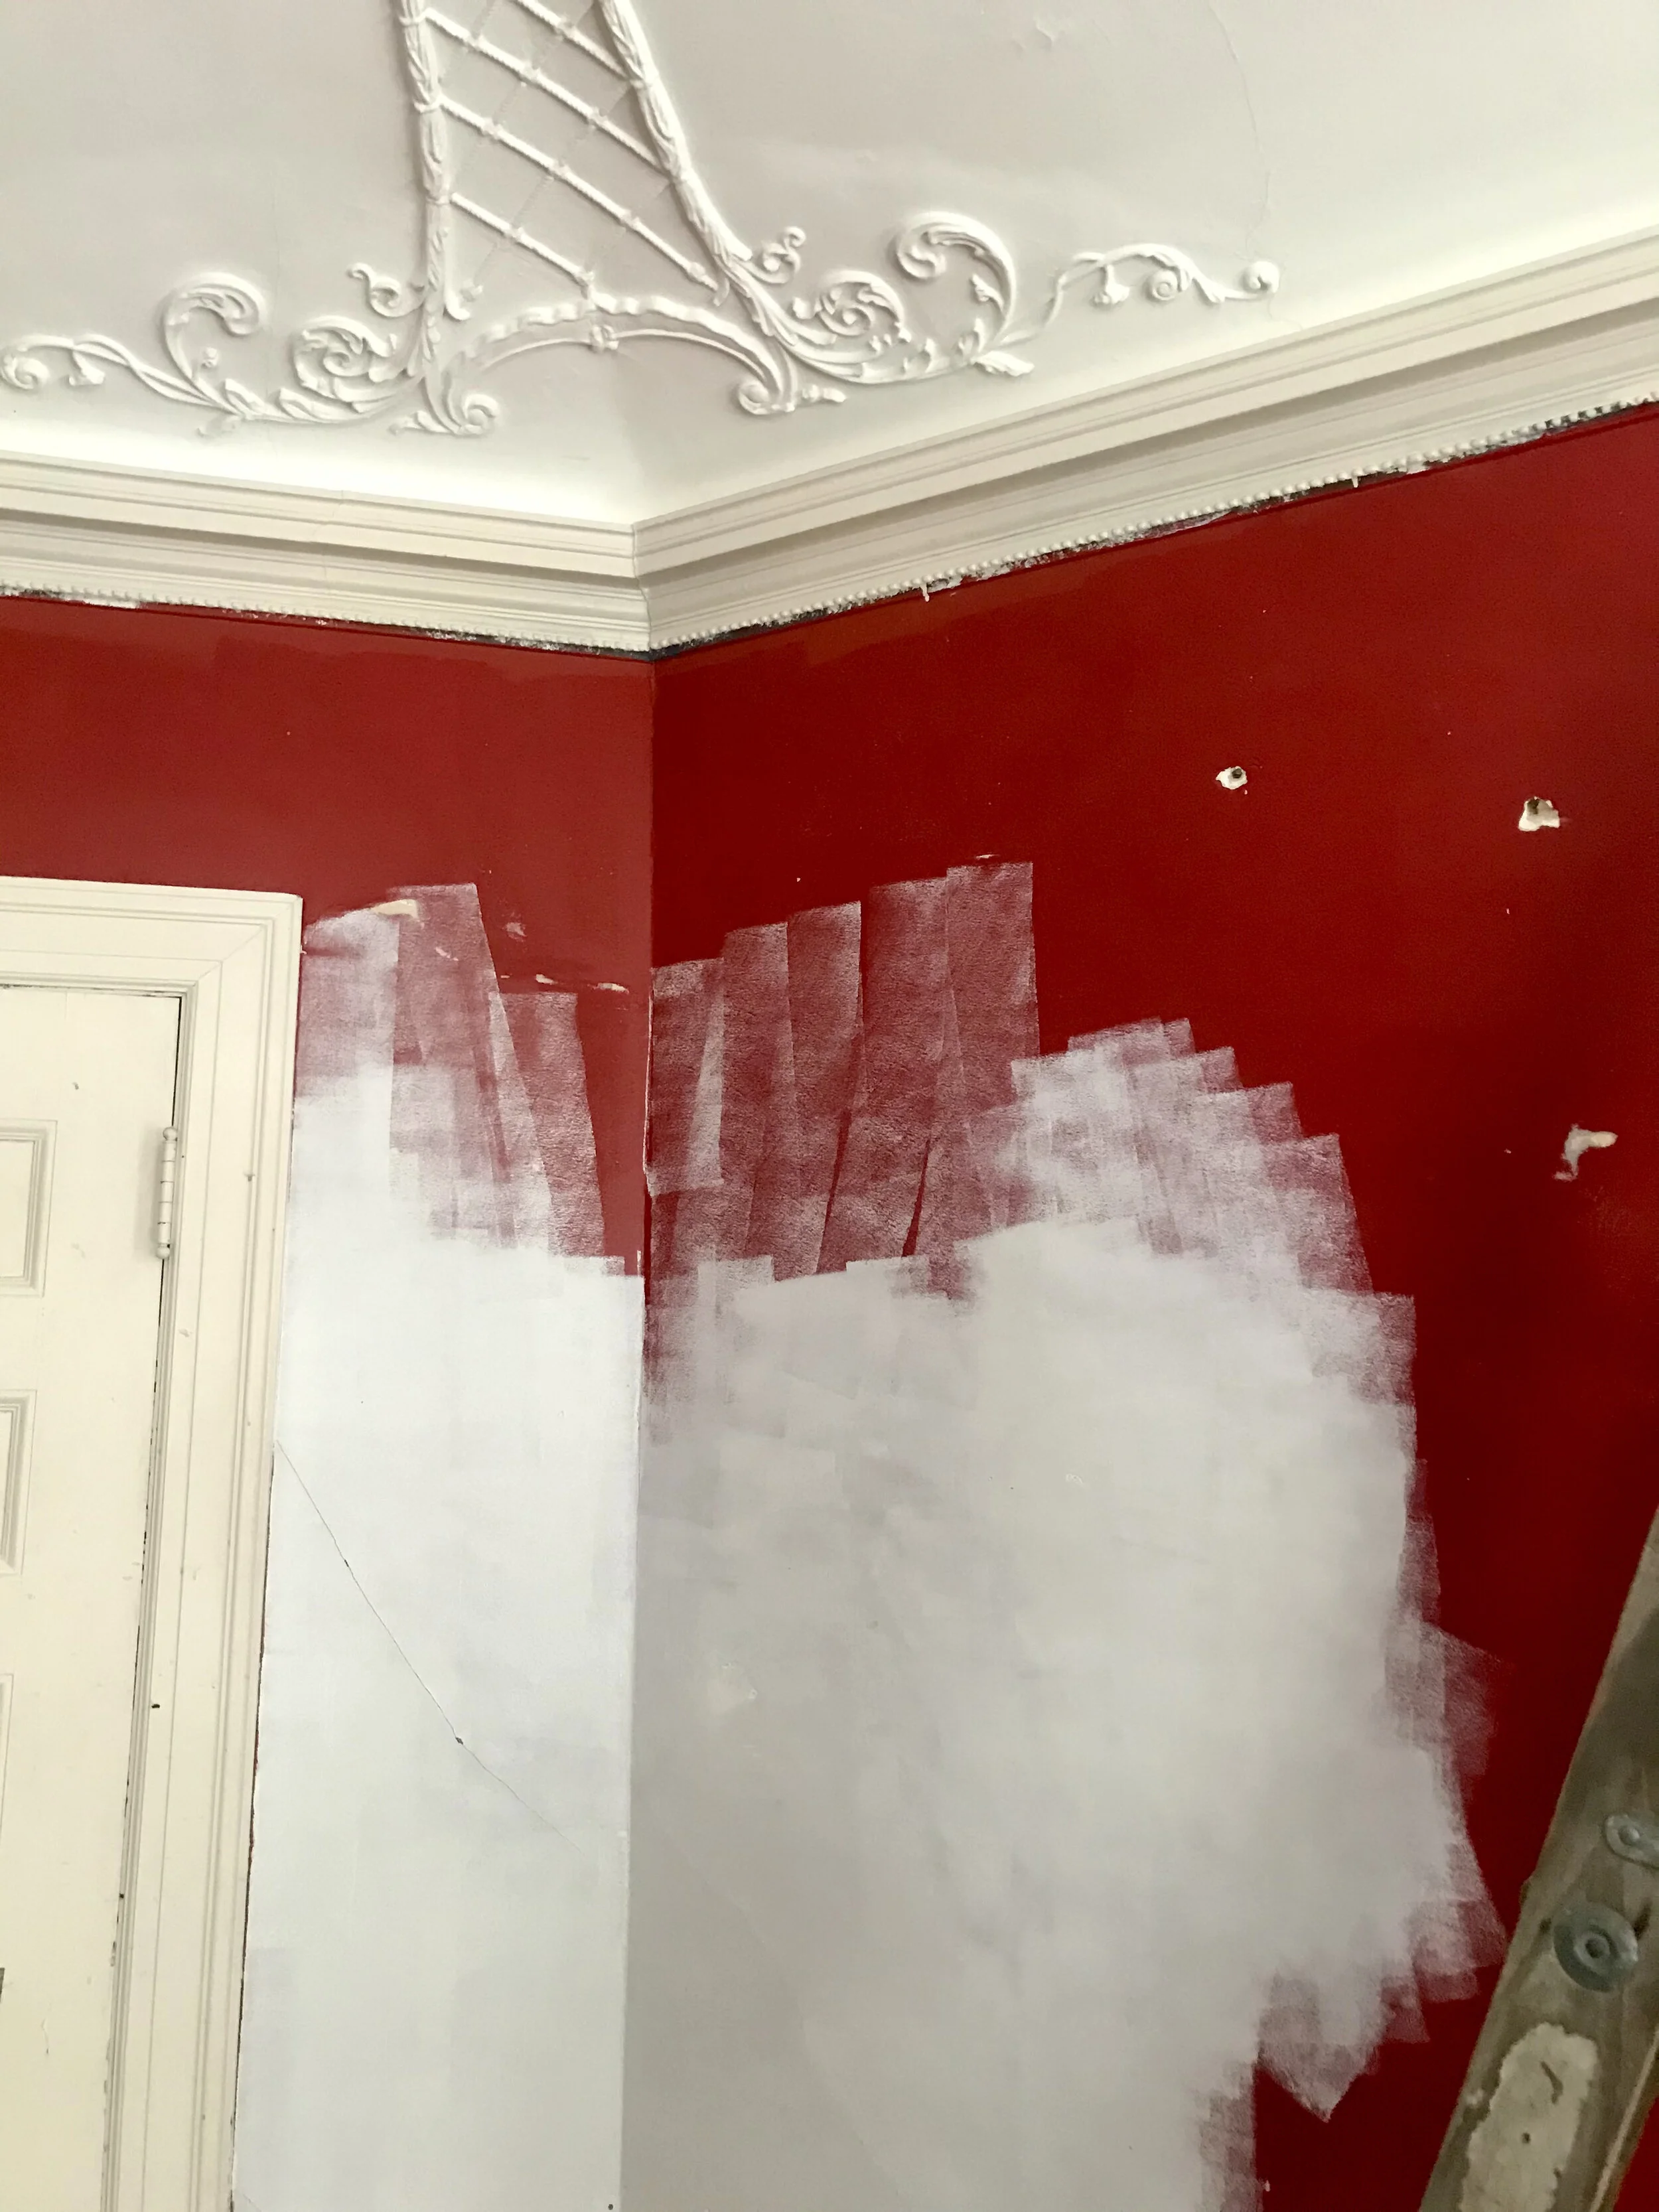
Sometime in 2020 I couldn’t take the red walls and decrepit state of the octagonal room any longer. I brought in a 10’ ladder.

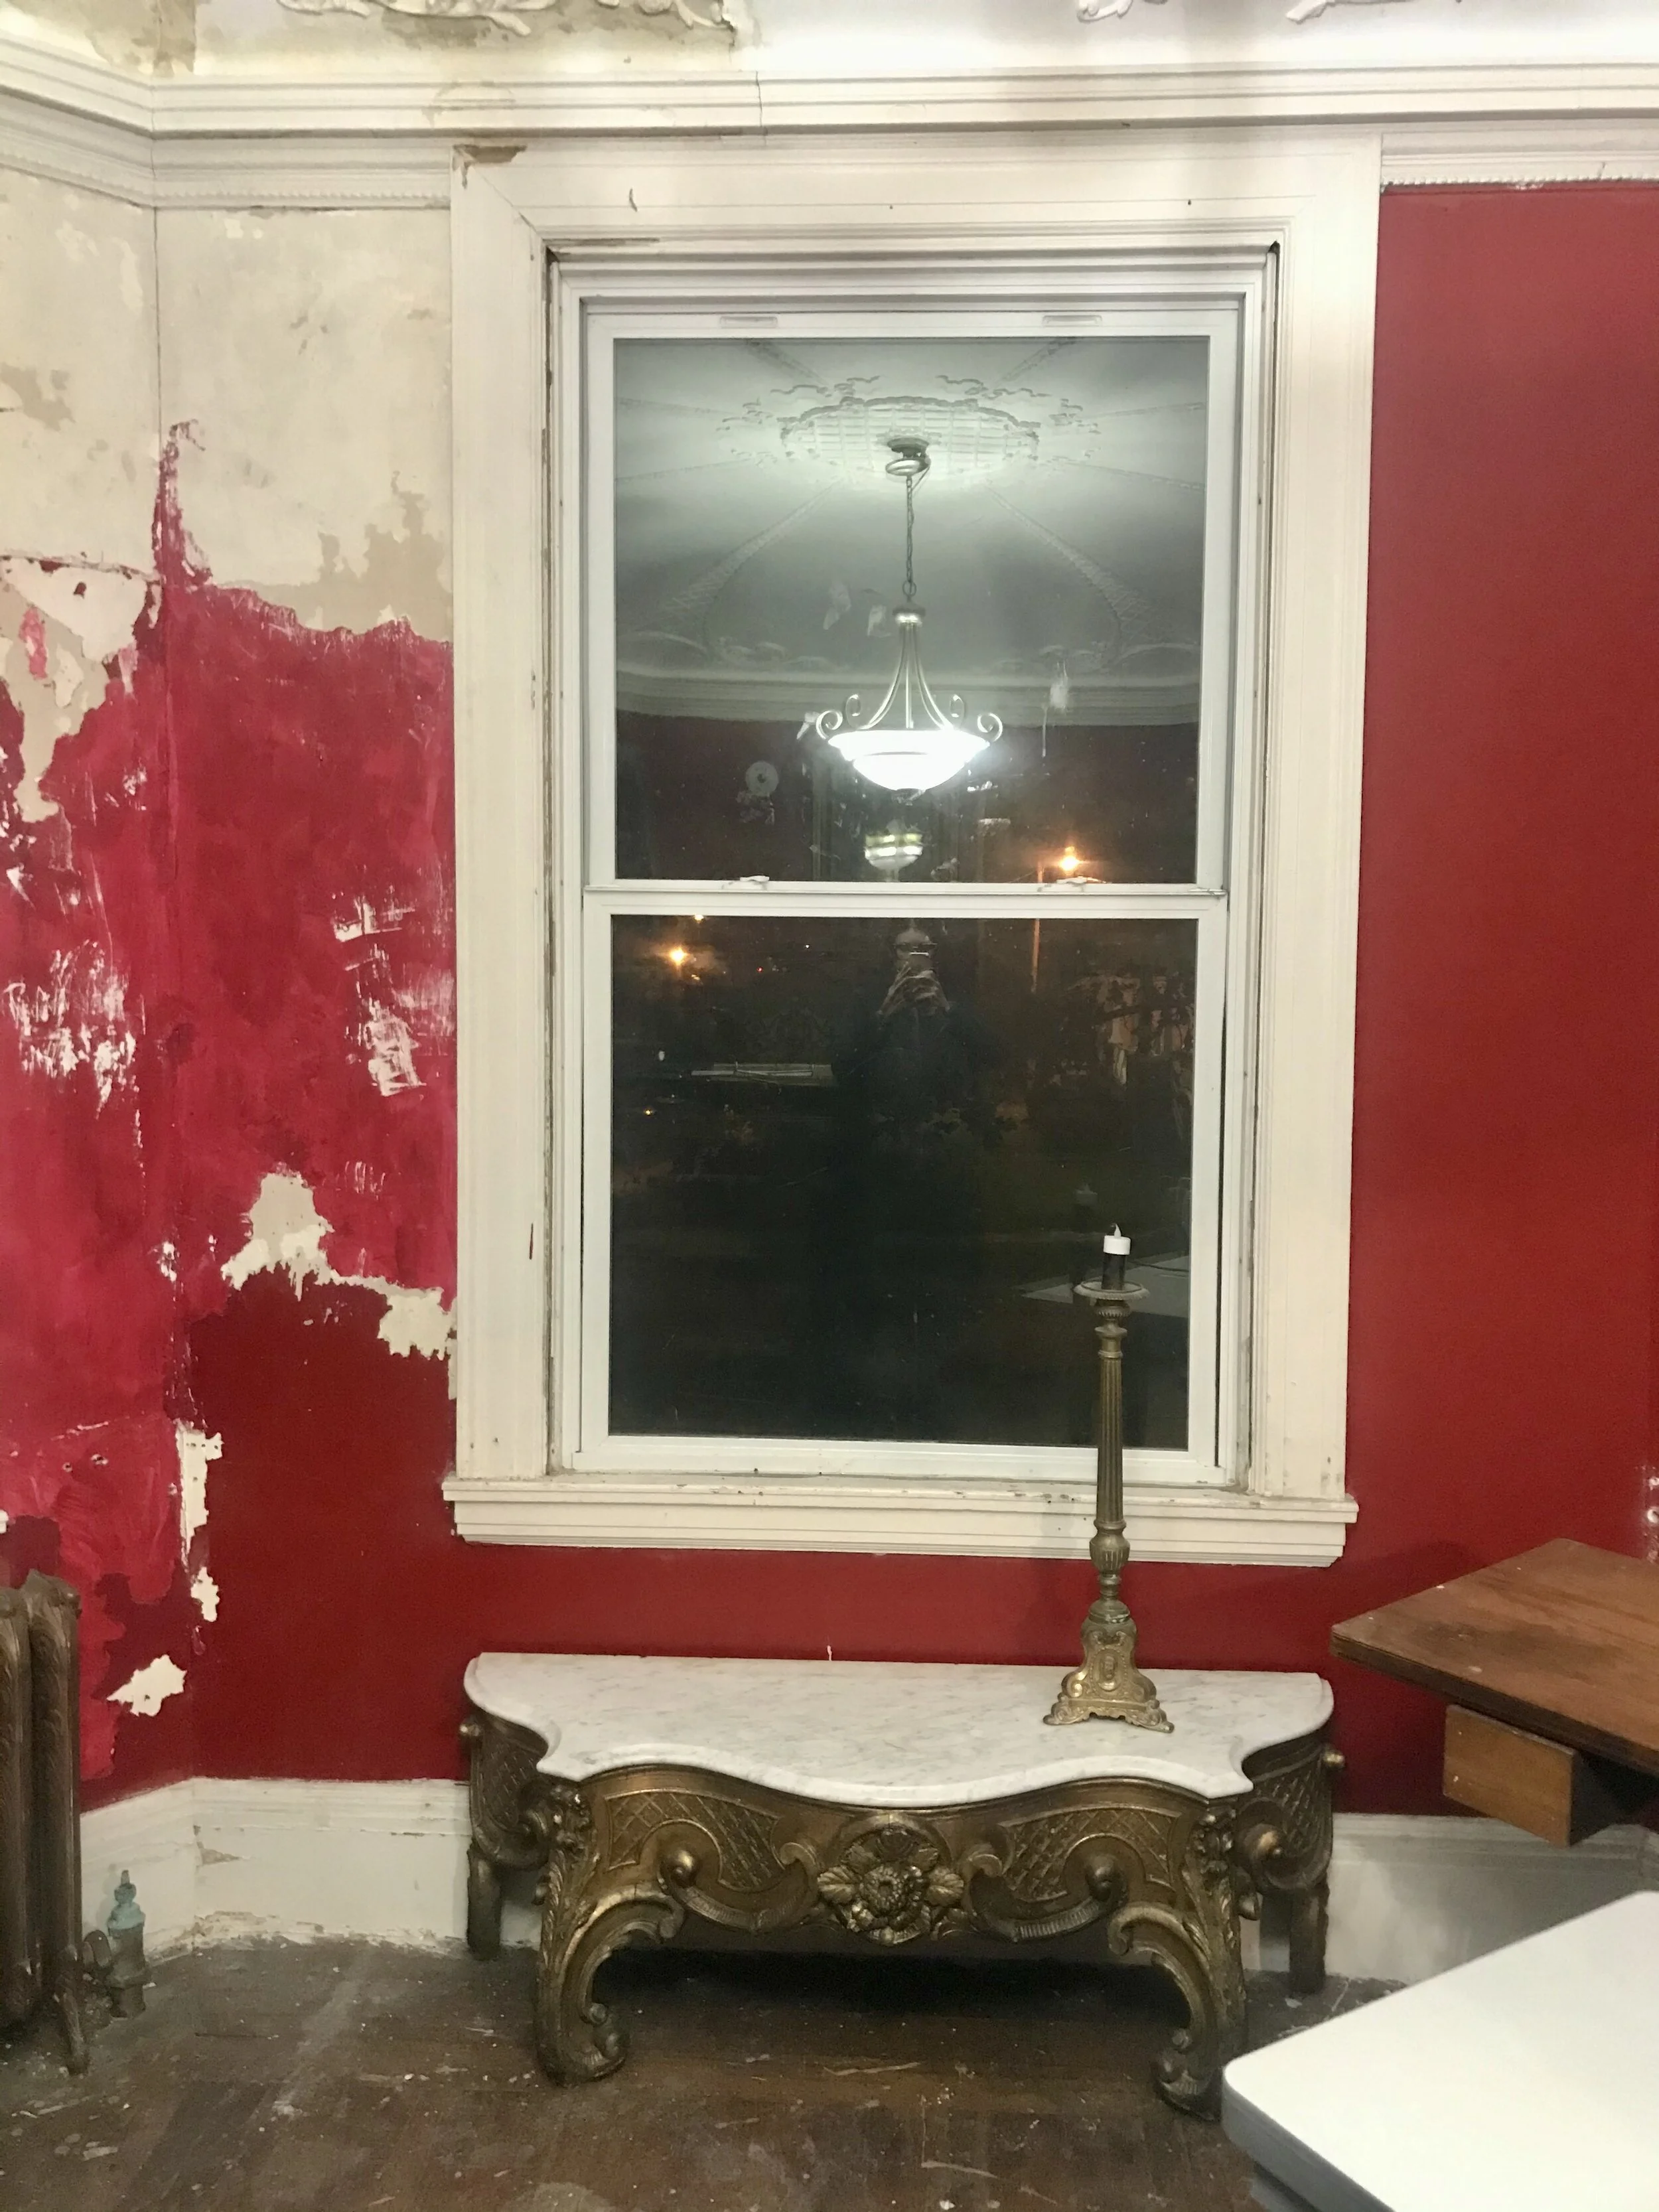
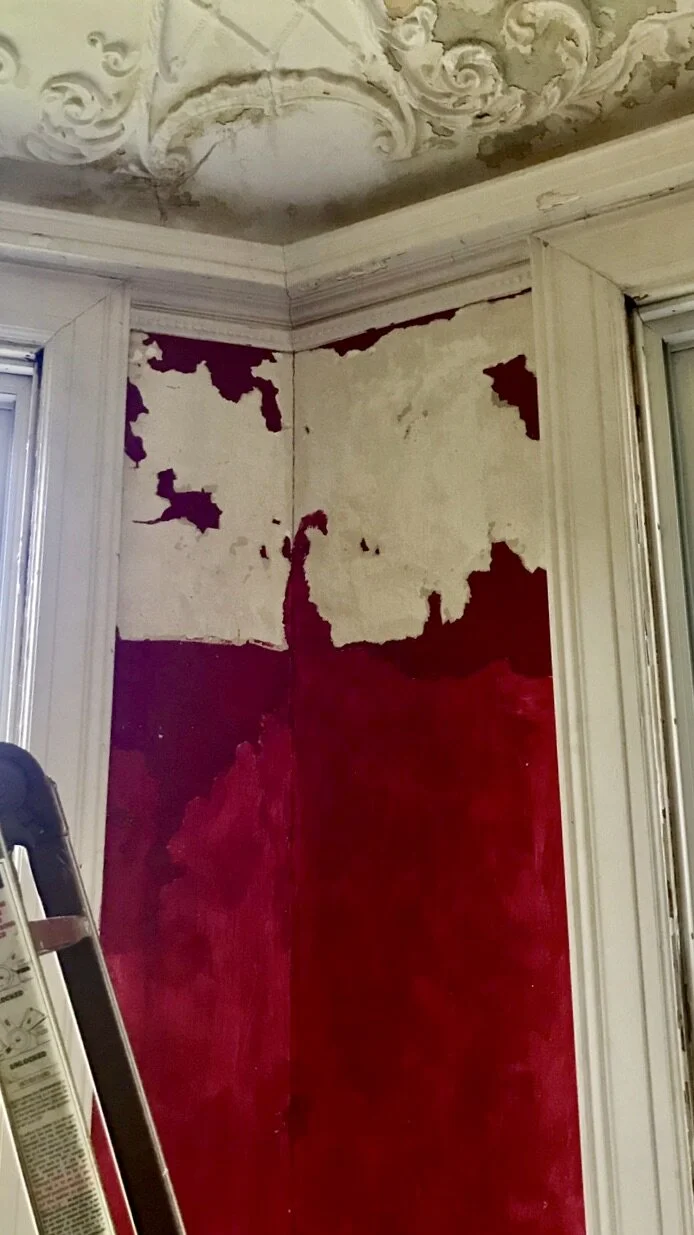
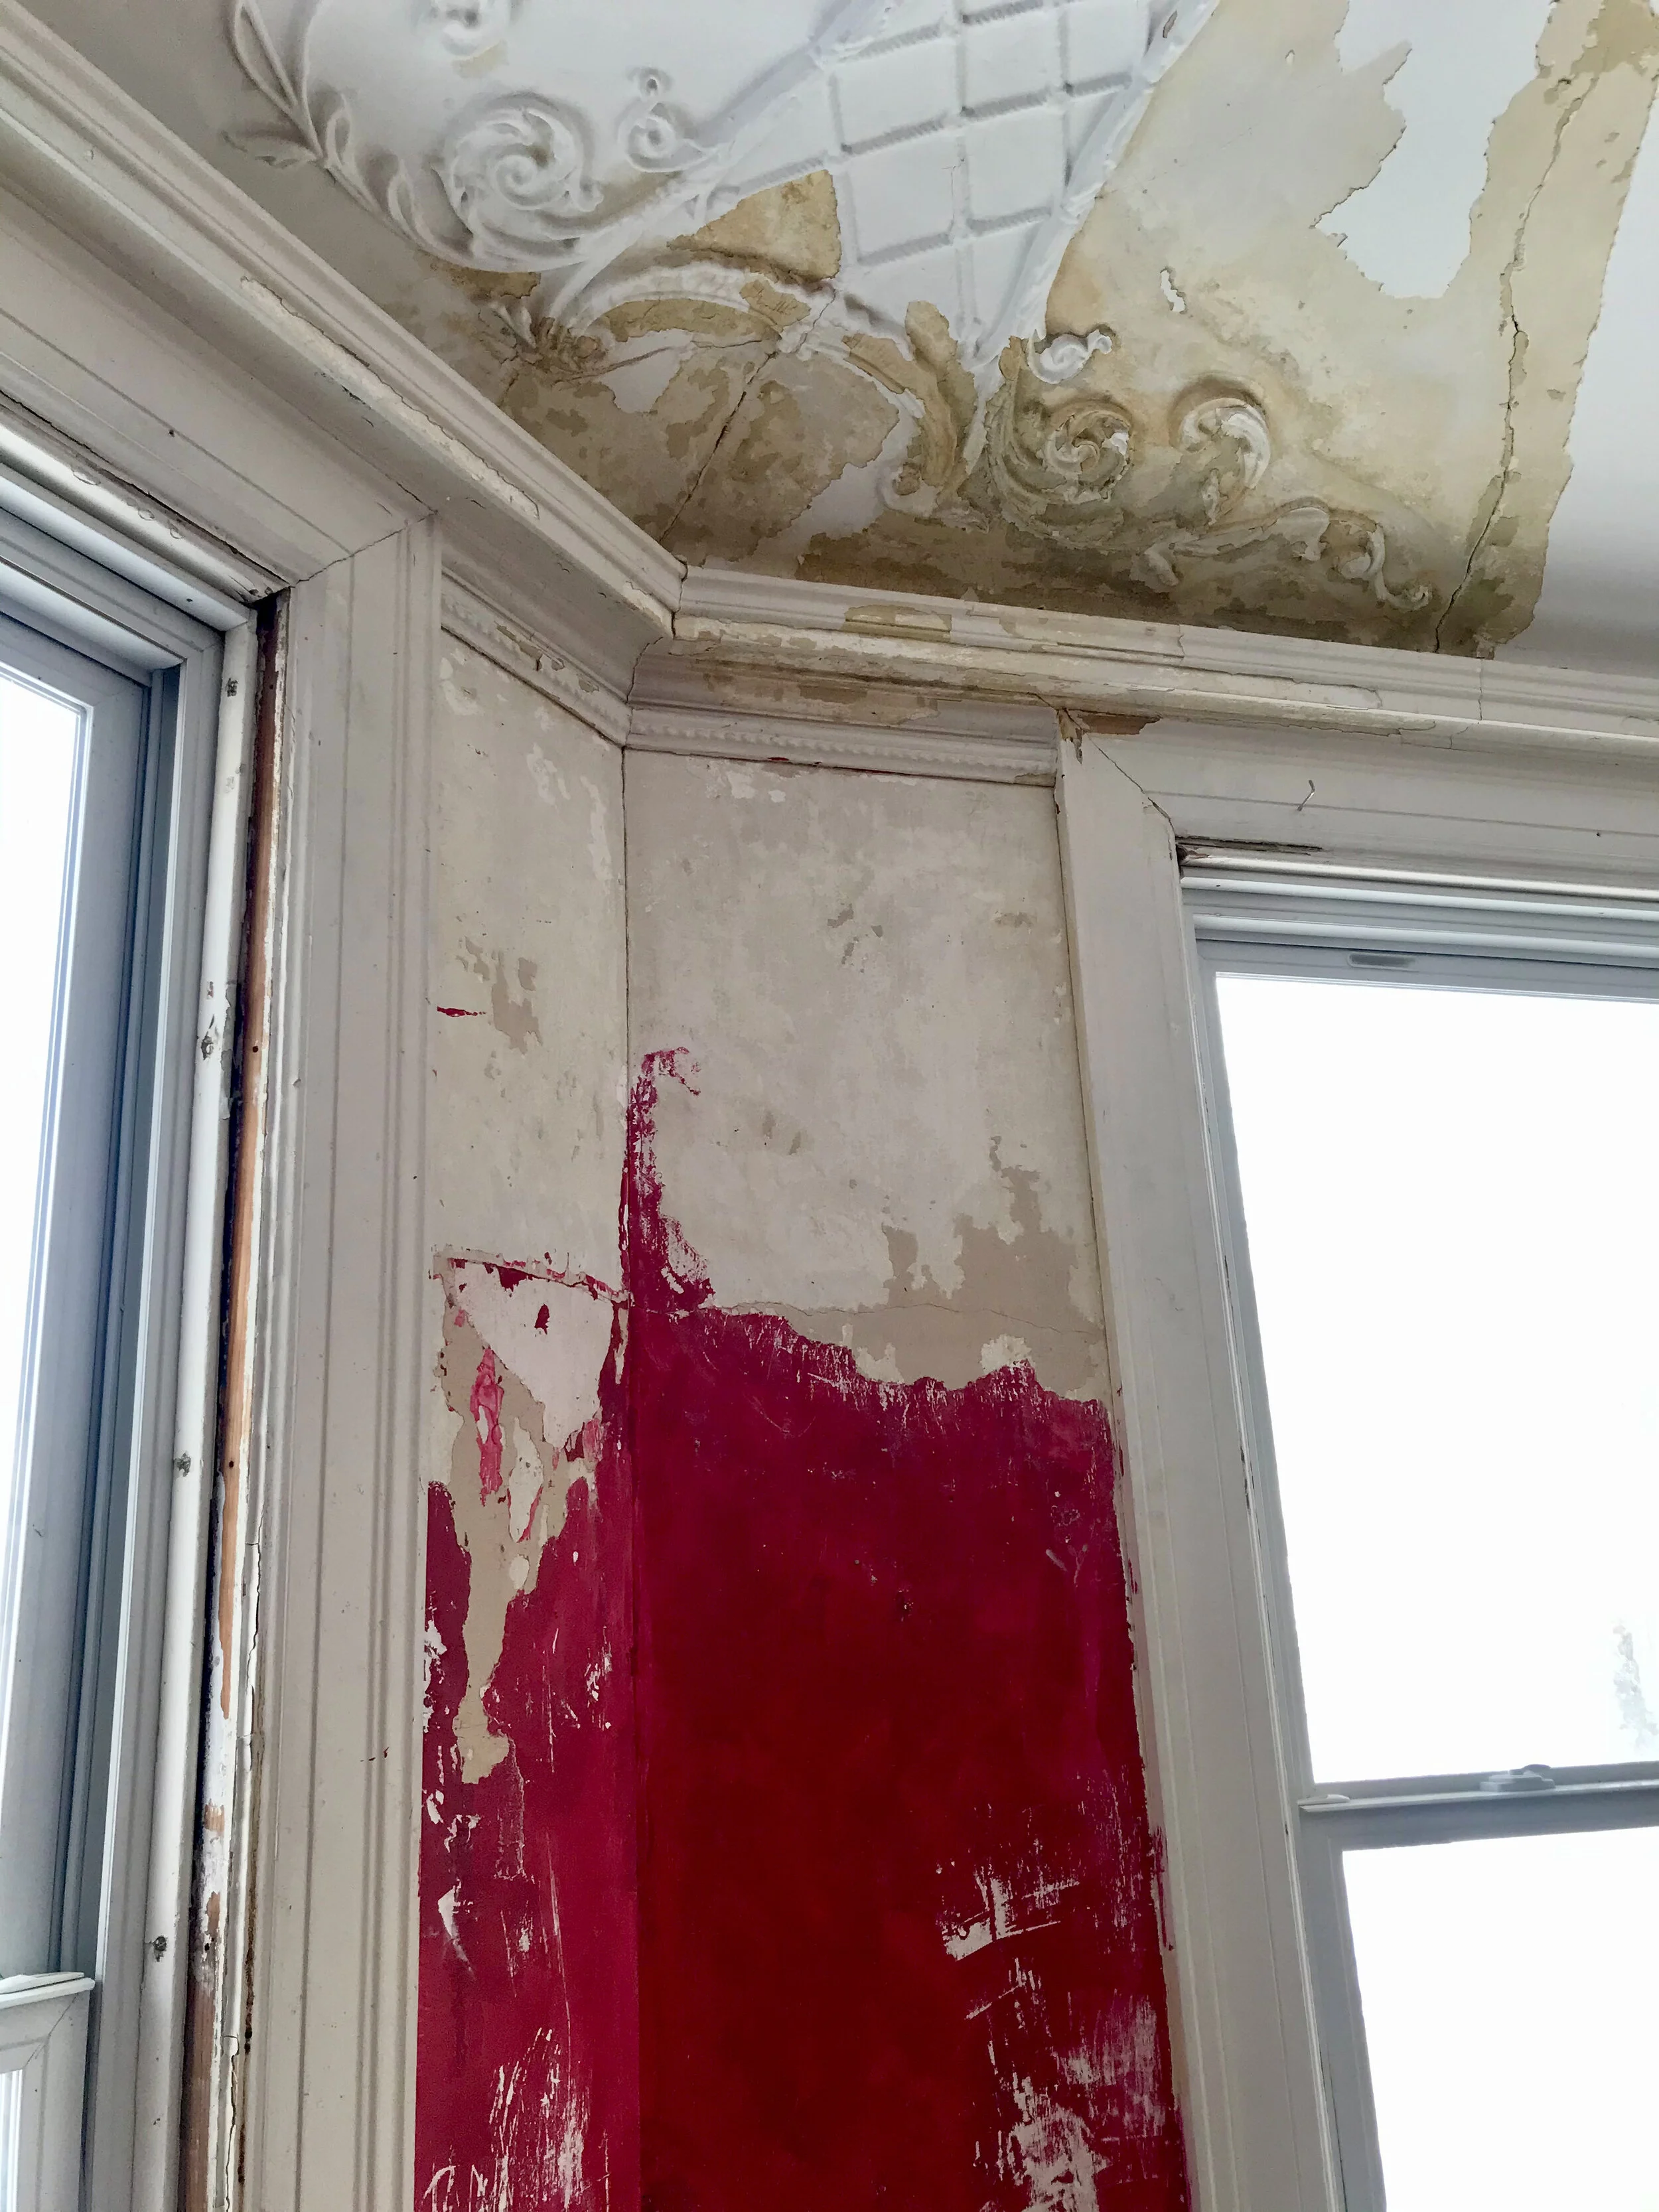
To begin I tried to peel the red paint off of the plaster walls to expose the raw plaster ‘neath.
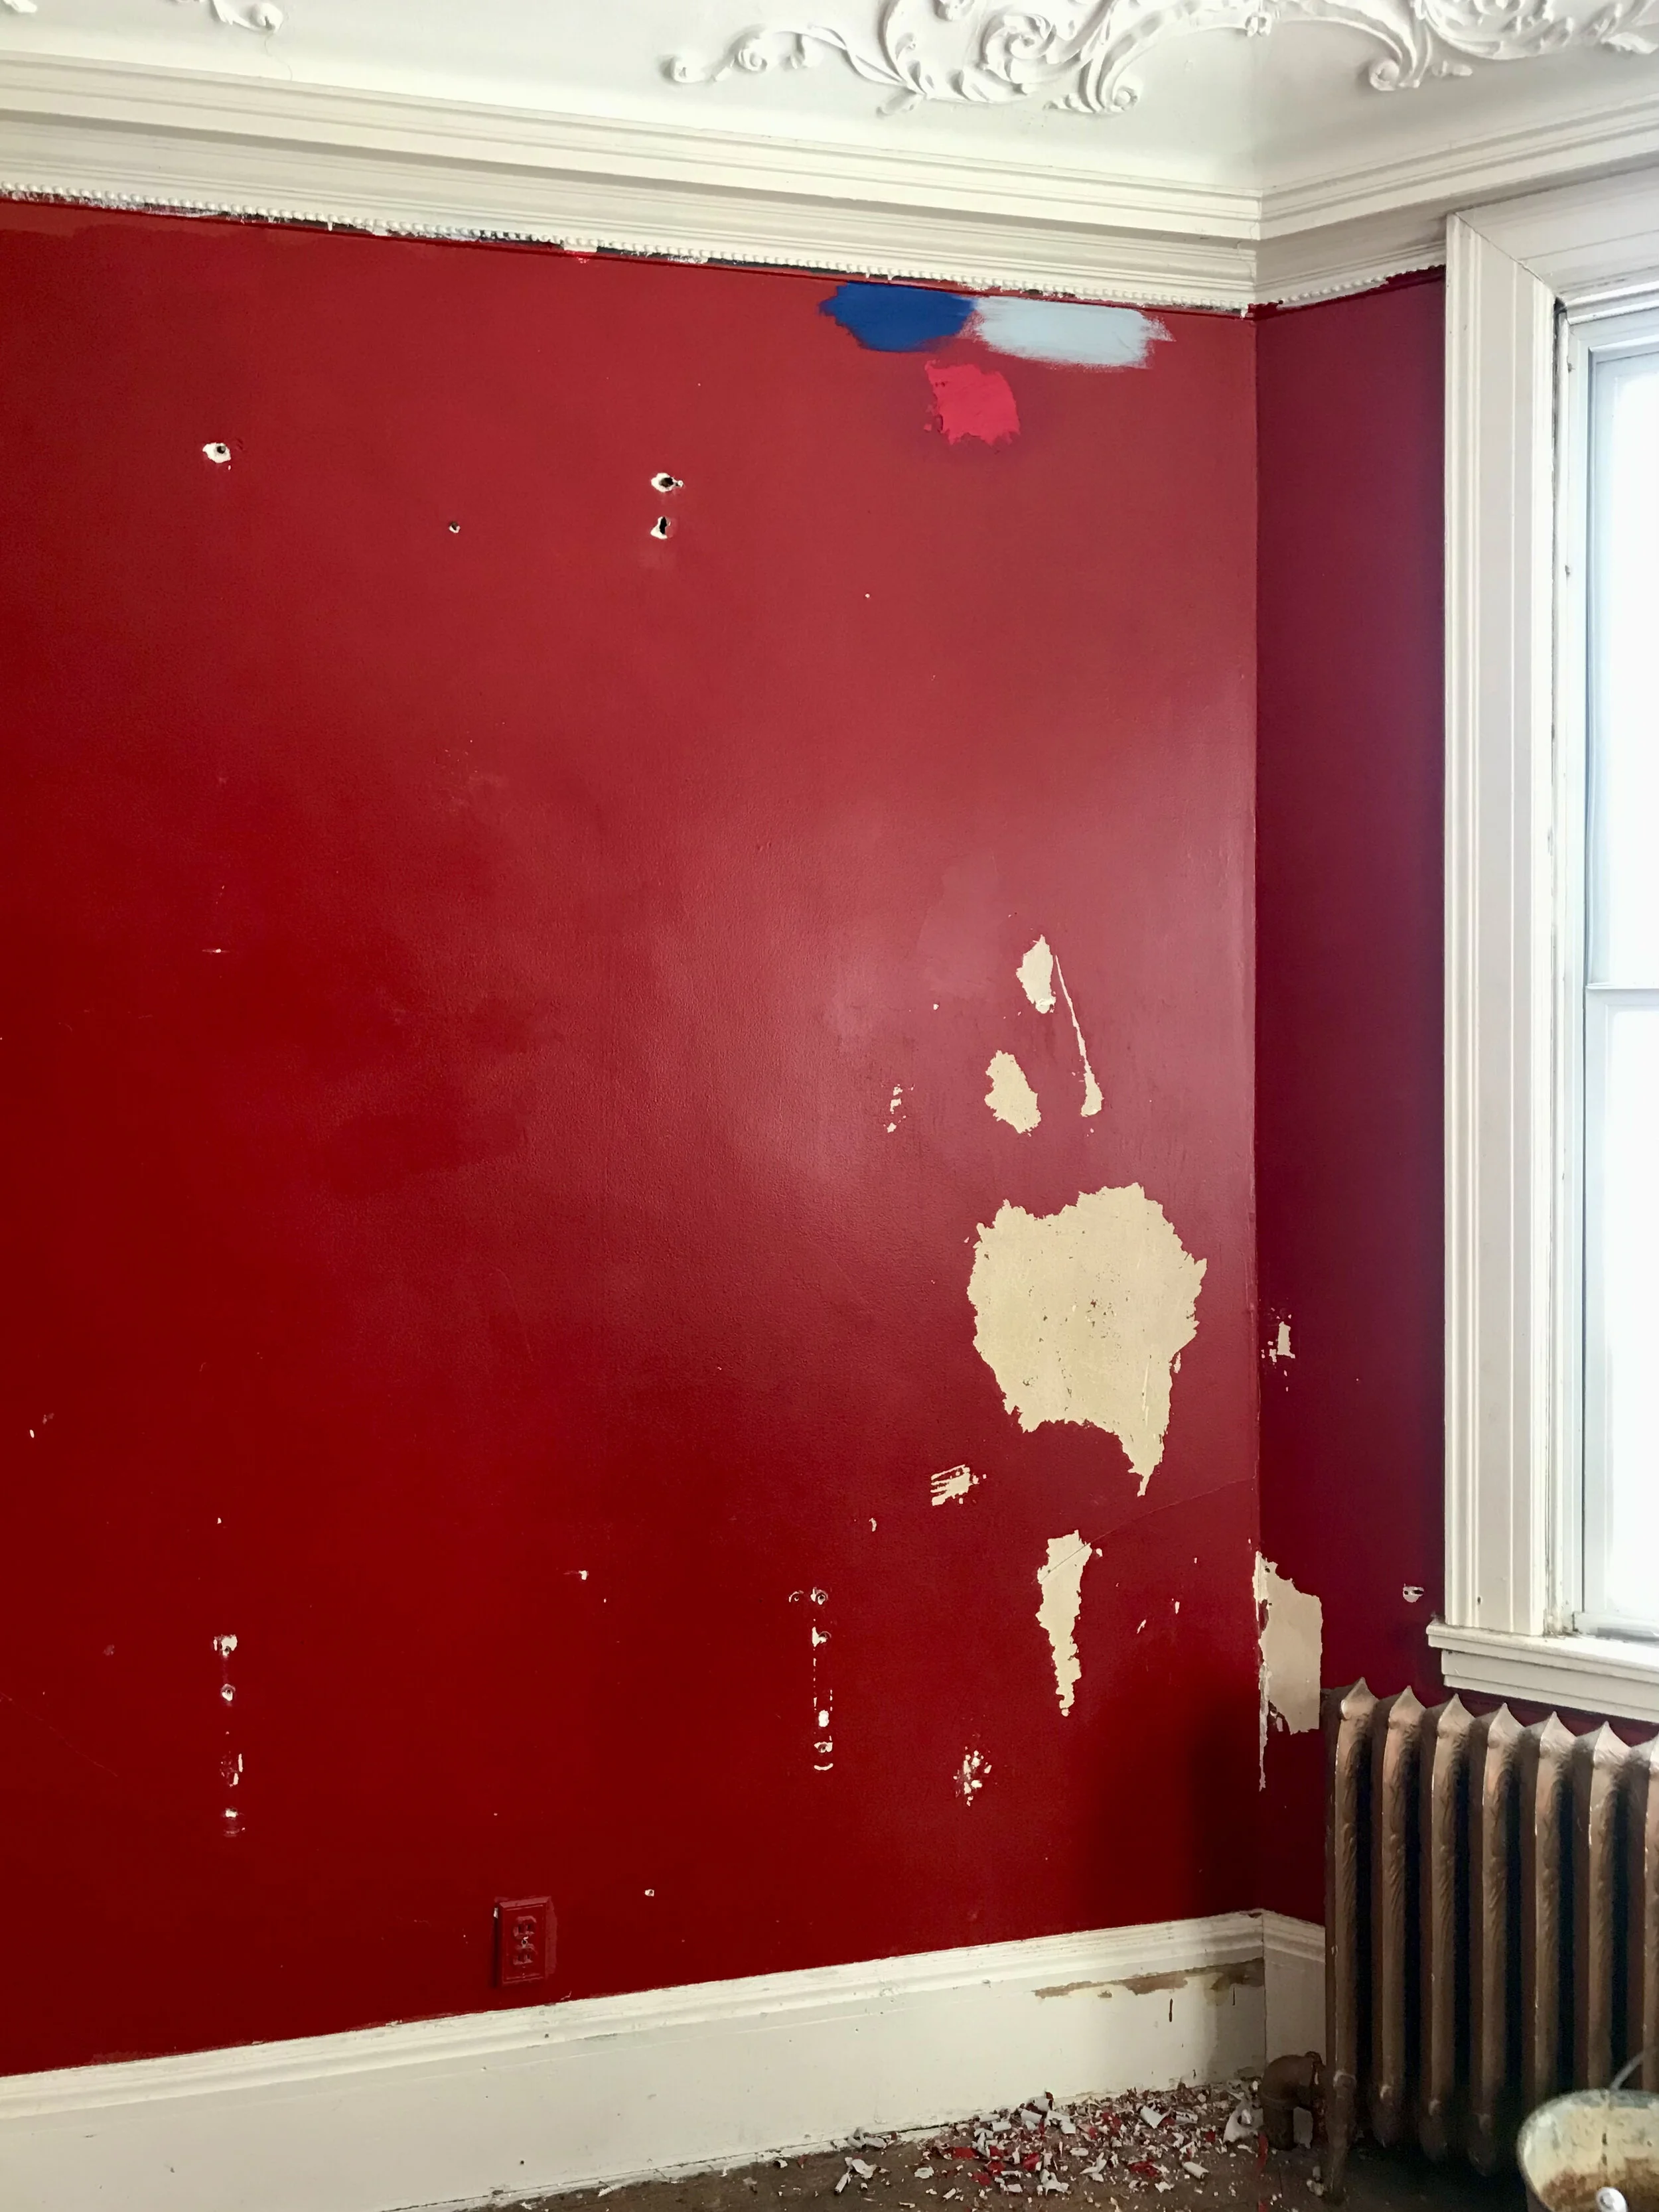
Removing the red paint went slow and I abandoned the task opting instead to paint over the scarlet with Ottosson interior white matte wall paint.

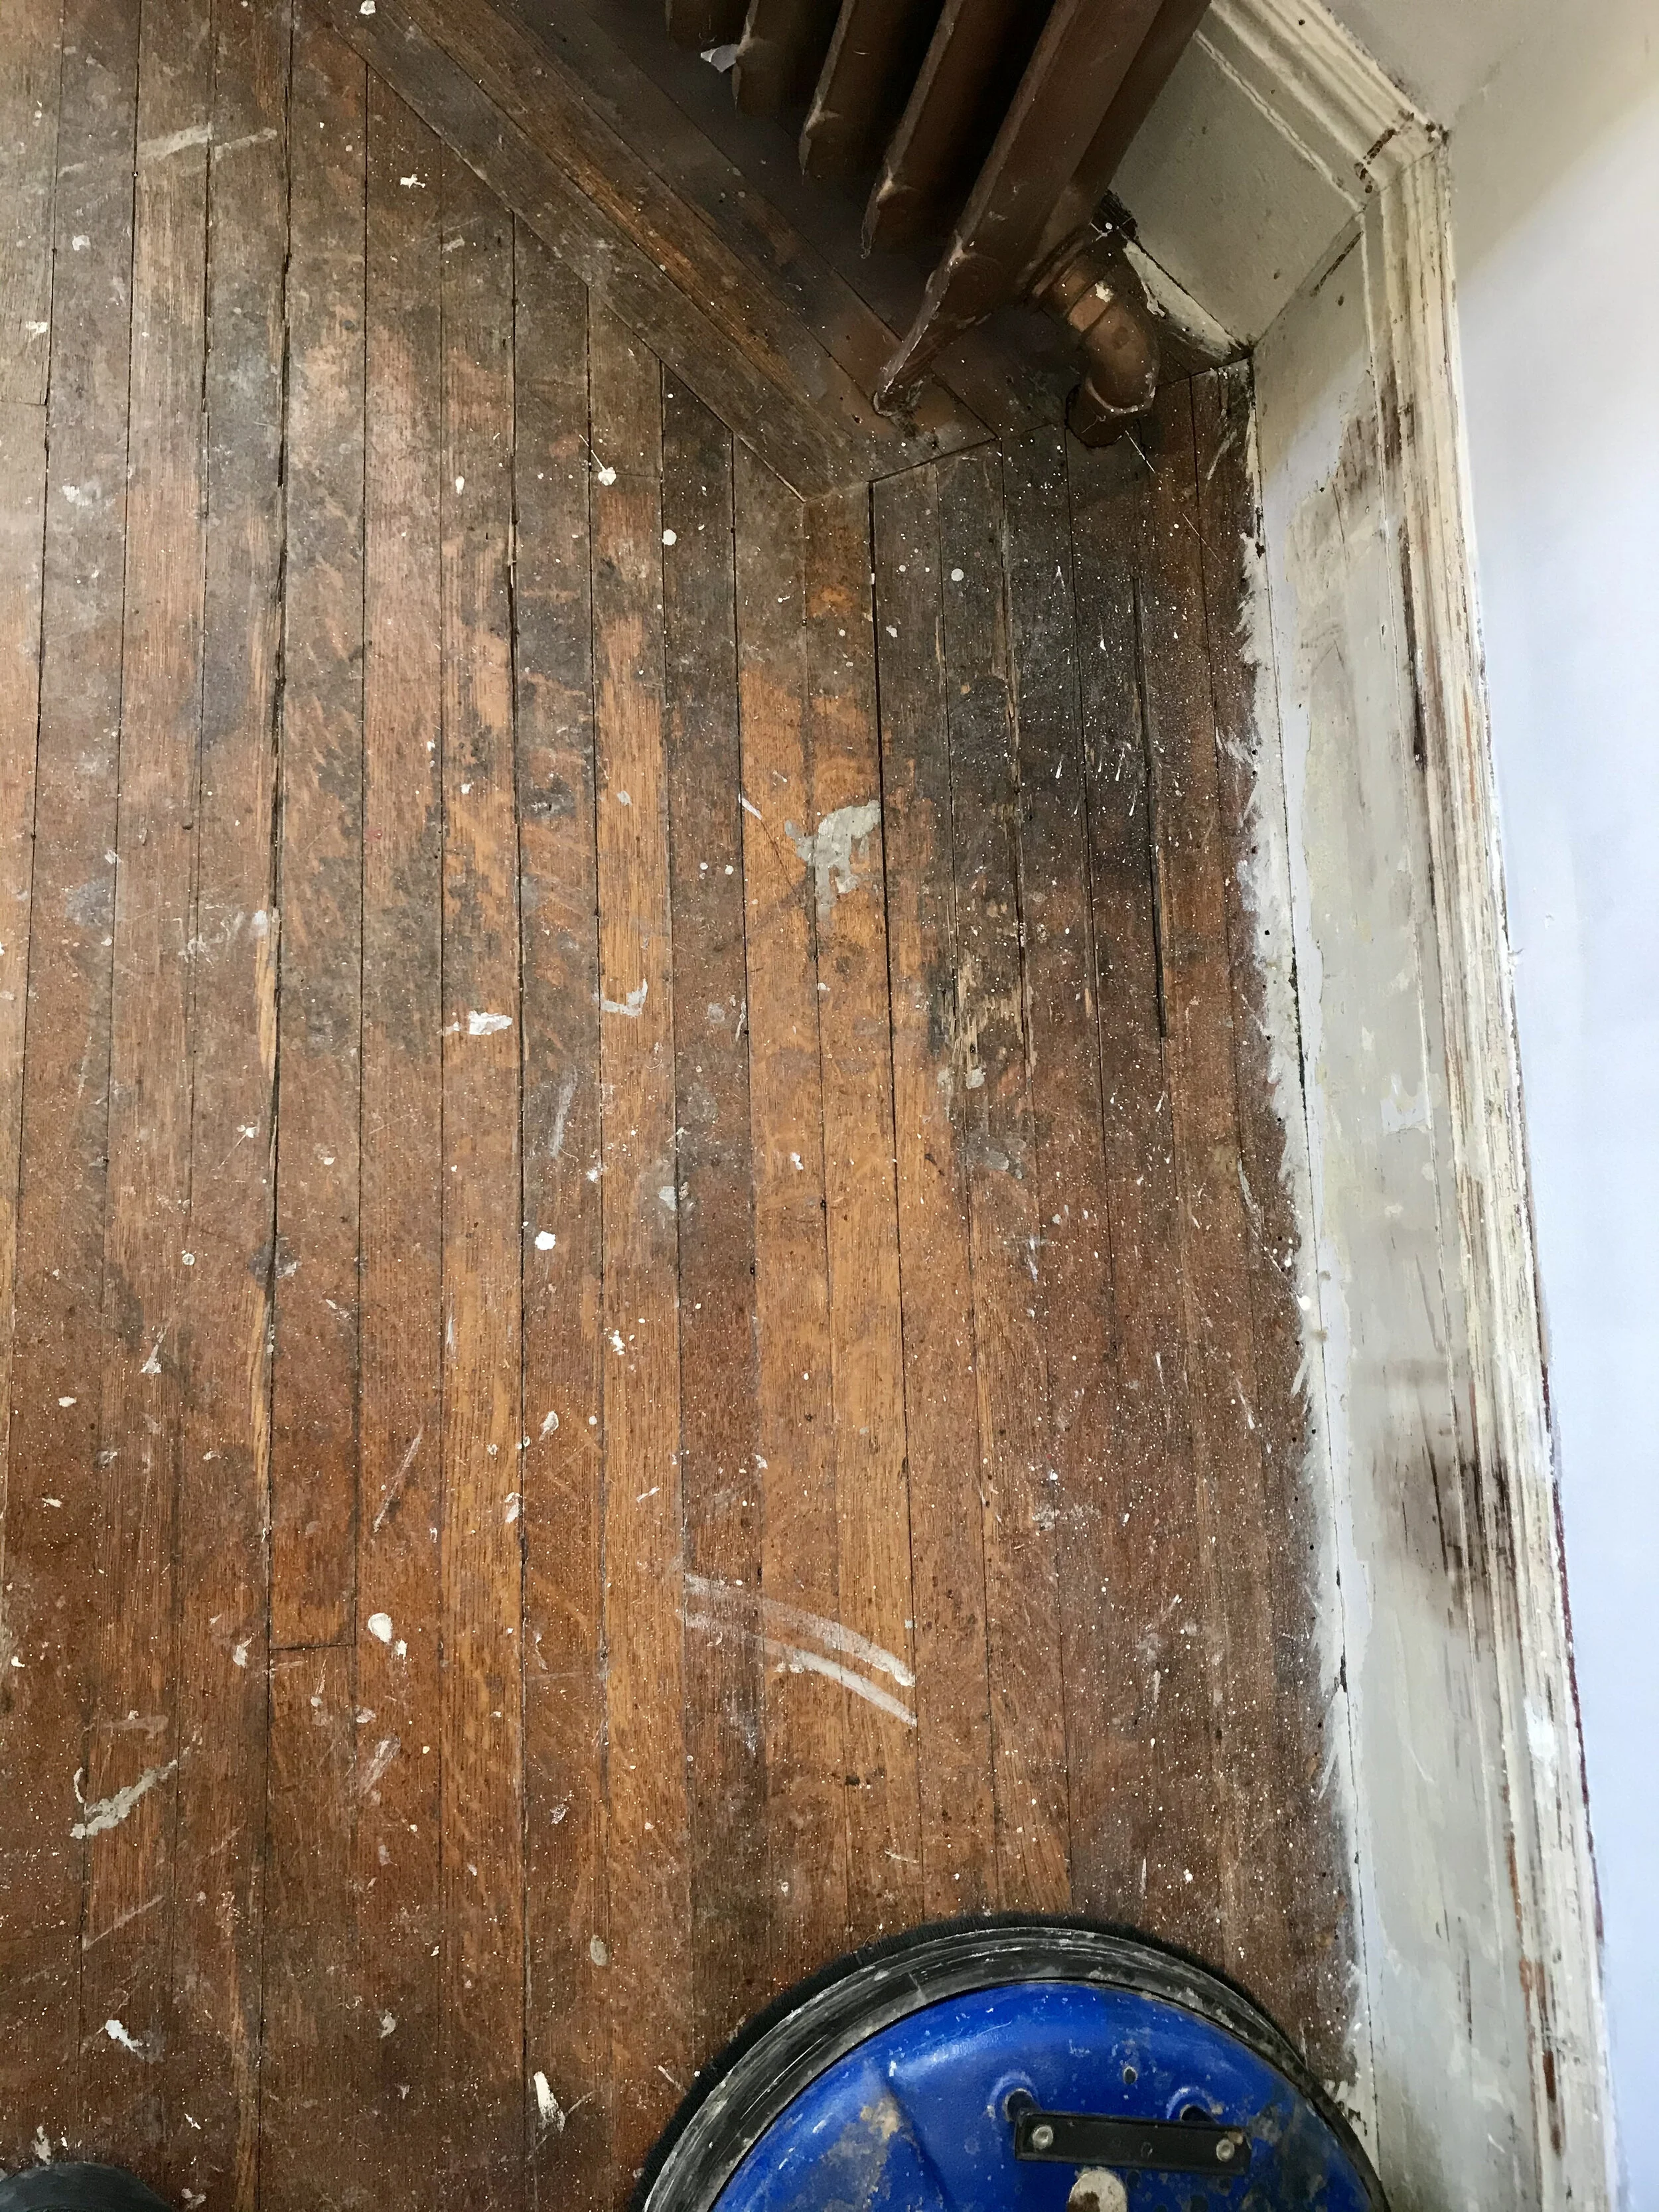
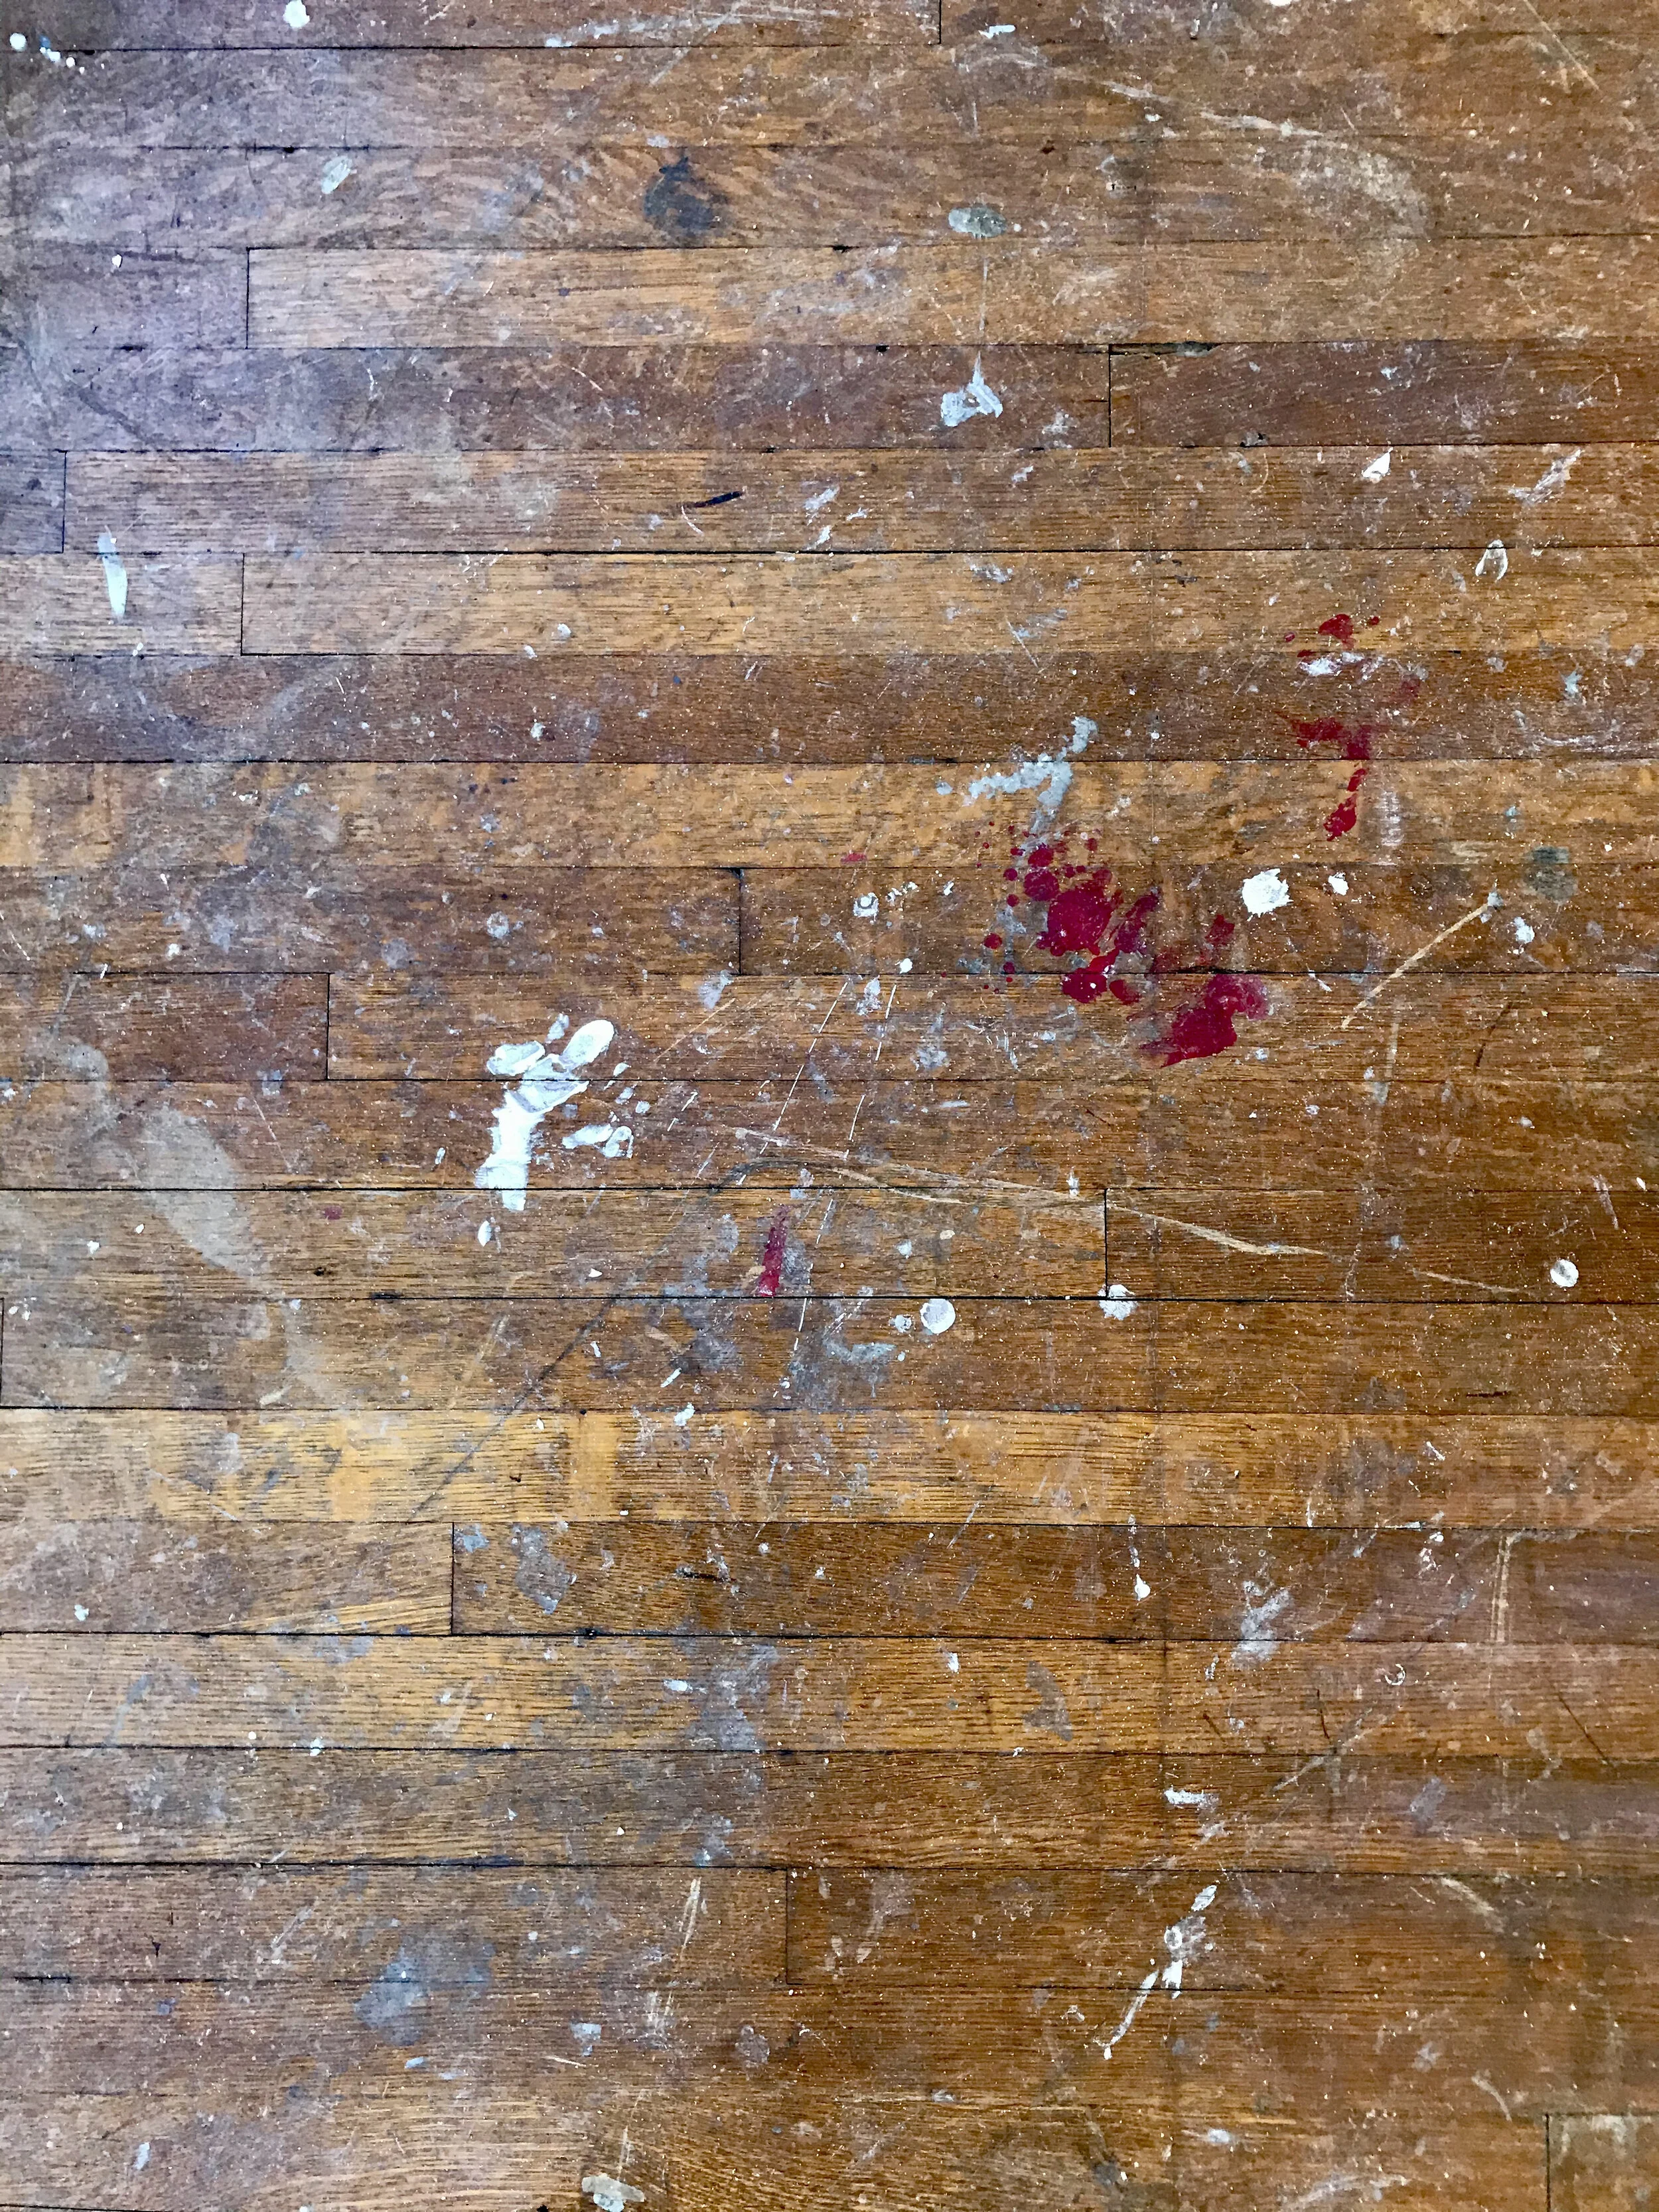
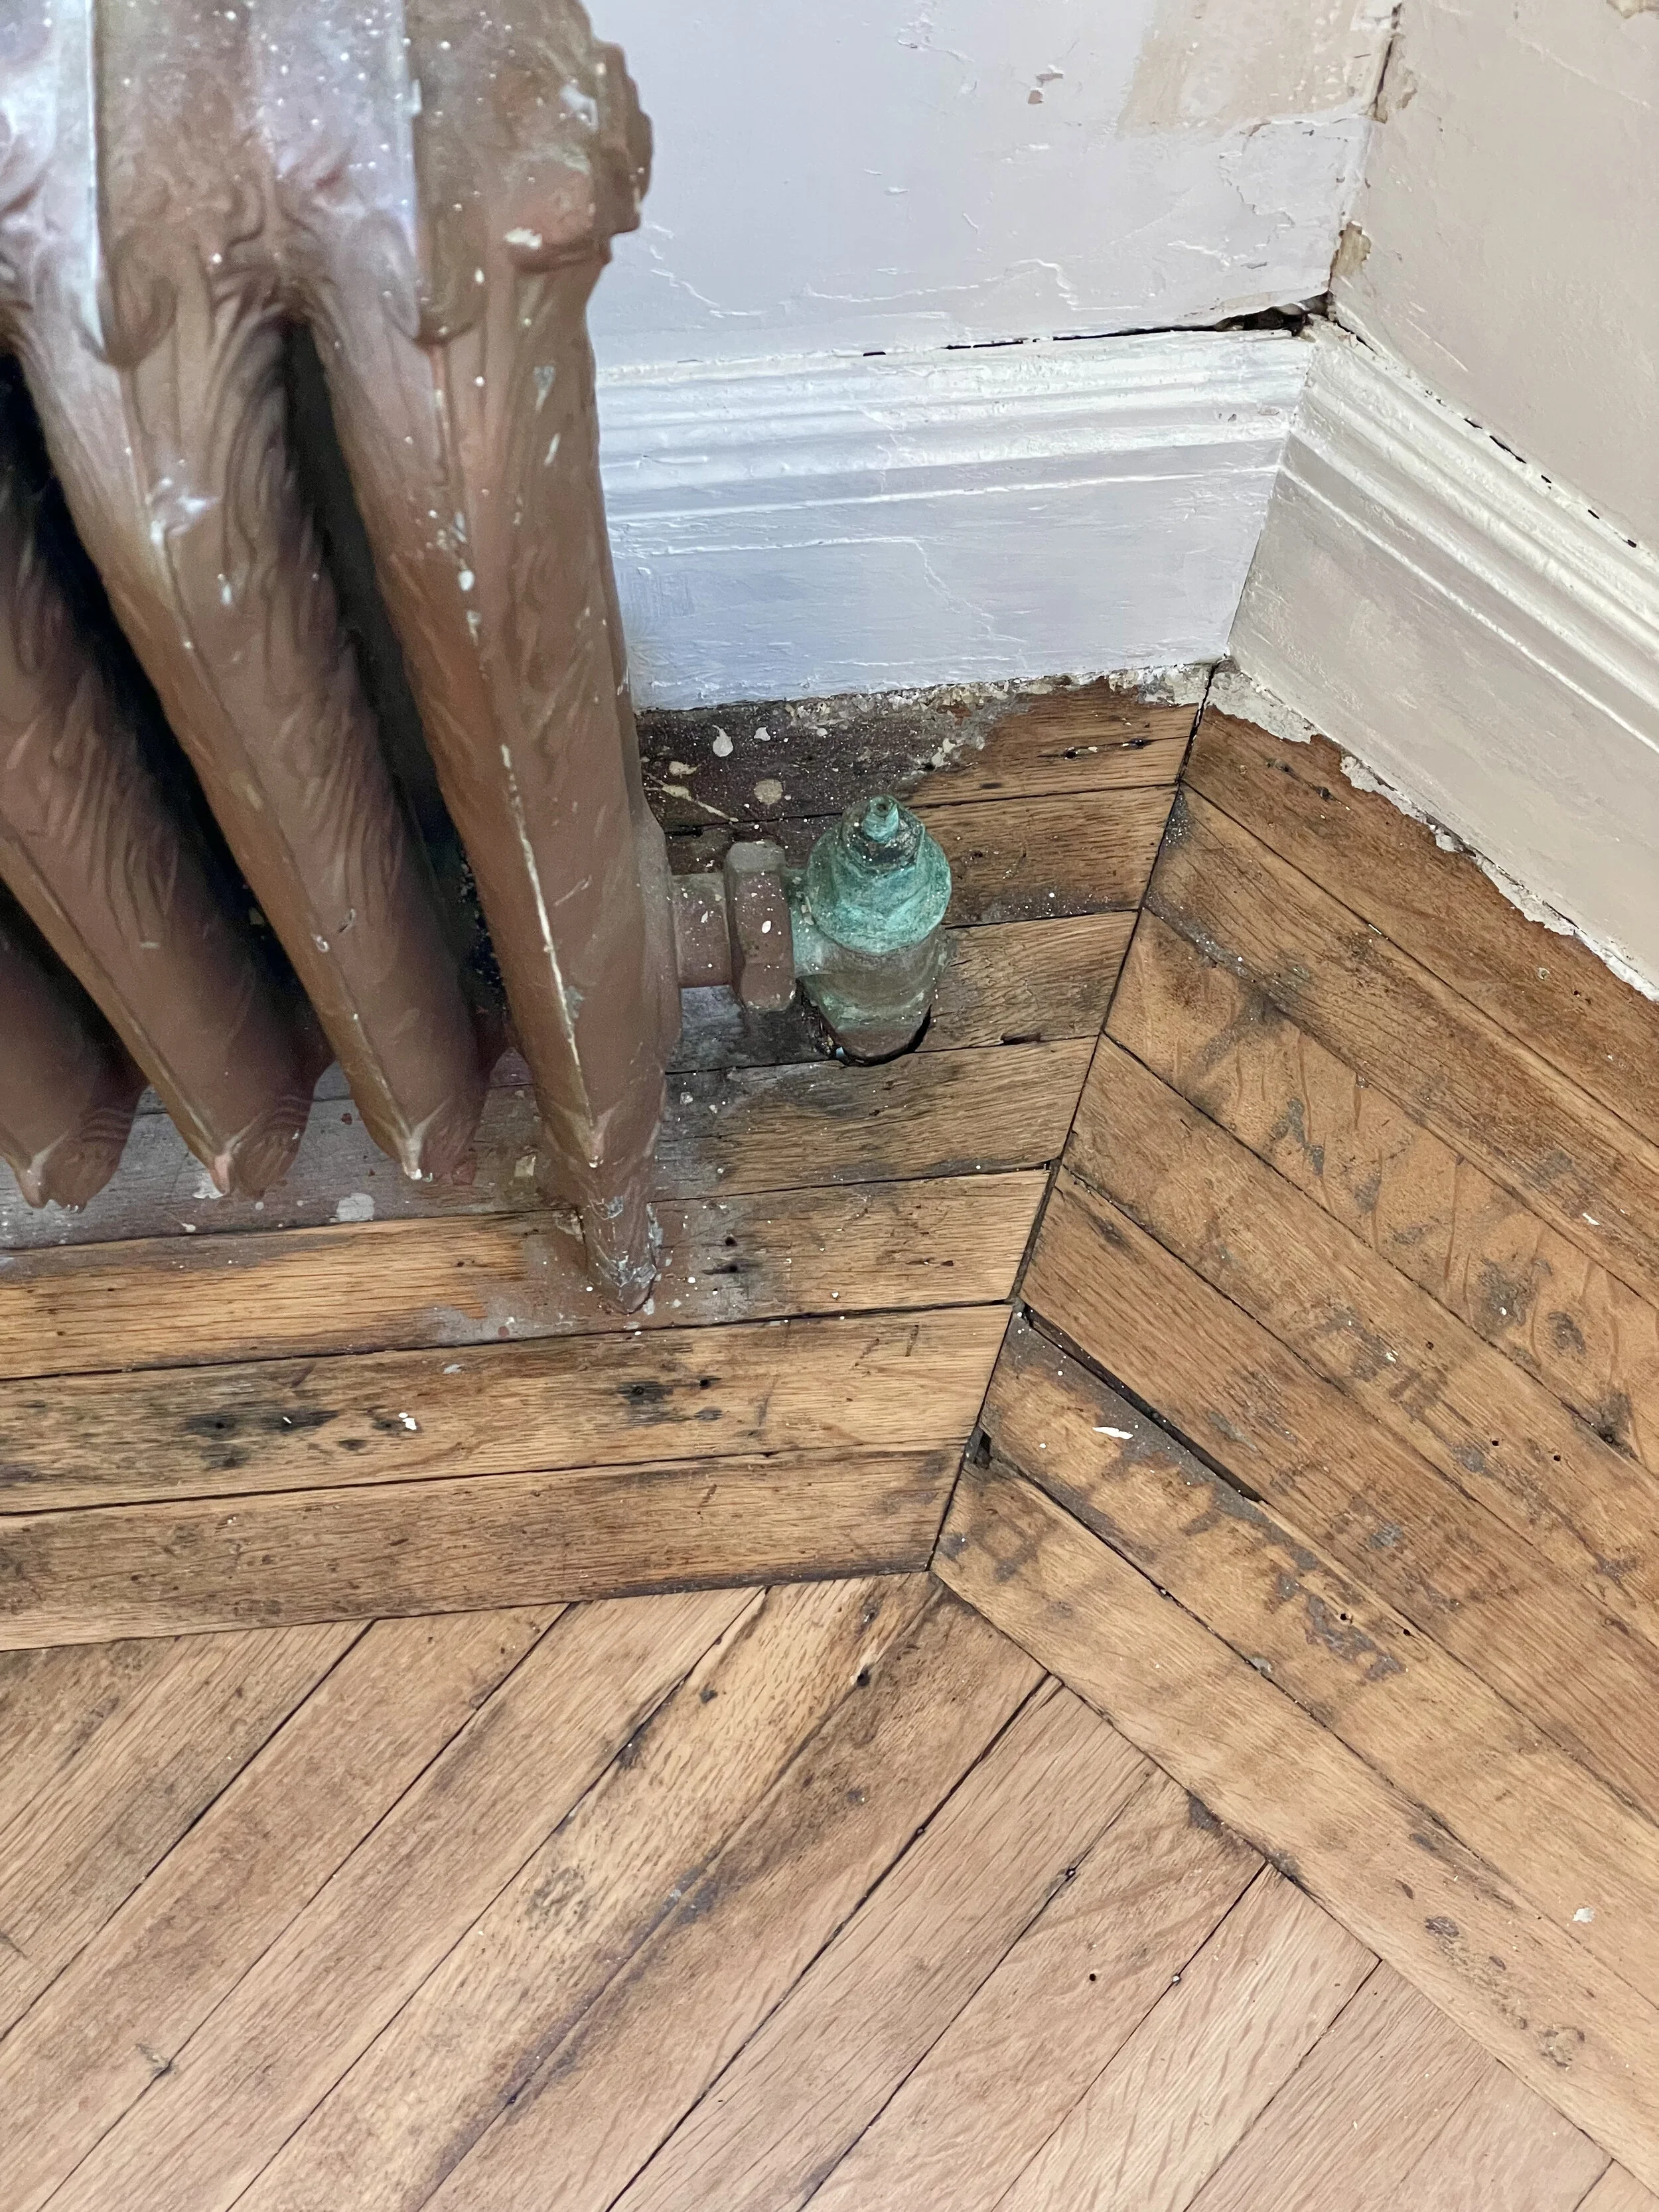
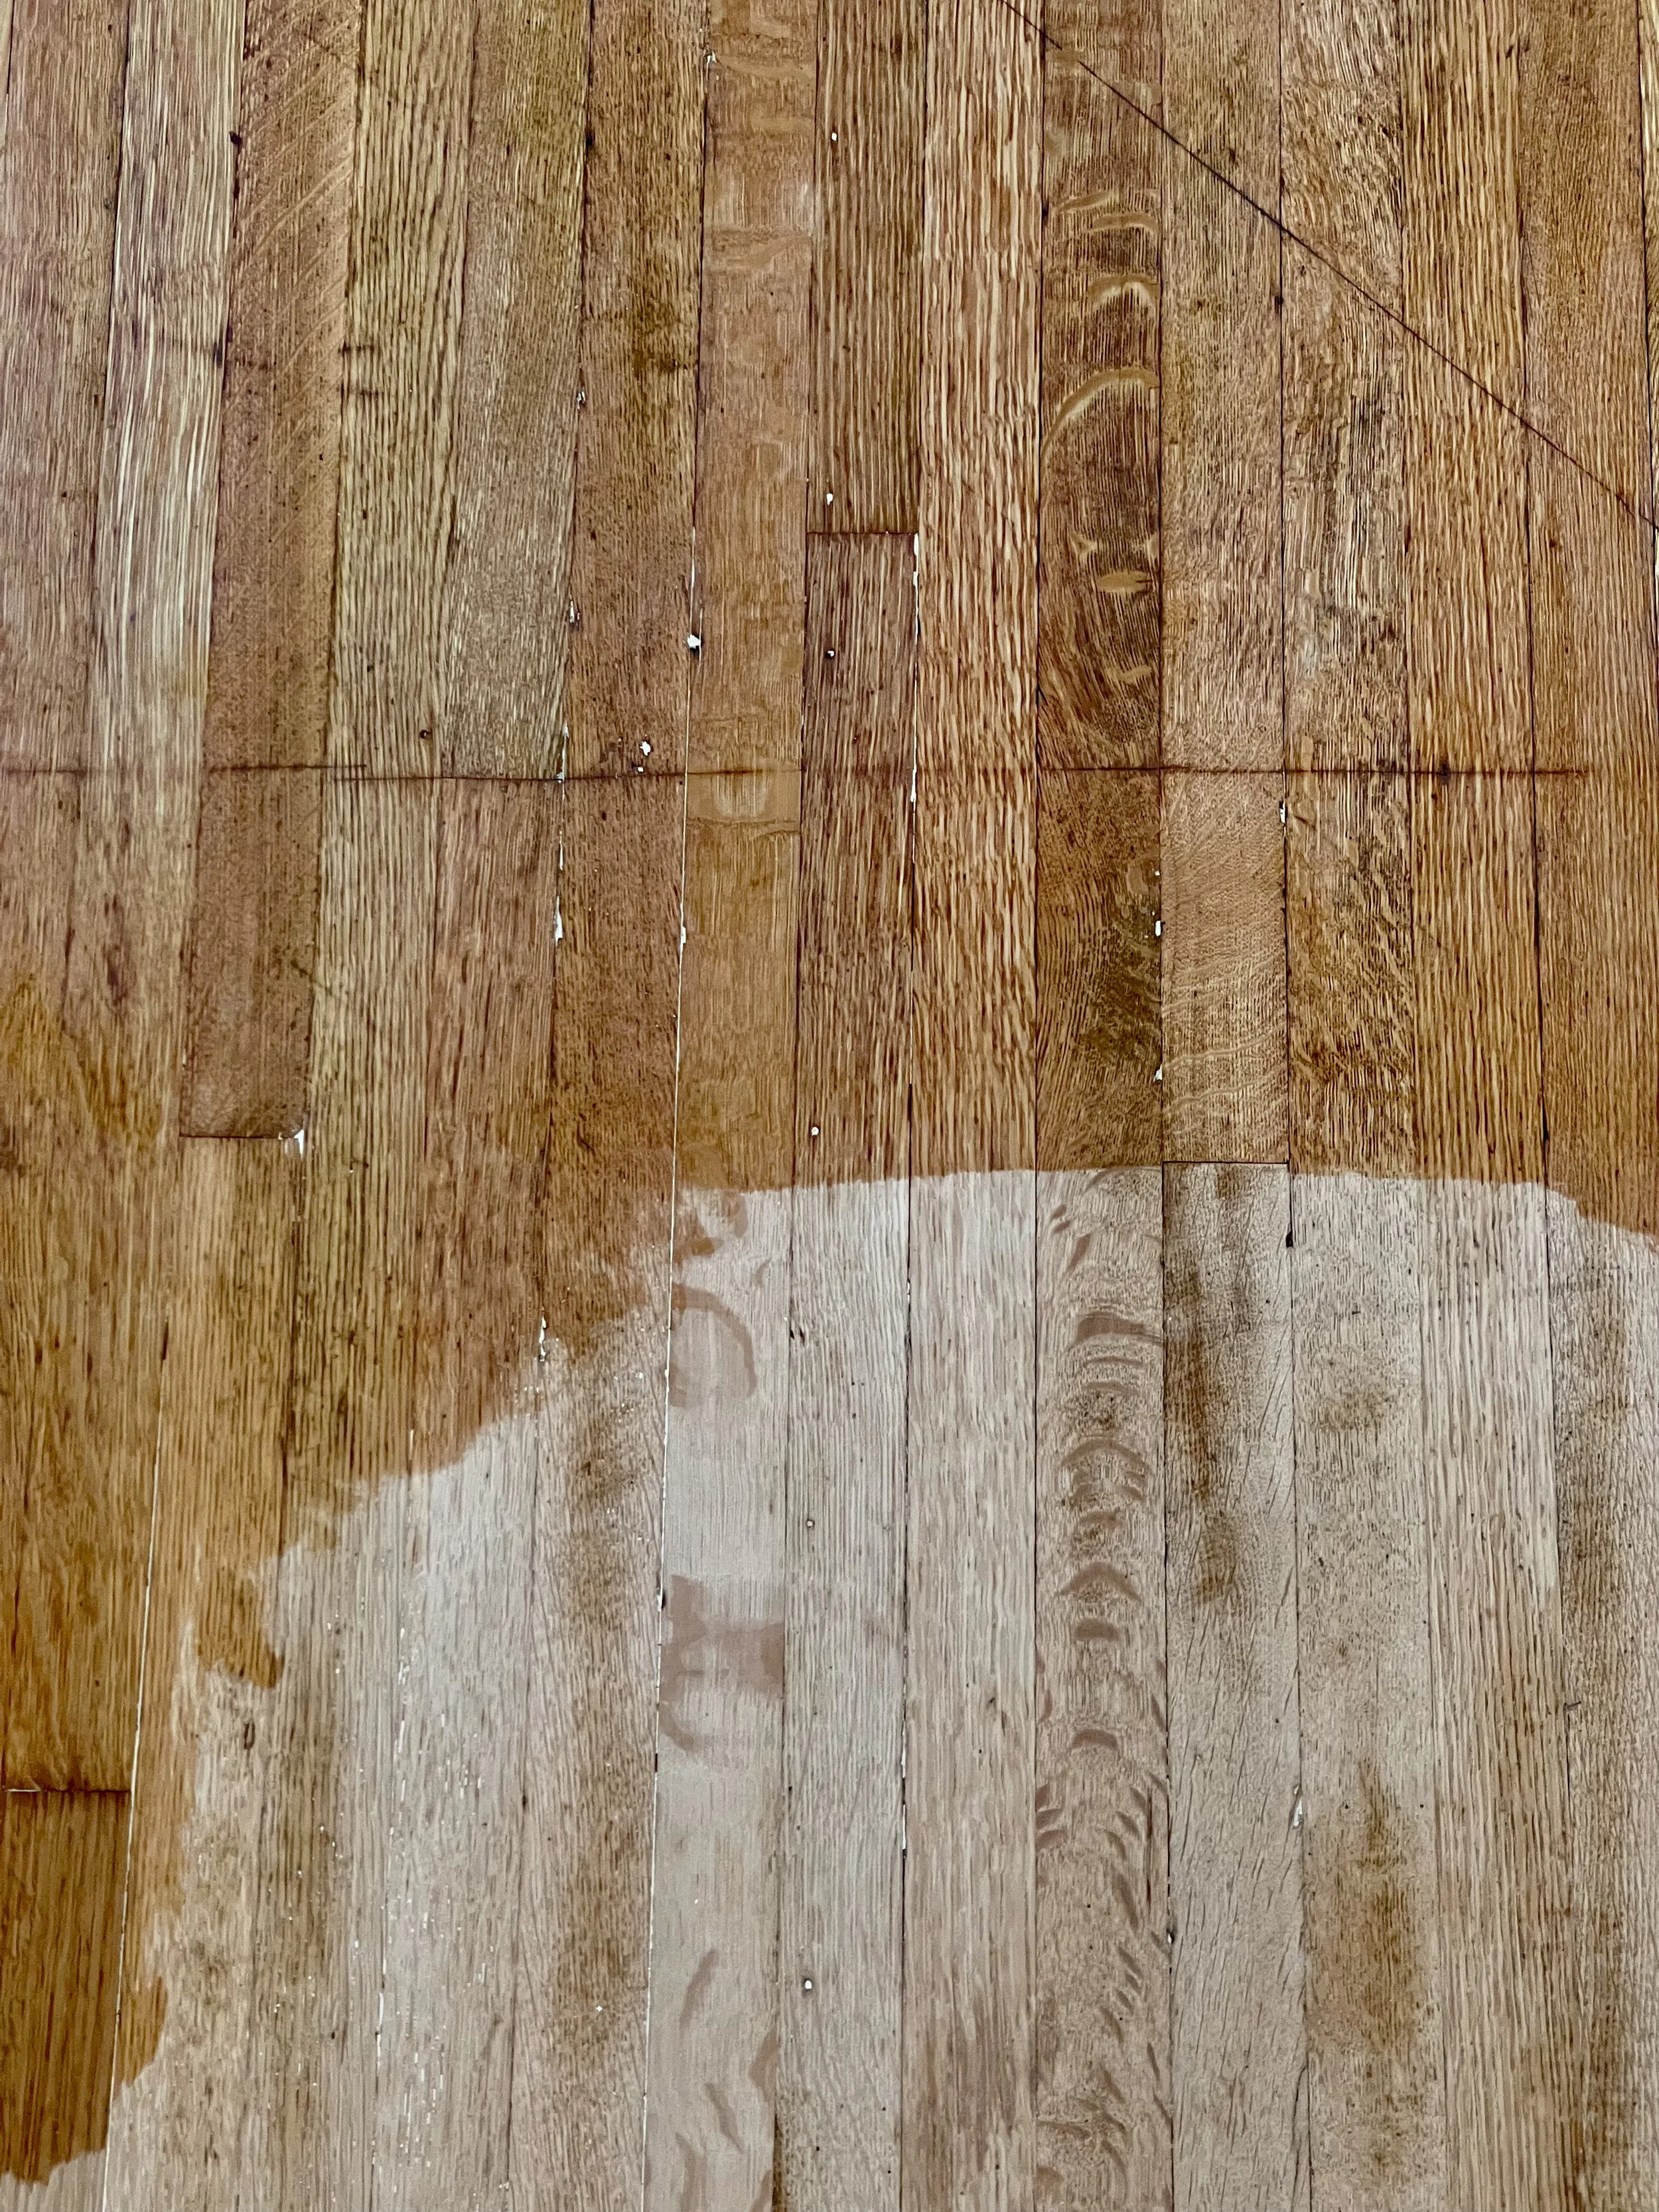
Here affords a glimpse of the black tar that covered a portion of the quarter sawn oak floors. I suspect there was once tile atop the wood and the black tar acted as an adhesive.

I washed the walls and removed all loose material.
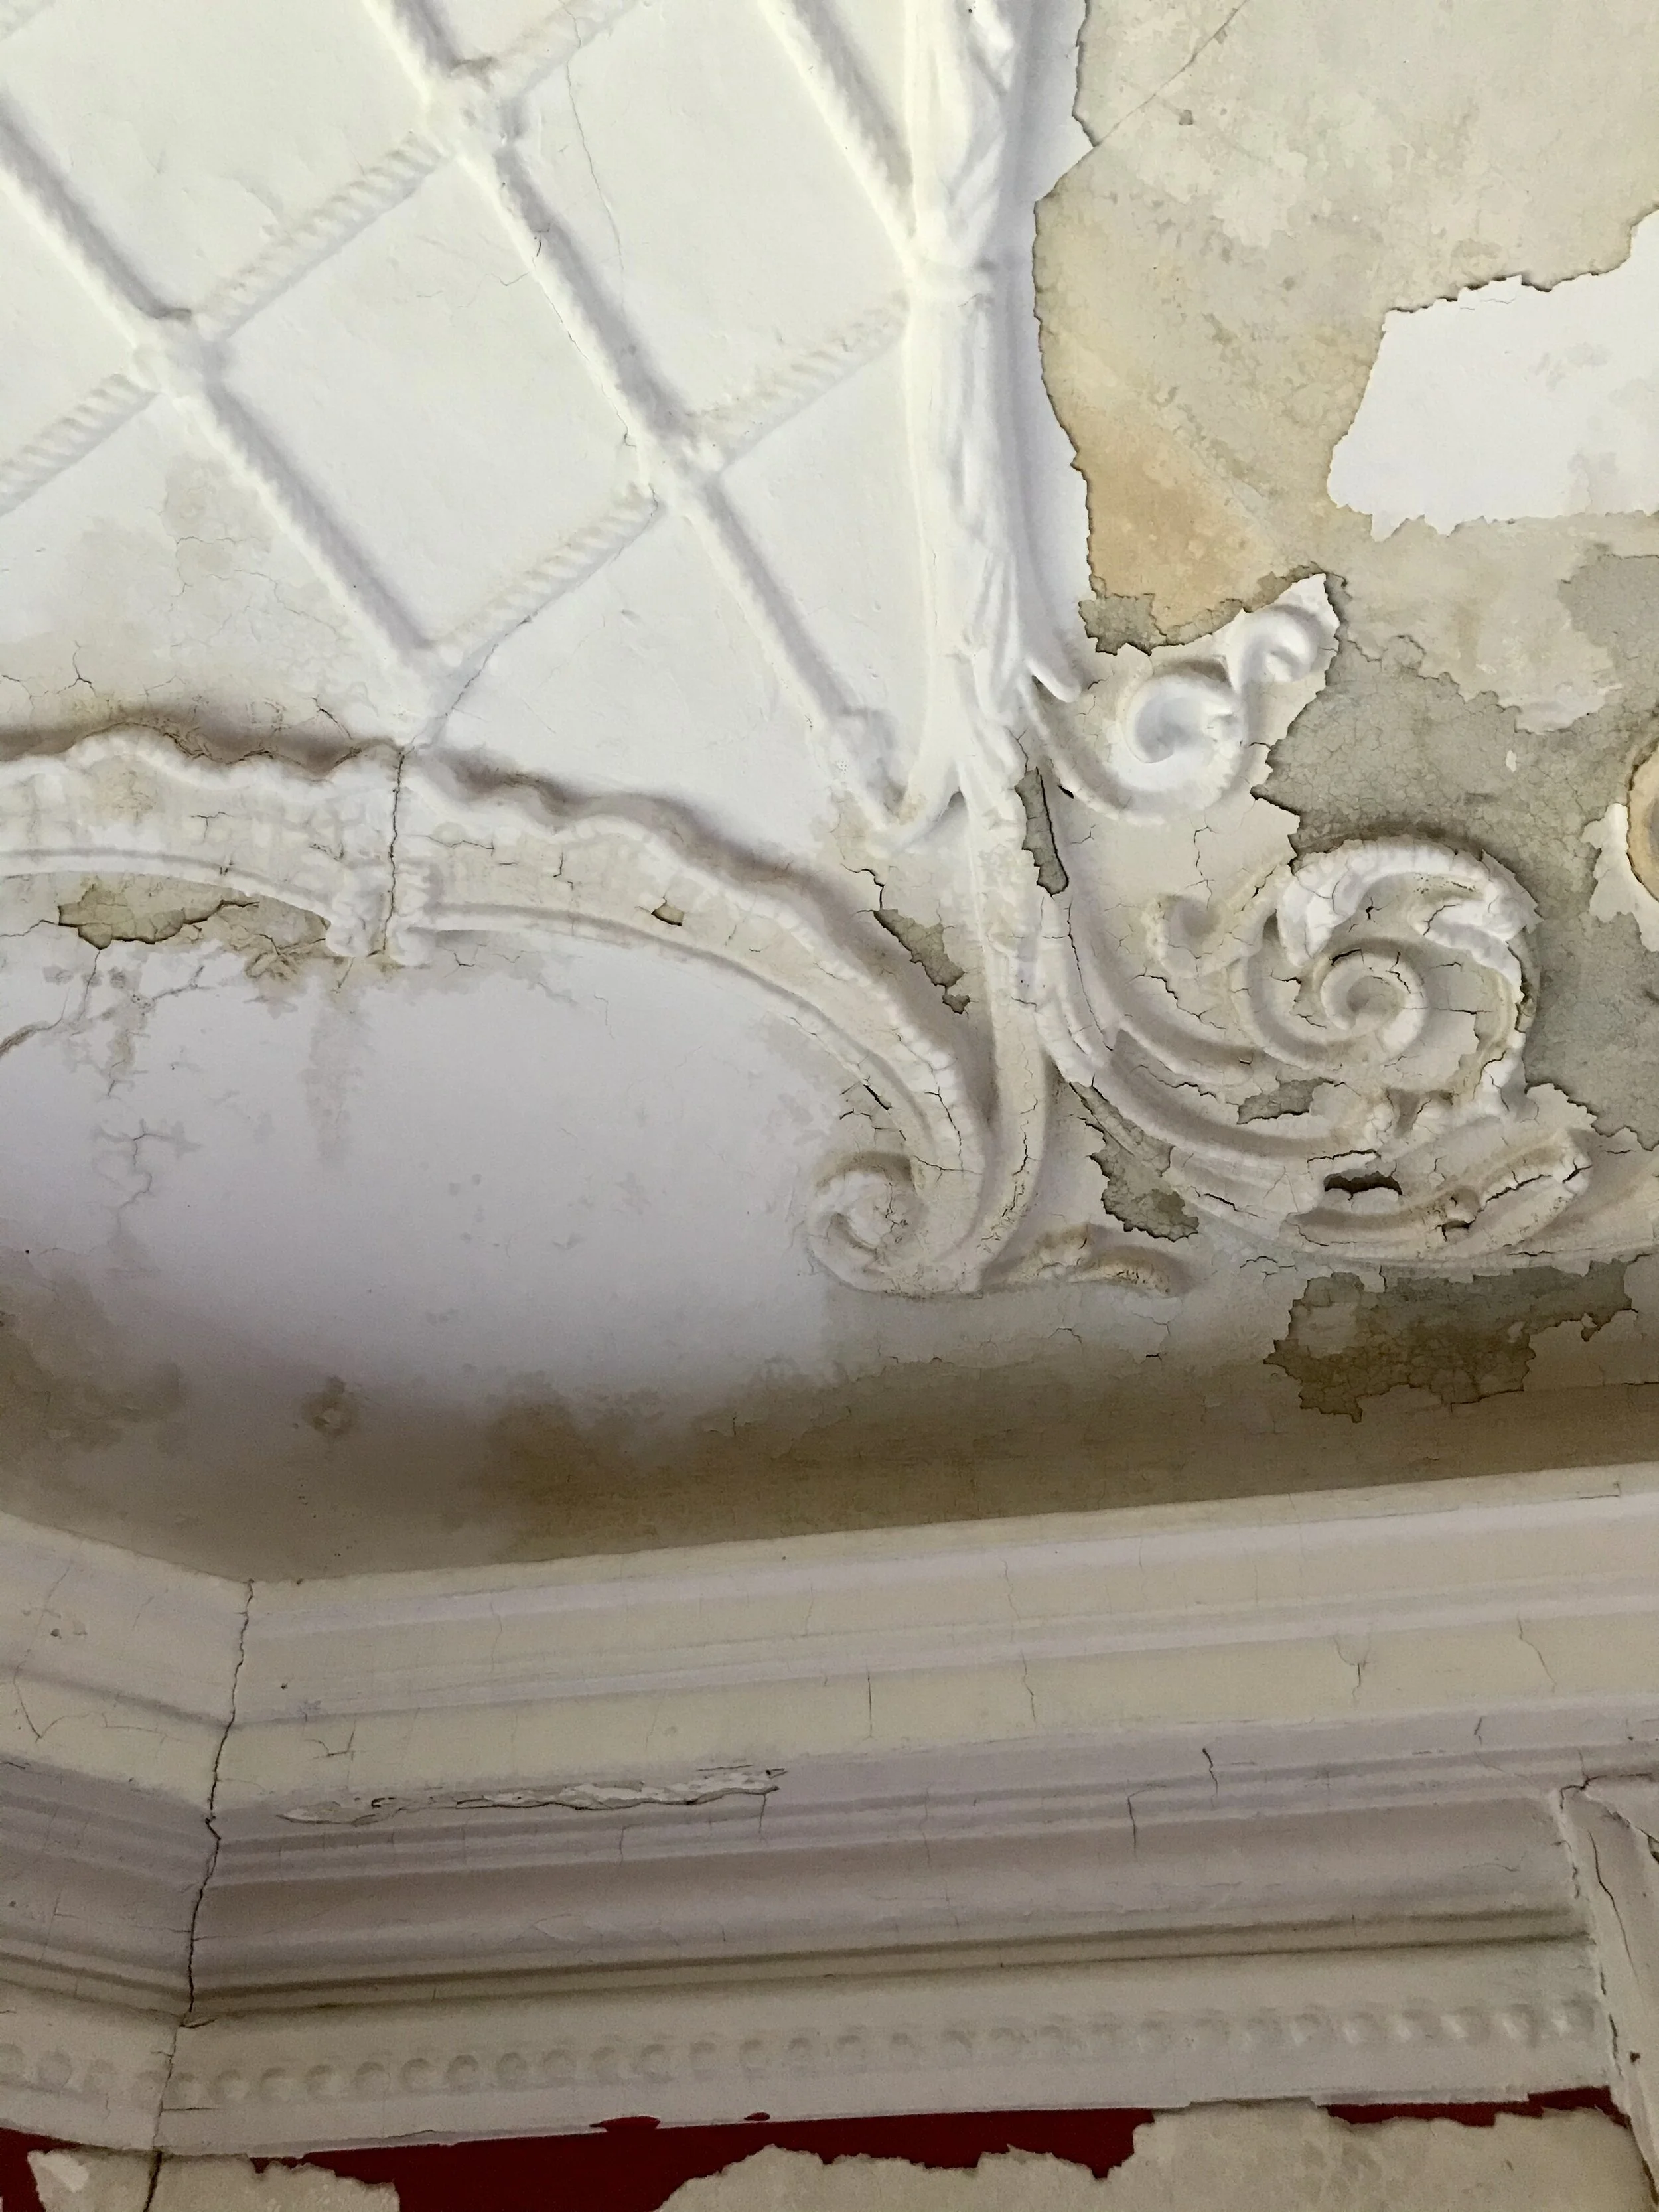
Beautiful original raw plaster. A treat for the senses.

Beginning to apply the first coat of Matte White Interior Ottosson Linseed Oil Paint.
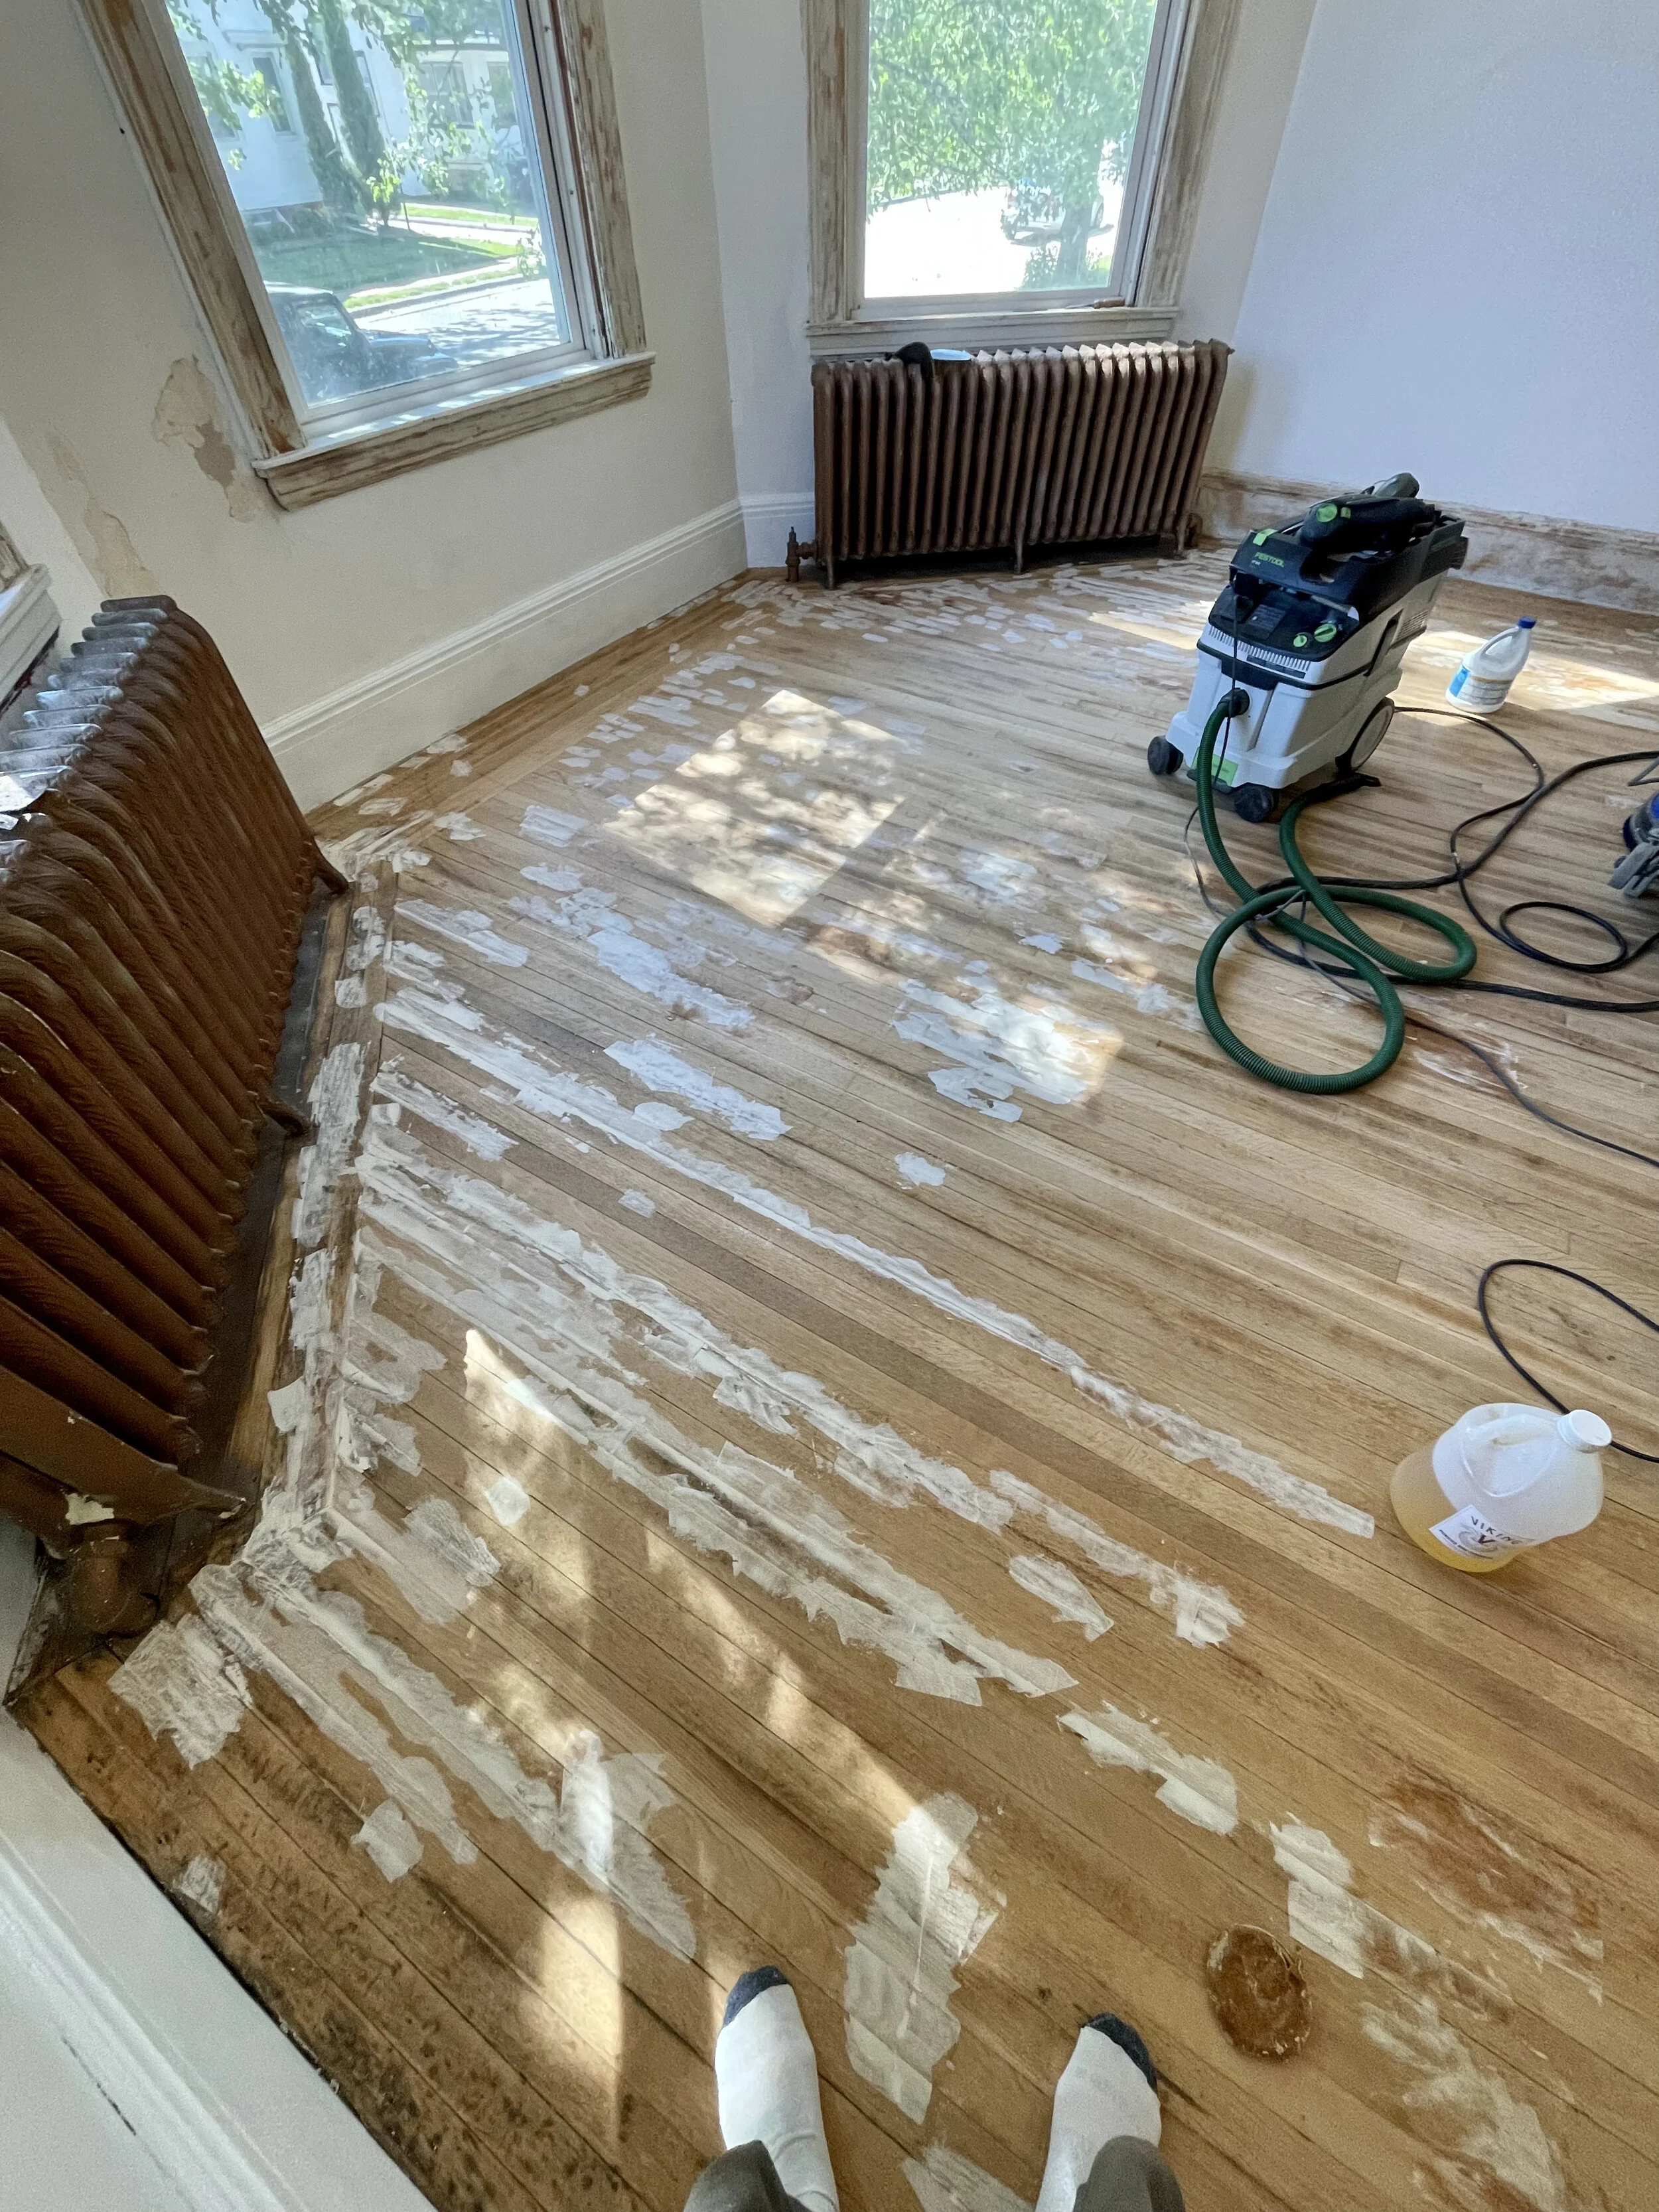
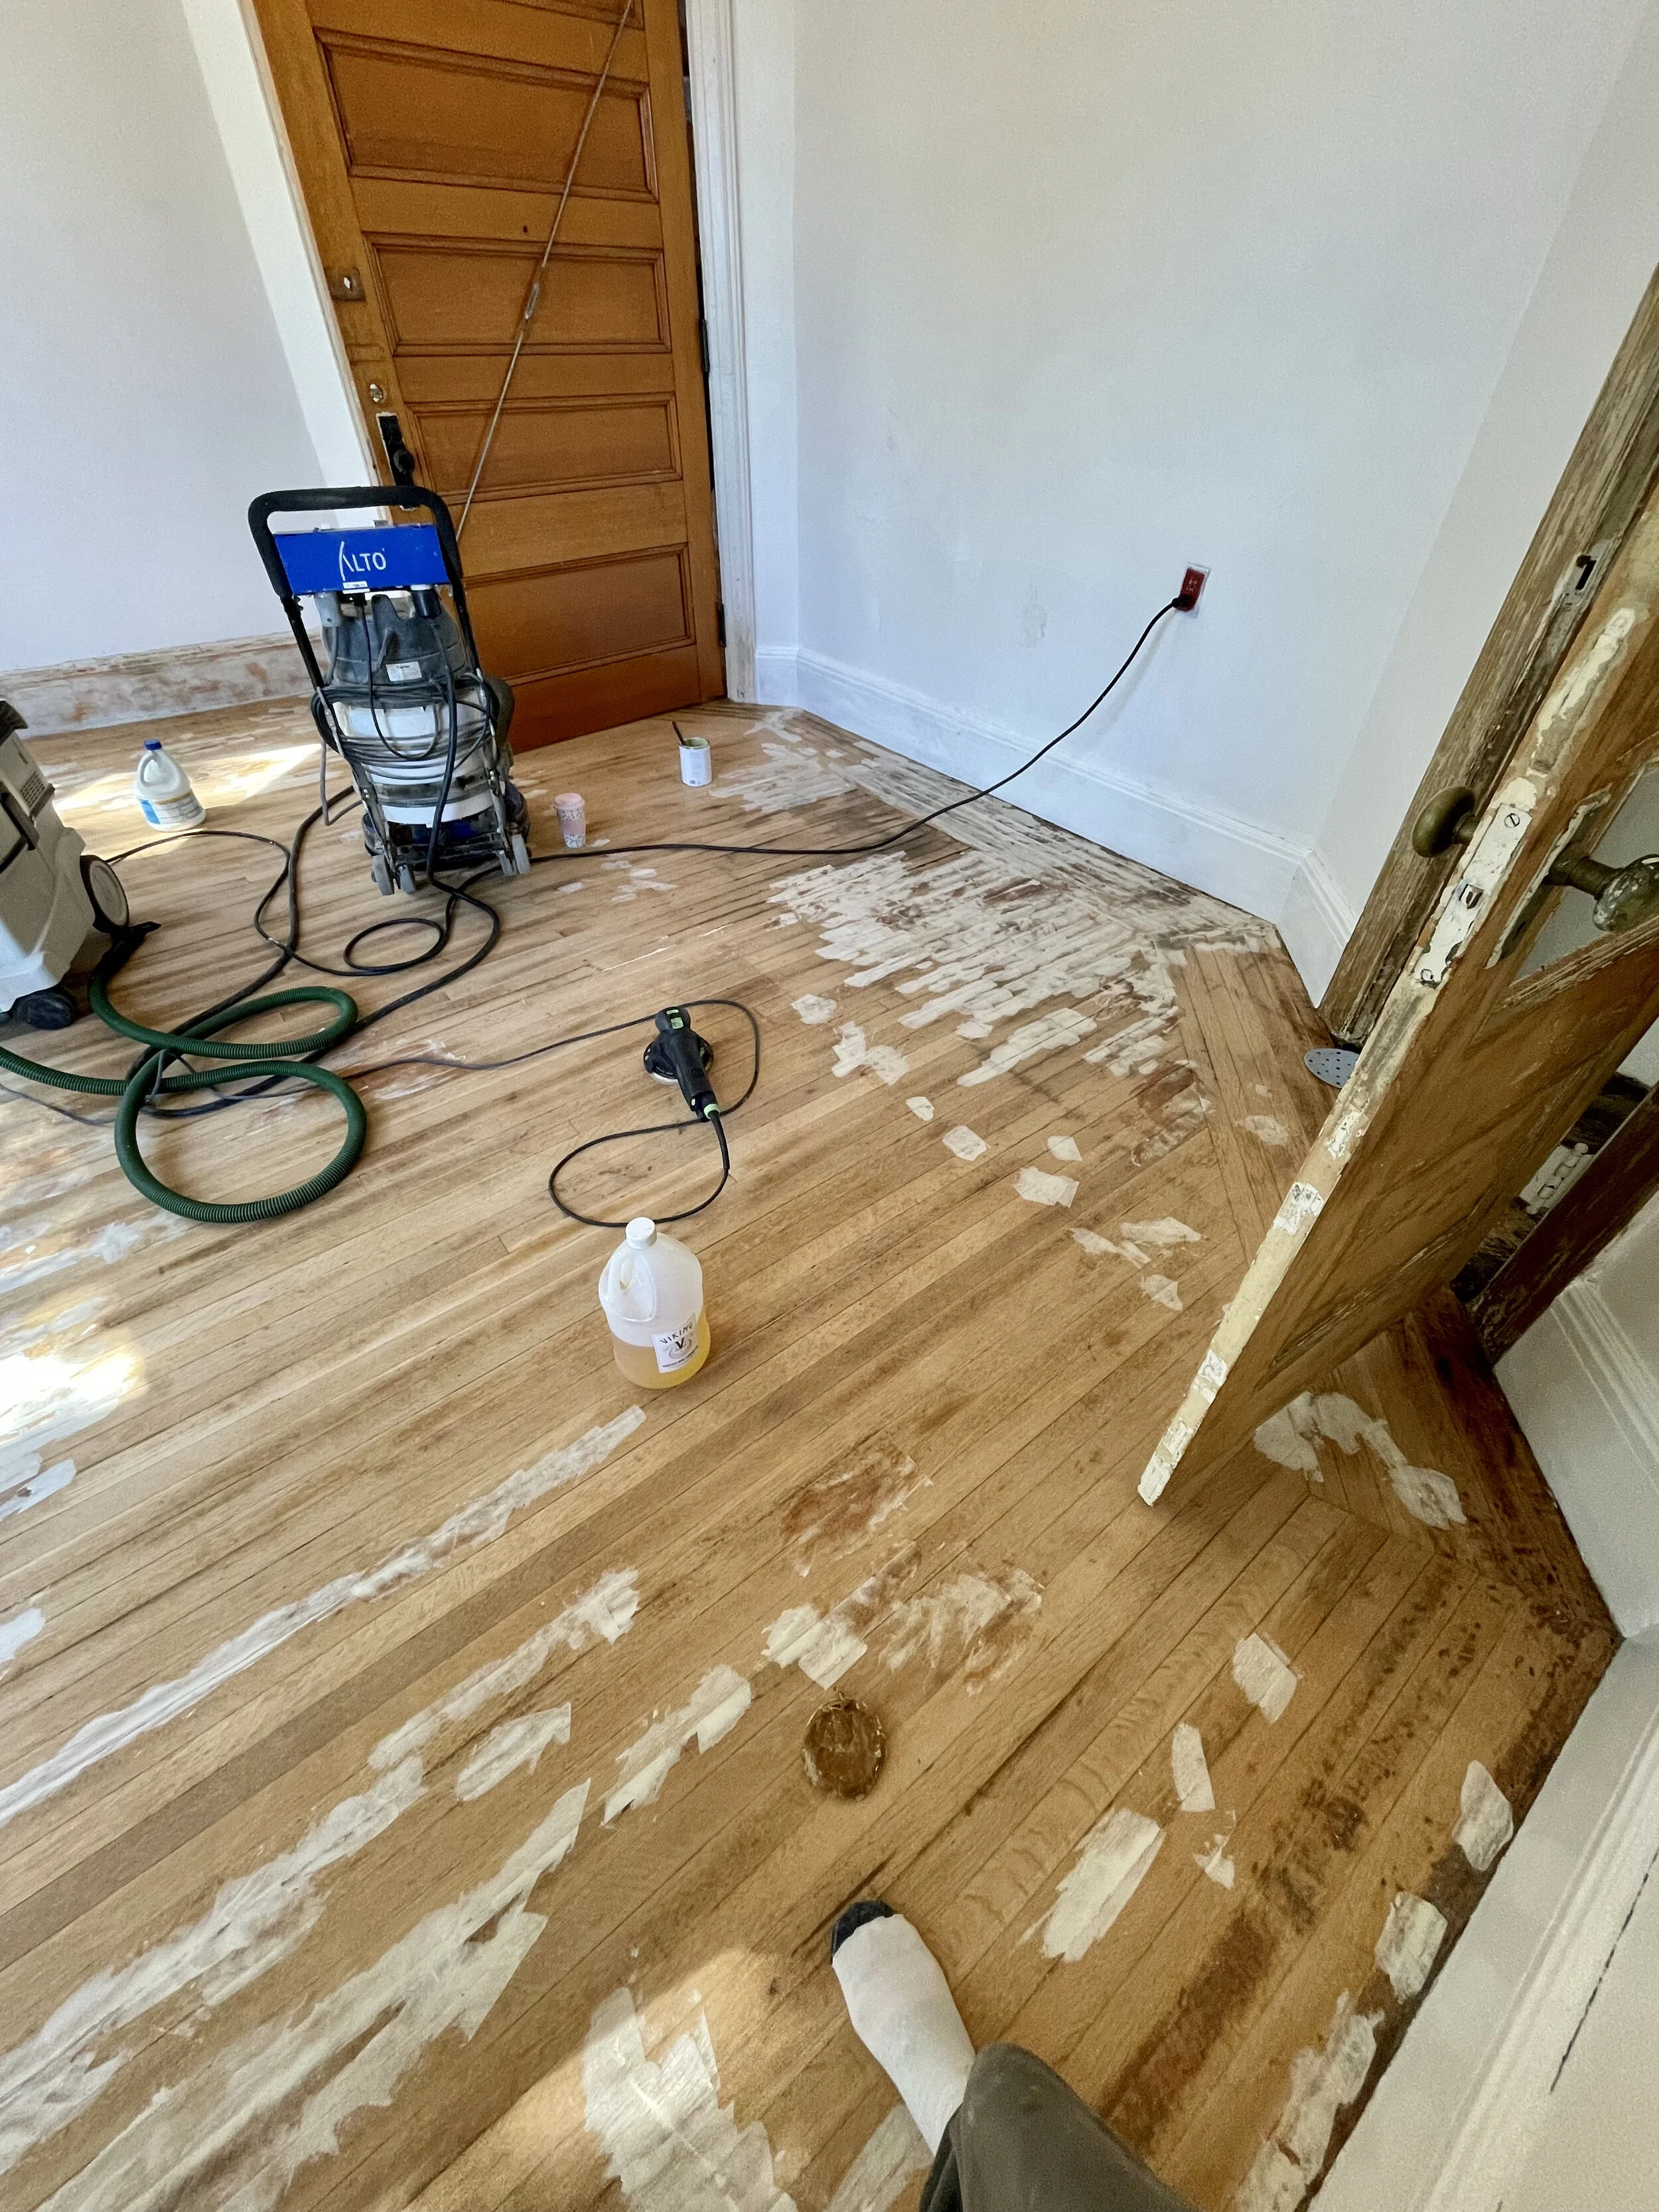
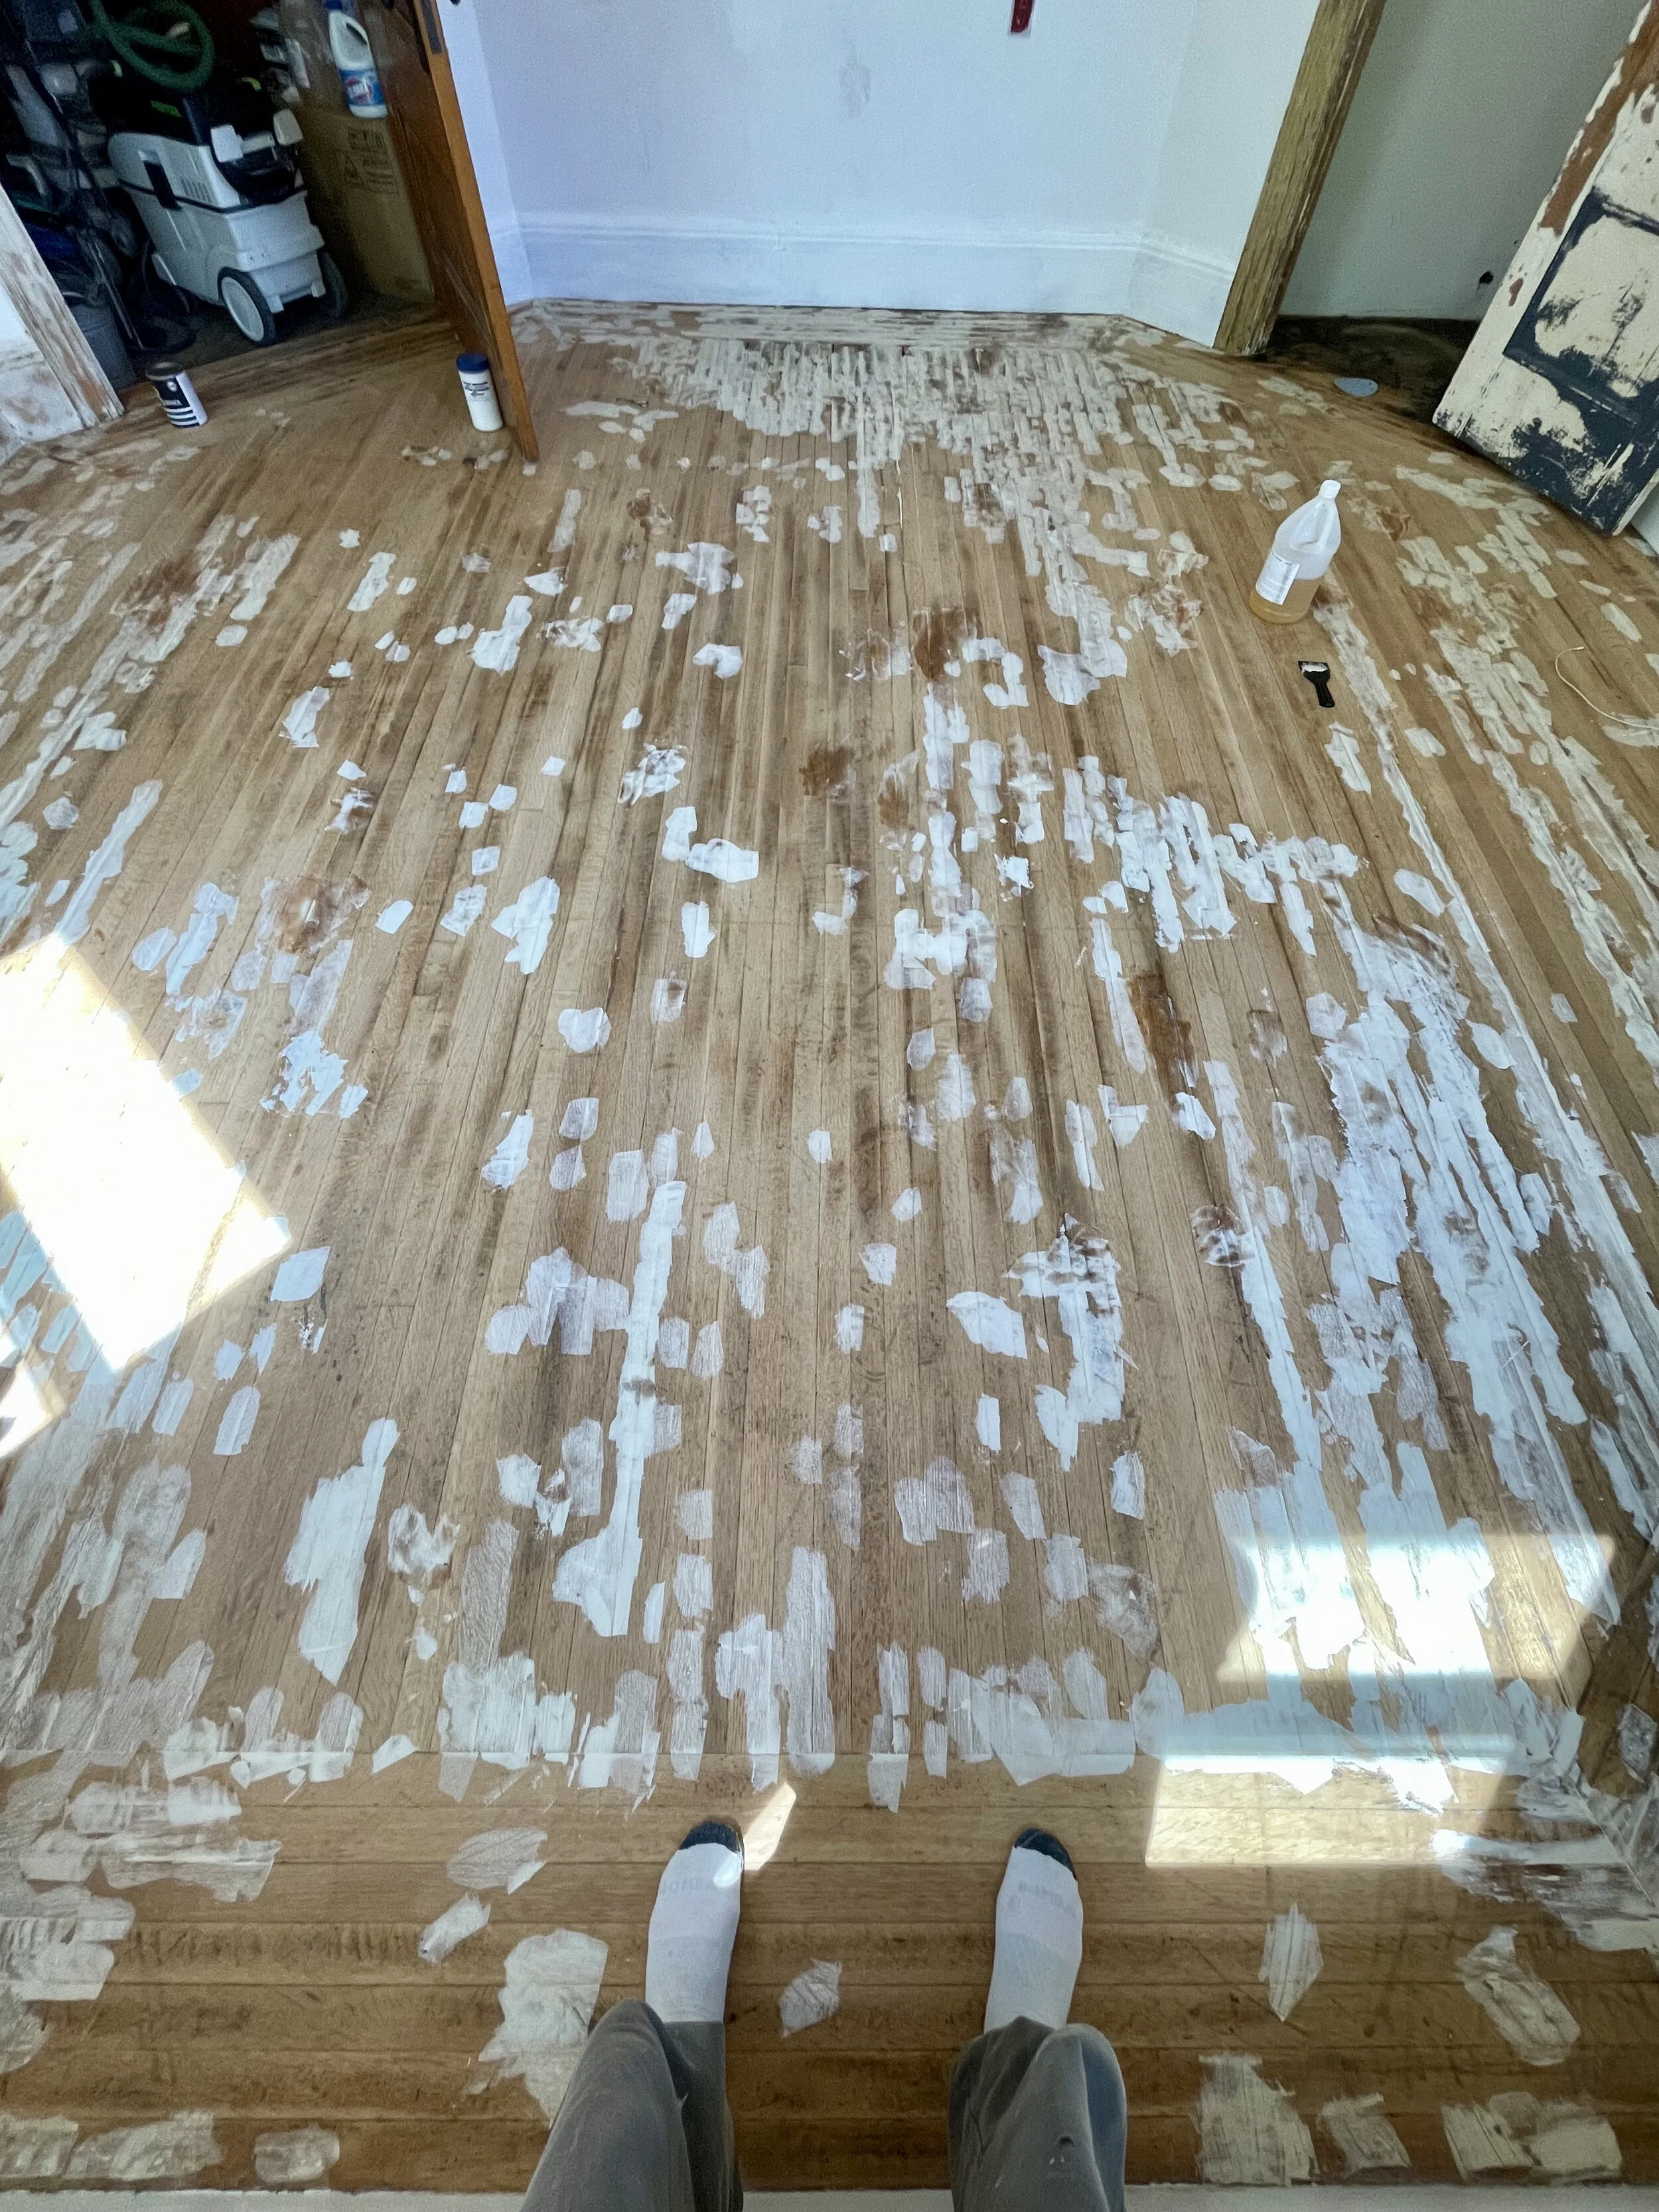
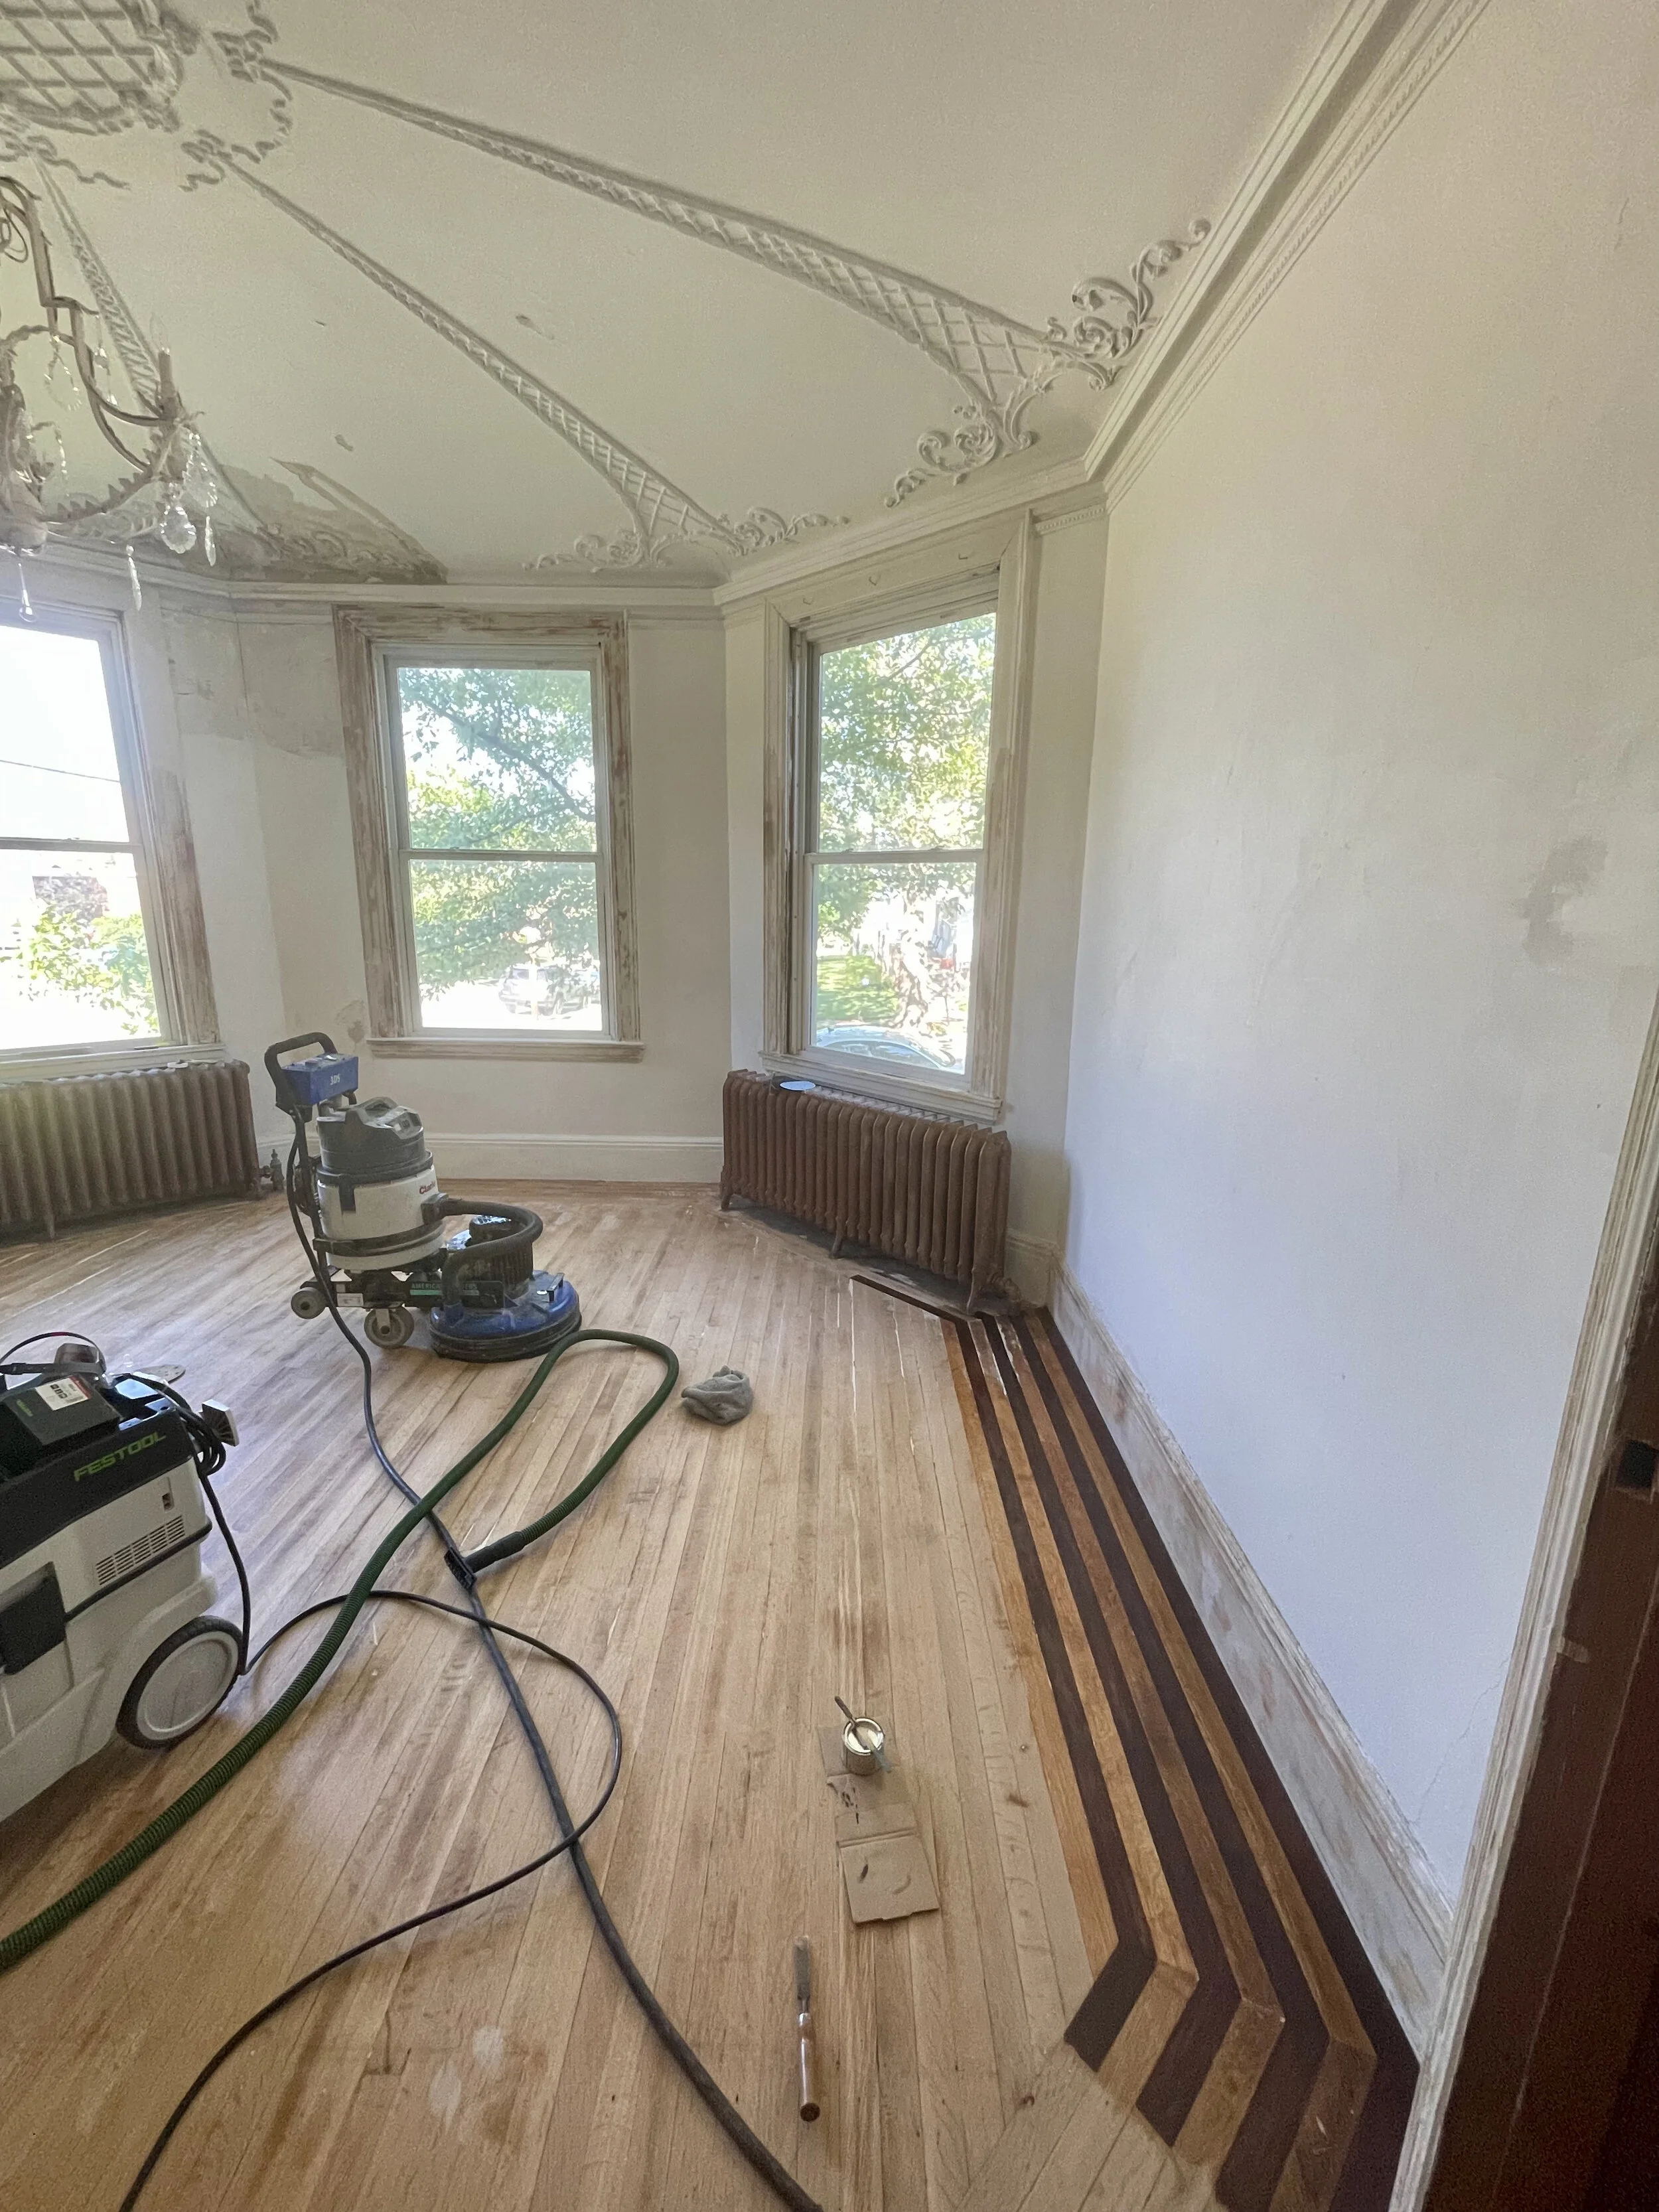
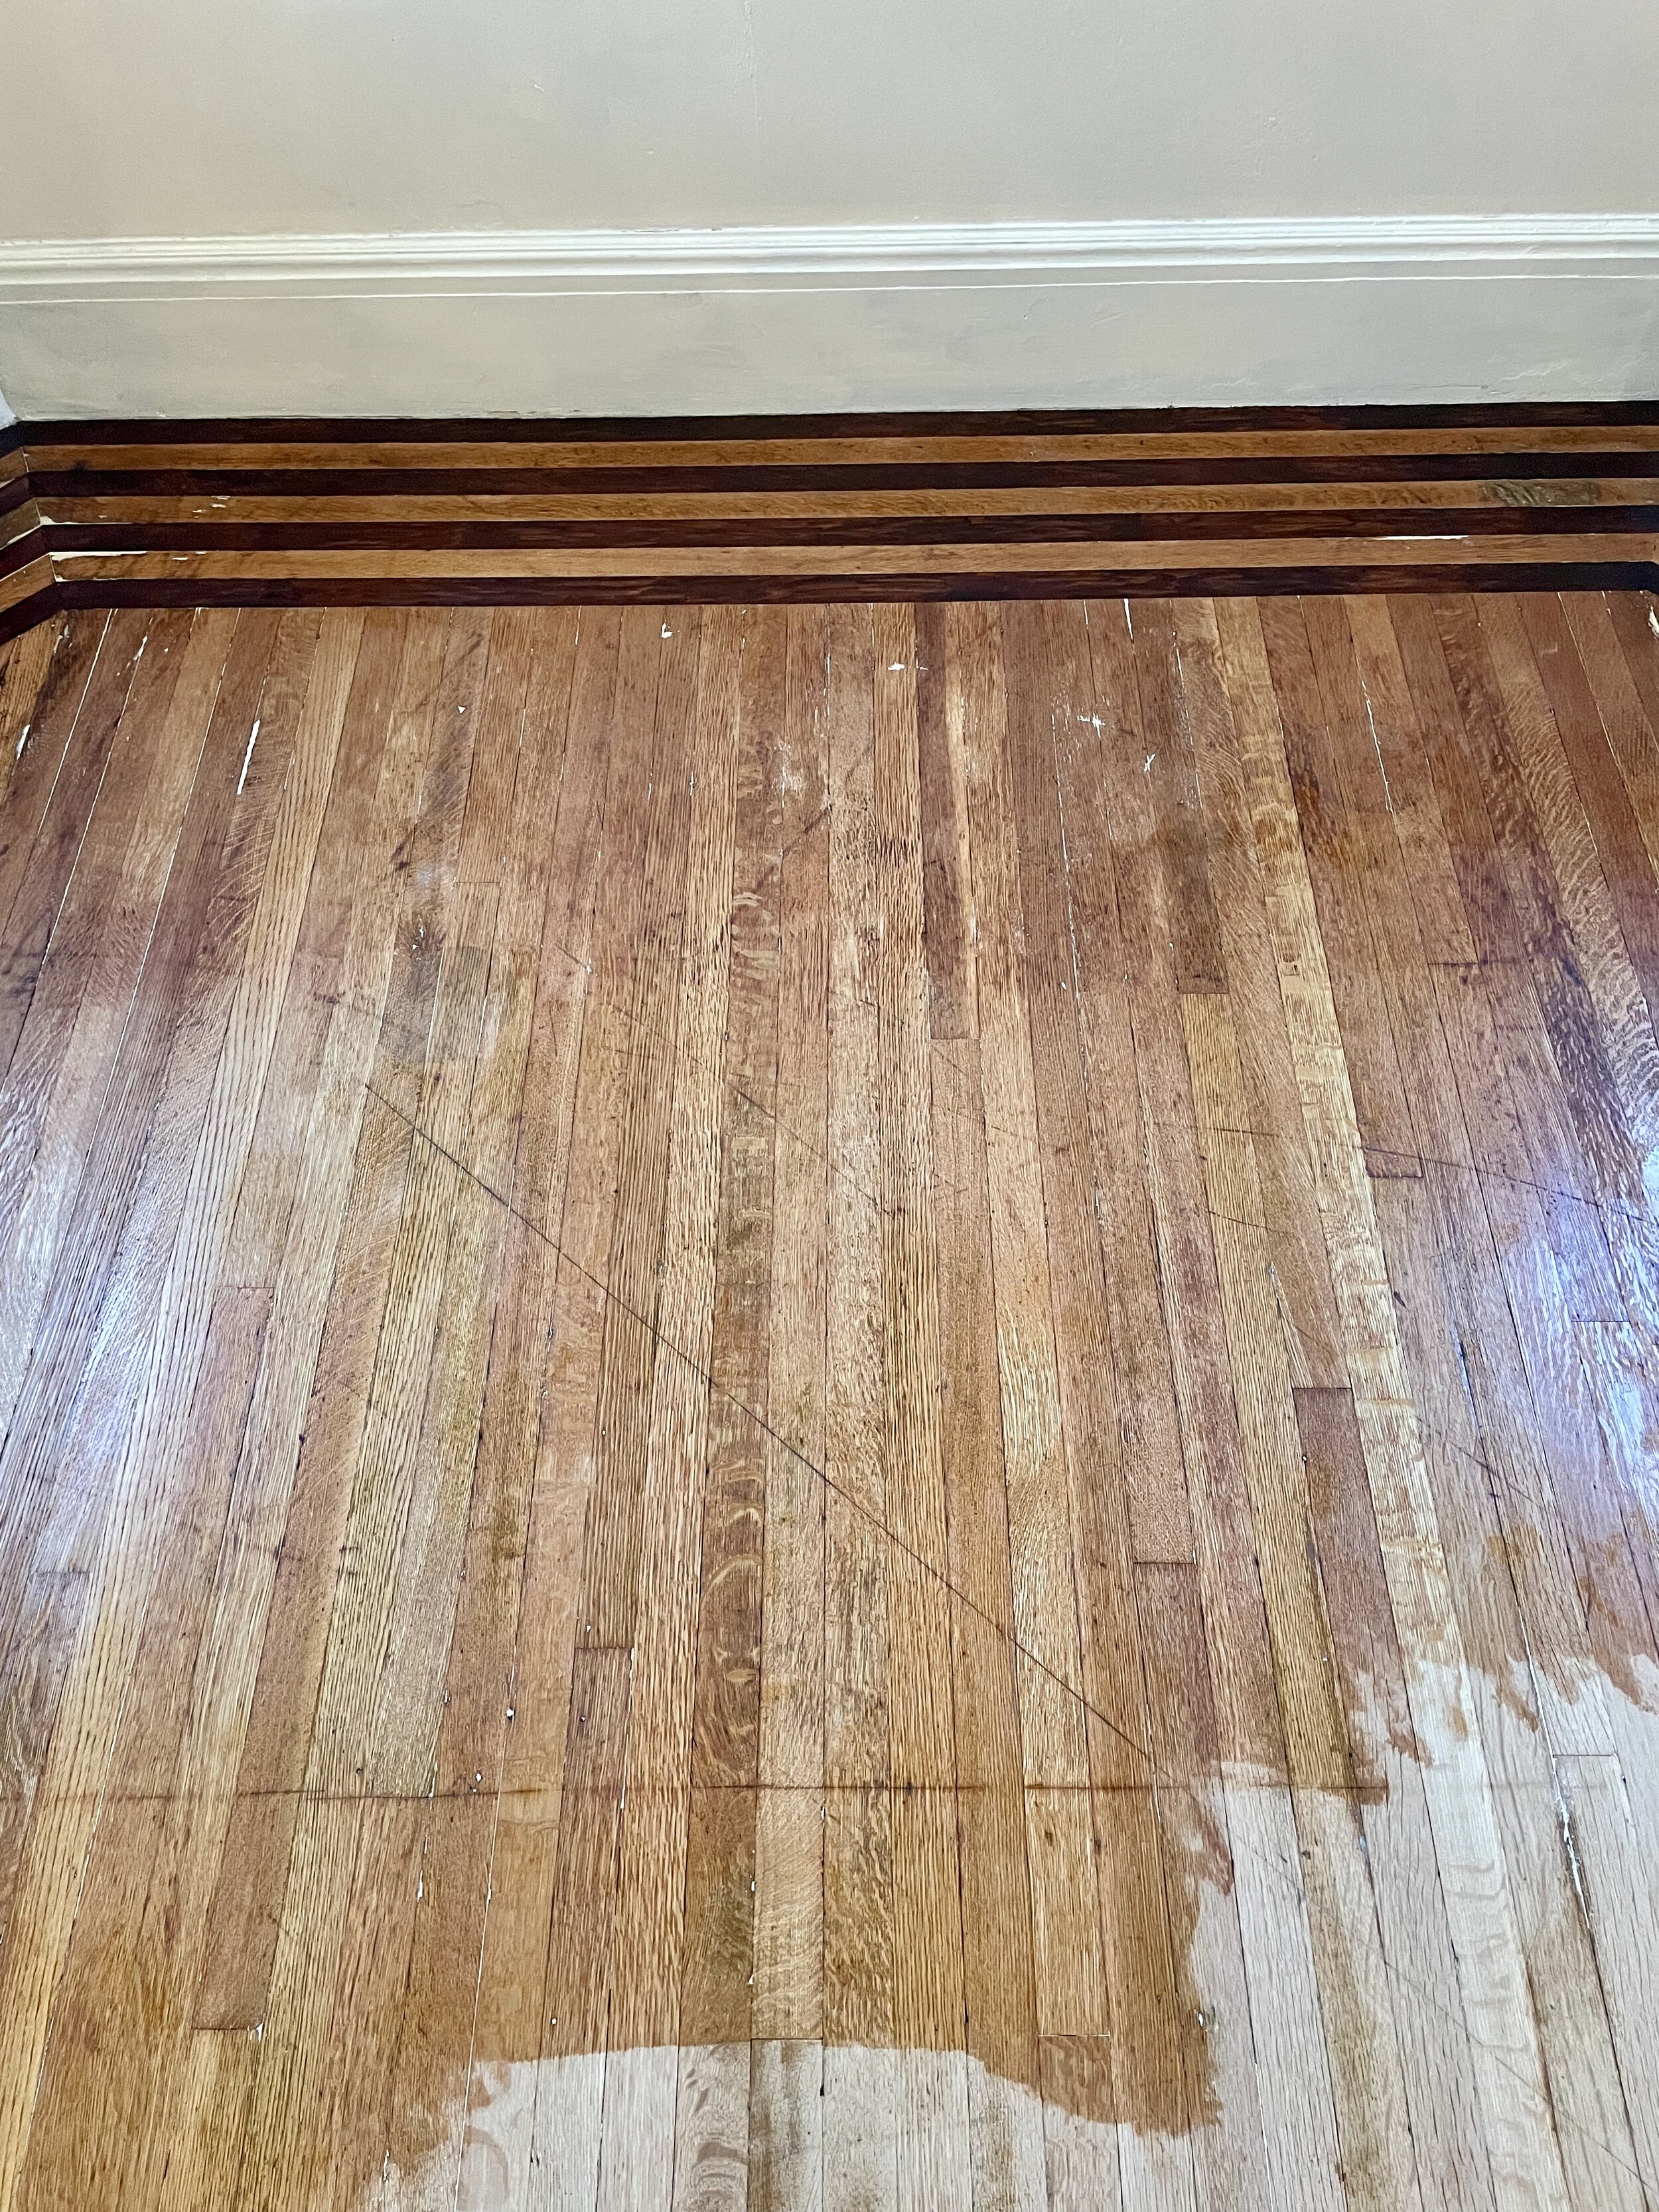
A look at the state of the quarter sawn oak floors before cleaning and sanding began.
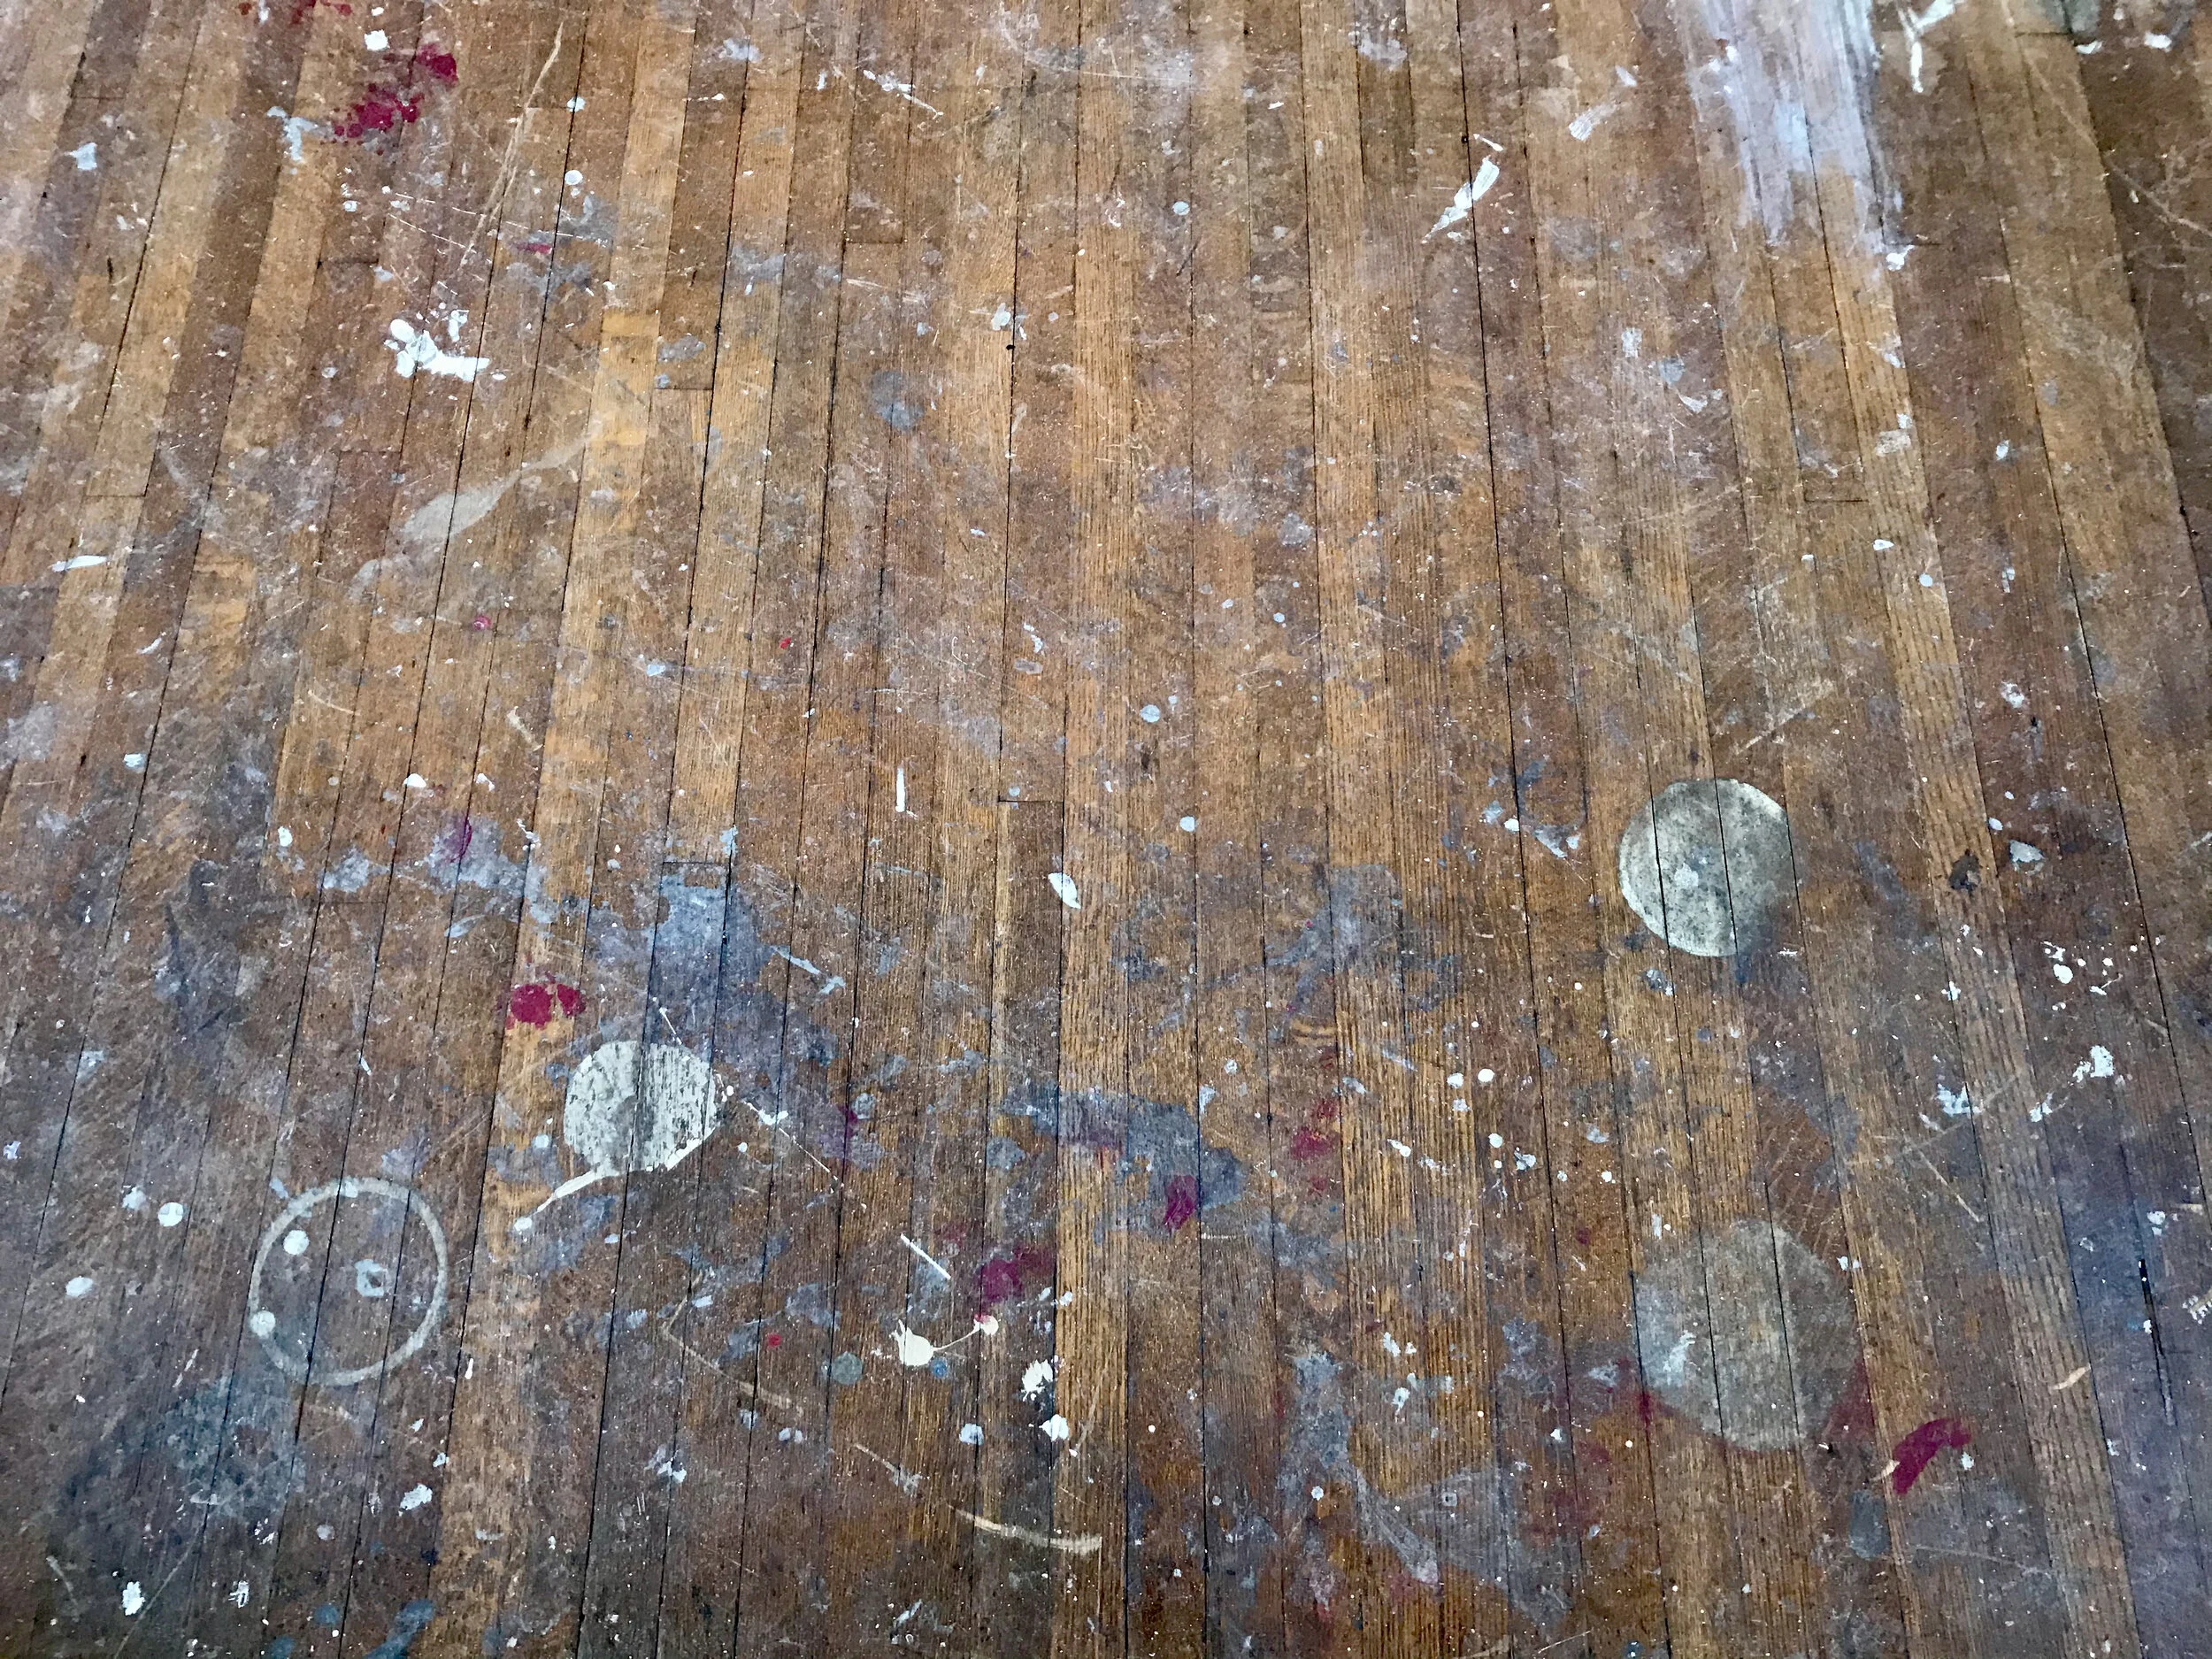
Progress of black tar removal; it did not depart willingly. Exposing portions of that beautiful white oak ‘neath the filth.
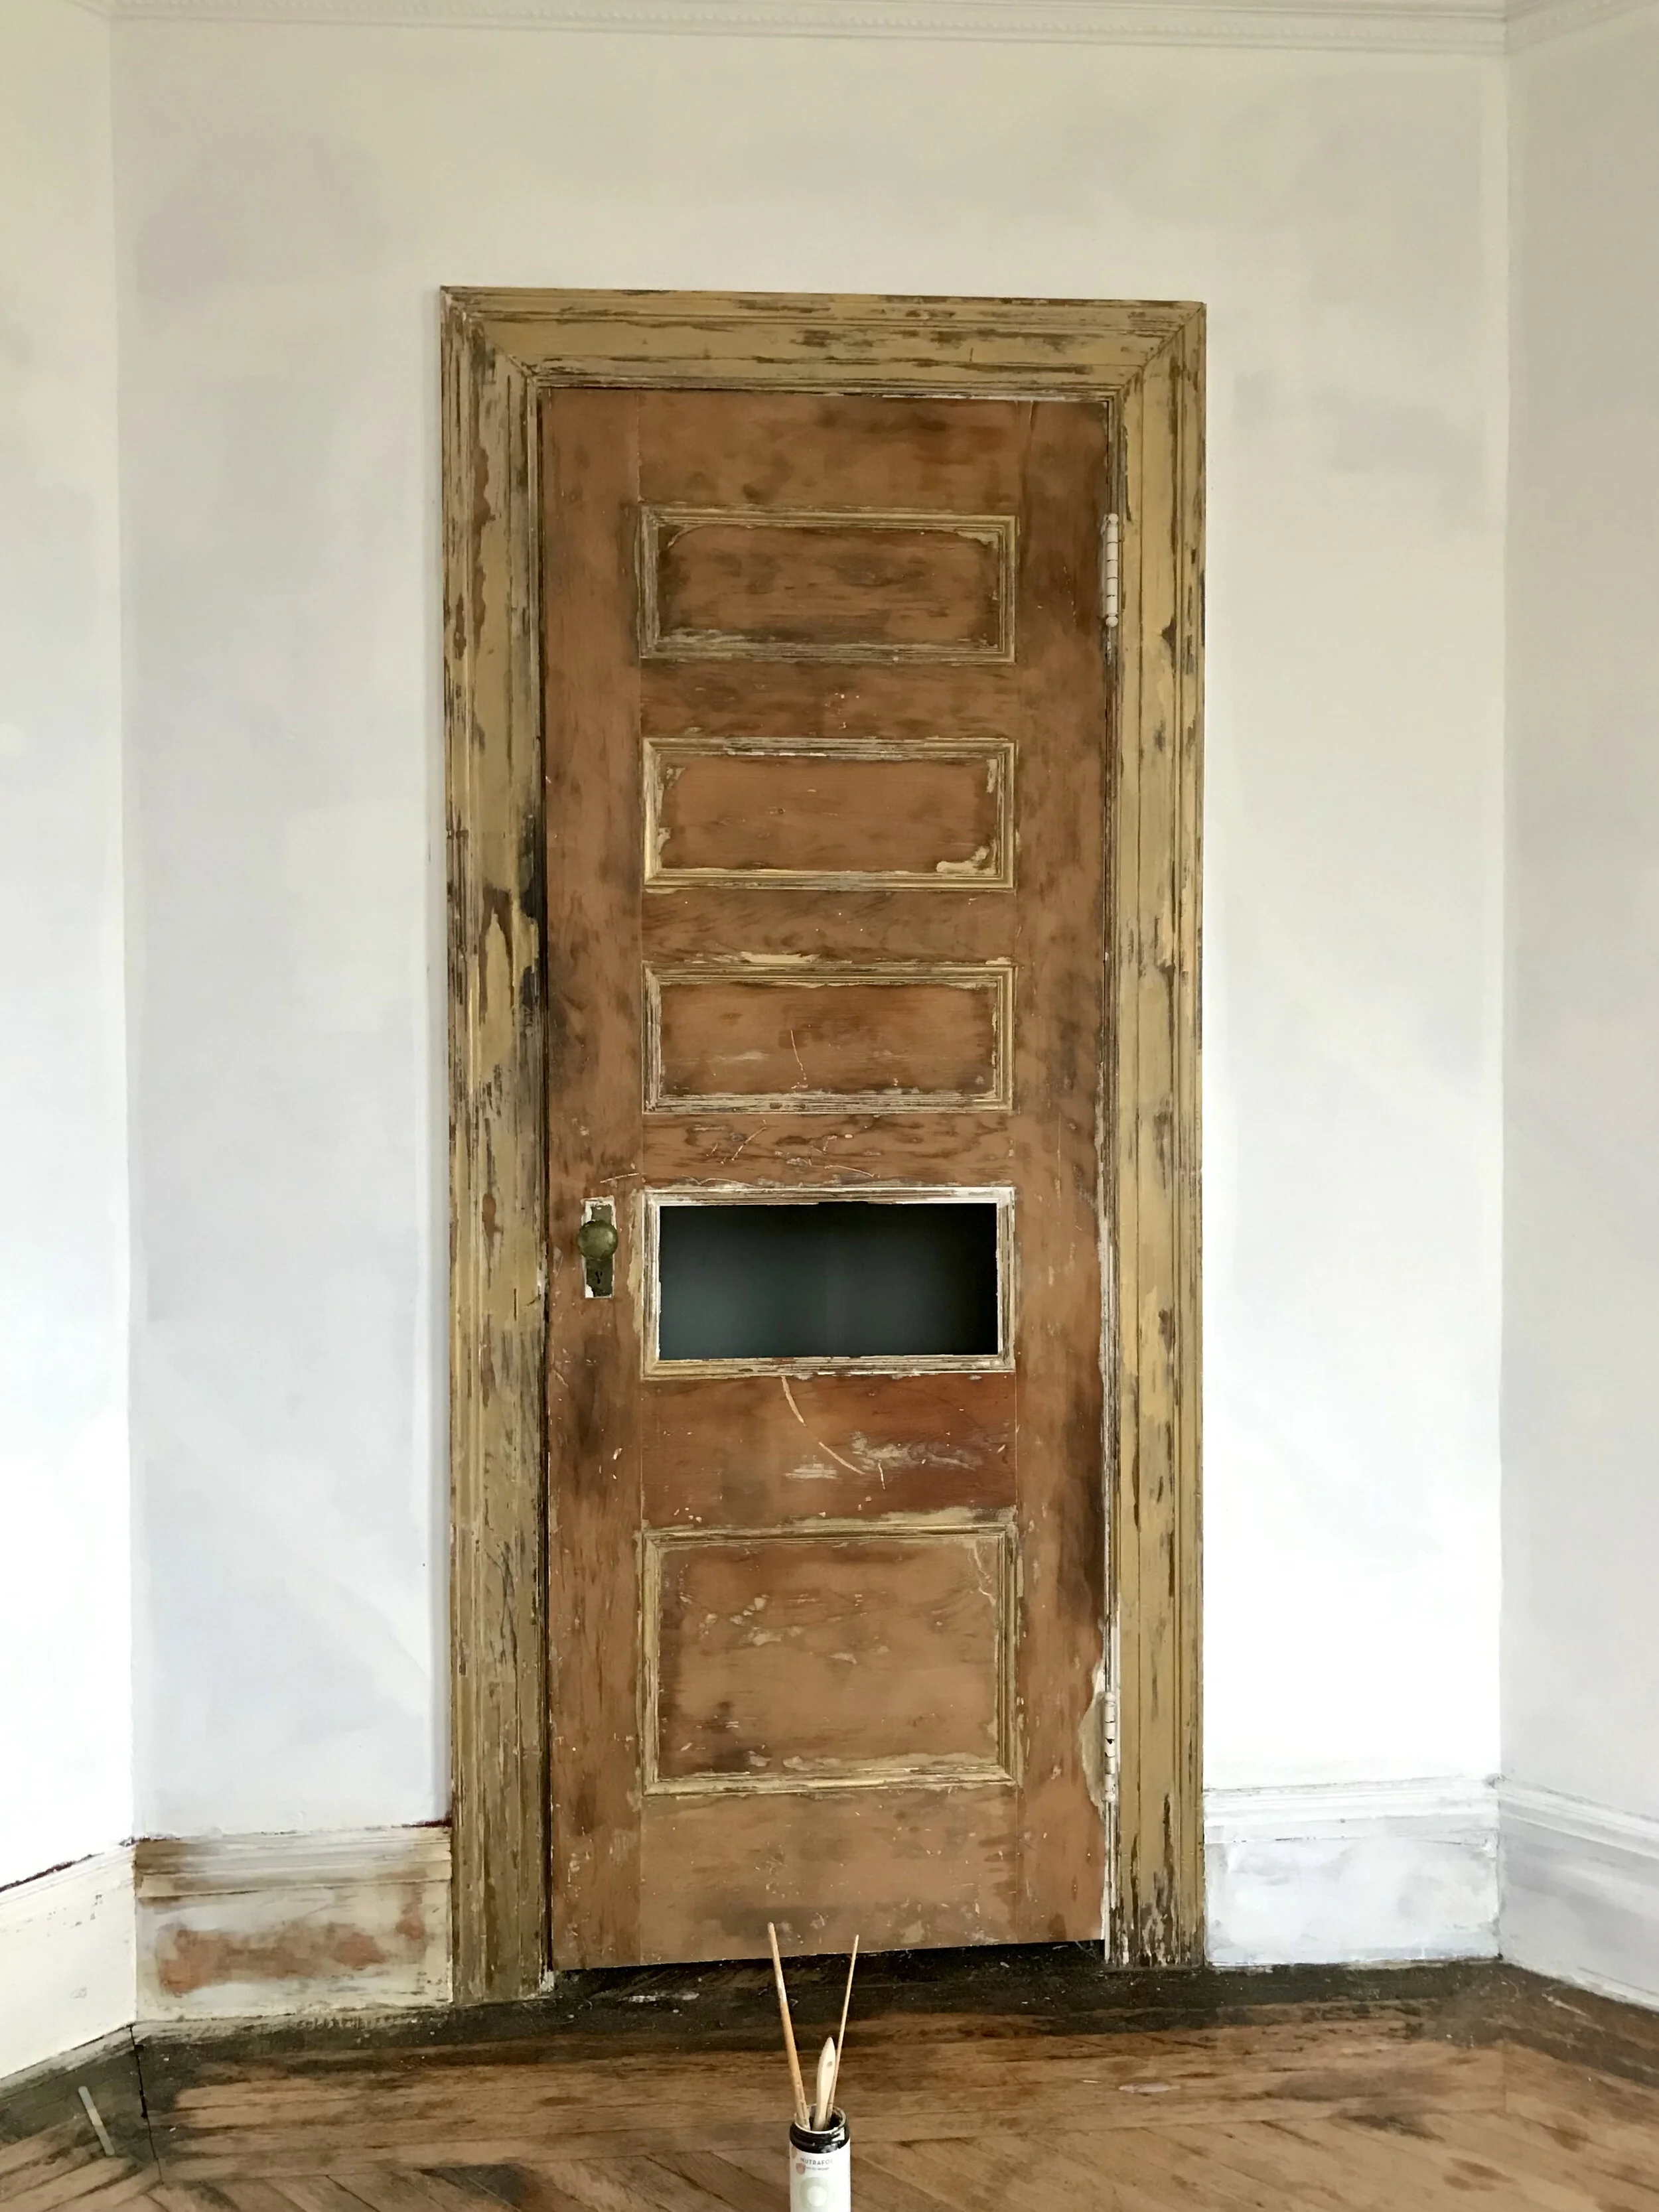
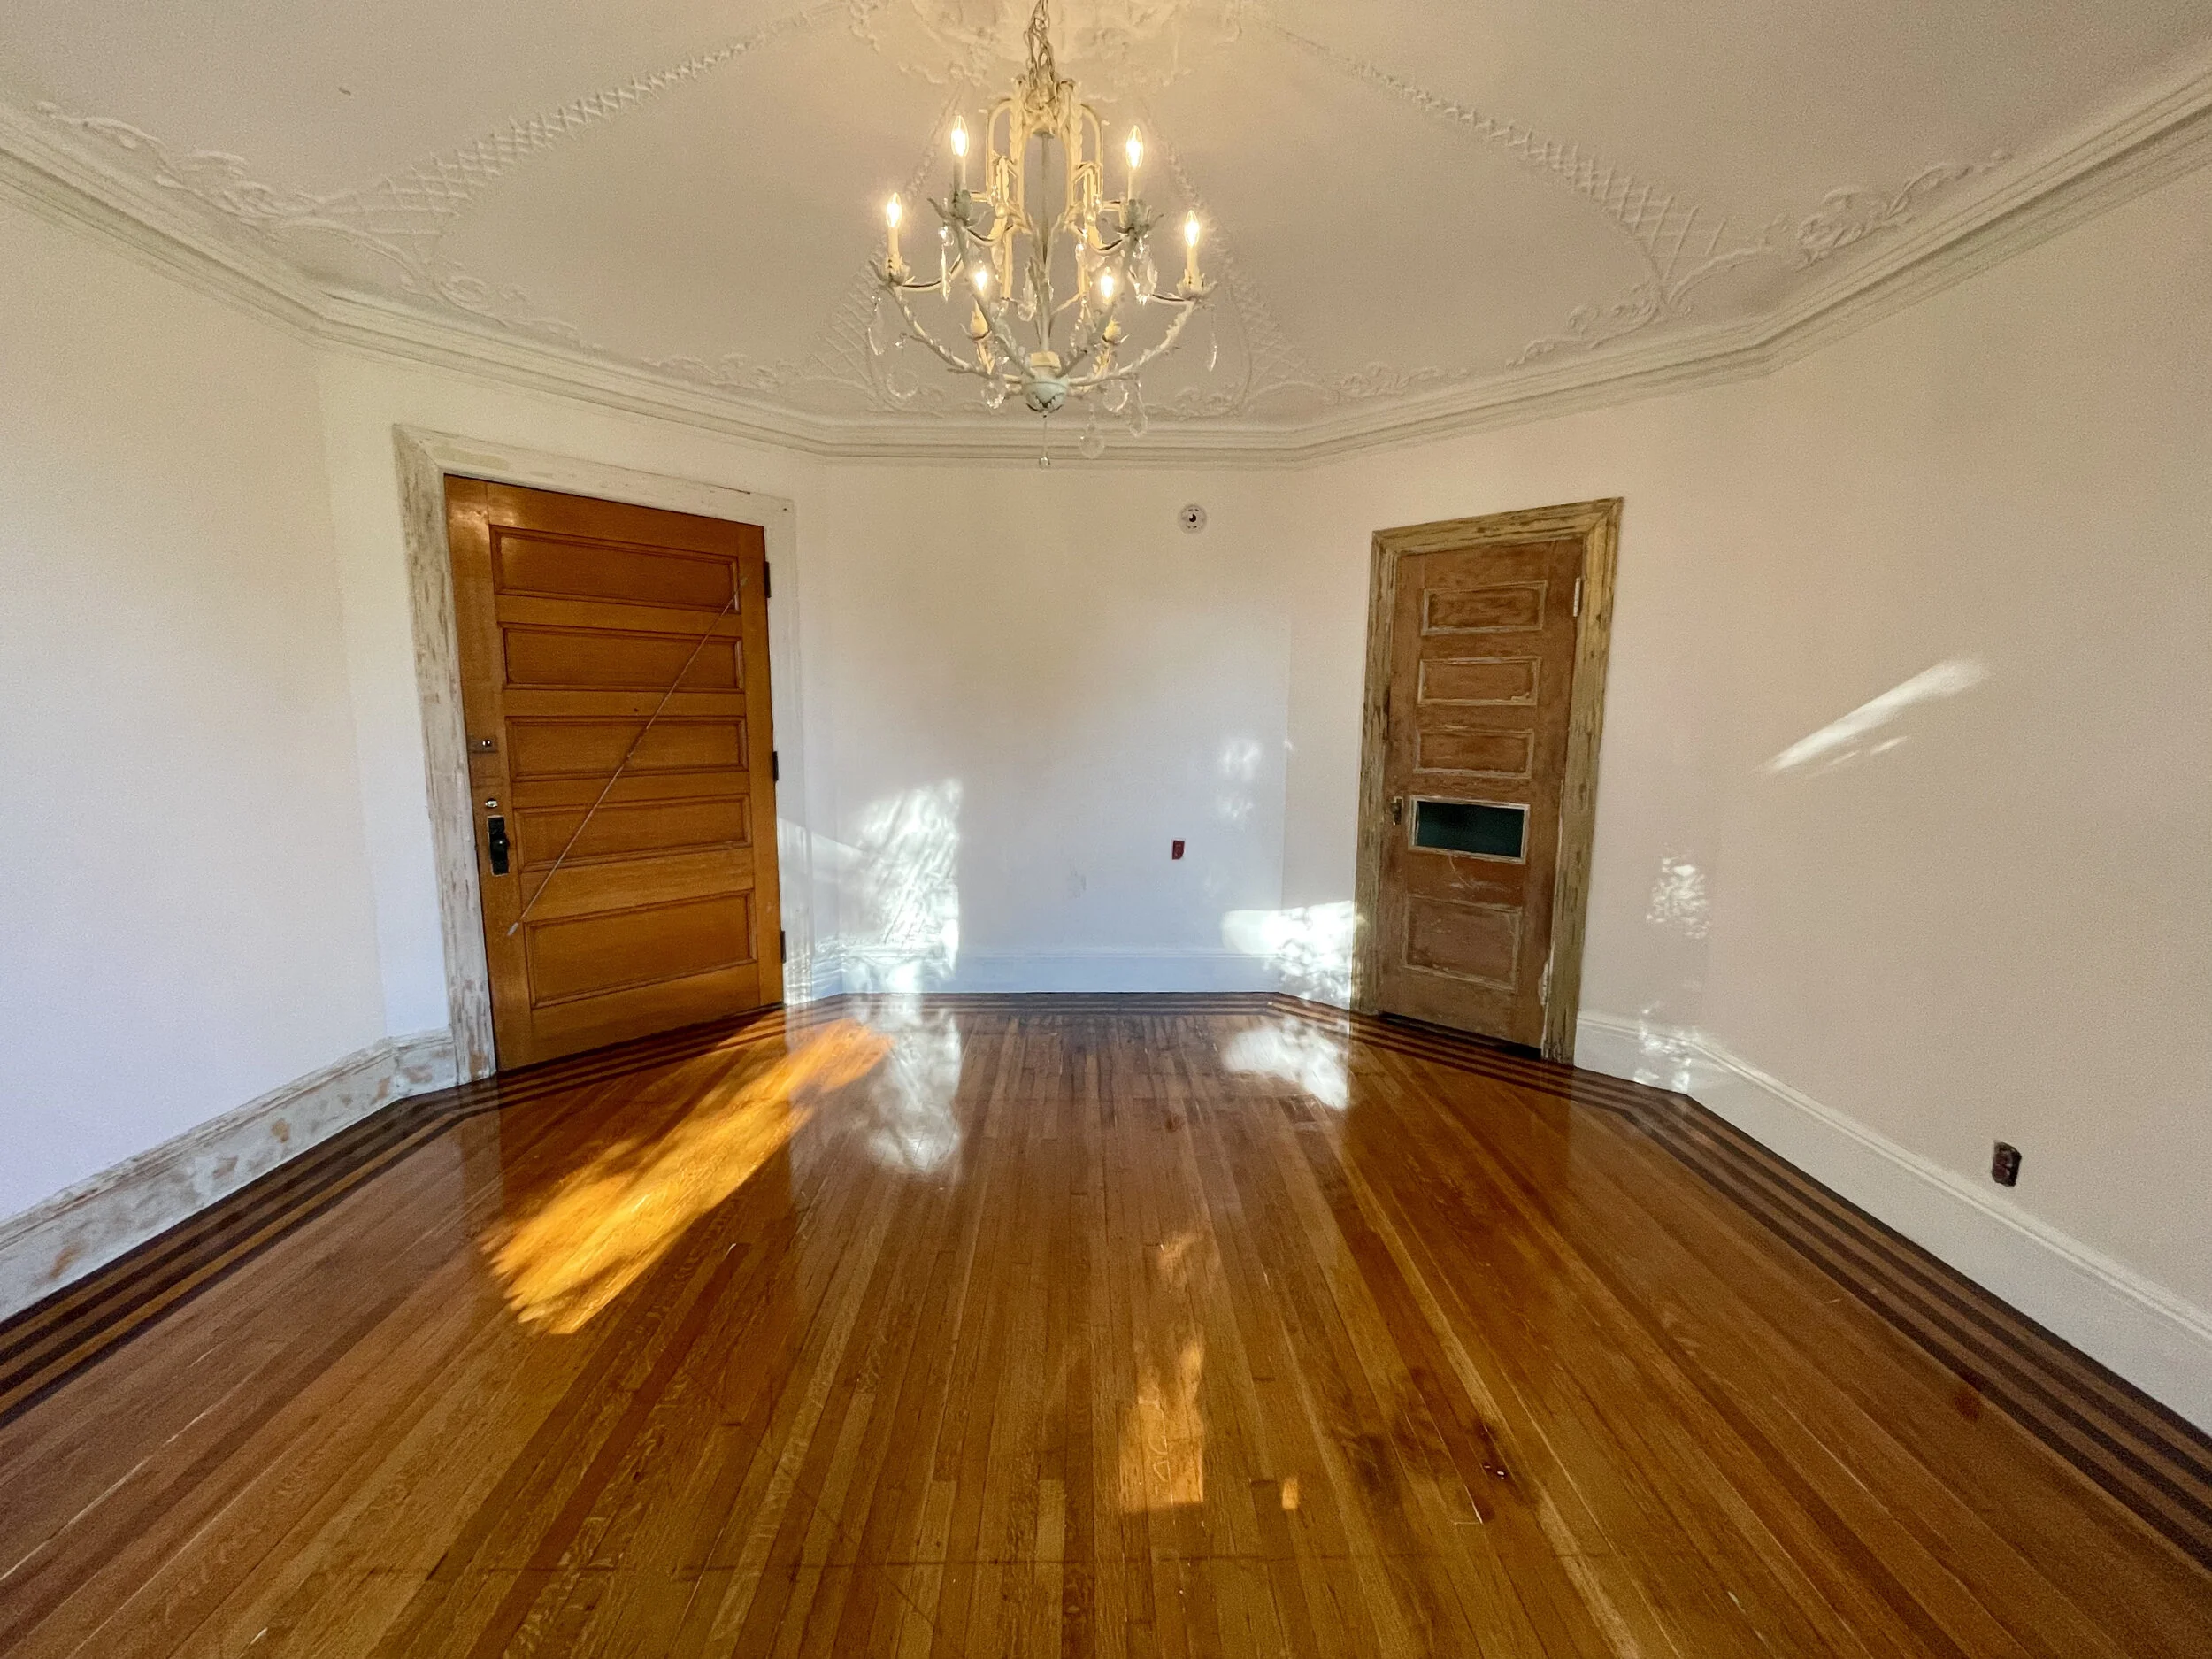
I removed the paint from this corner closet door and moulding. I applied gold enamel sign paint on areas that I couldn’t get the existing acrylic latex paint to release completely. This was experimental and it is something that I may rework later but the results are pleasing for now.
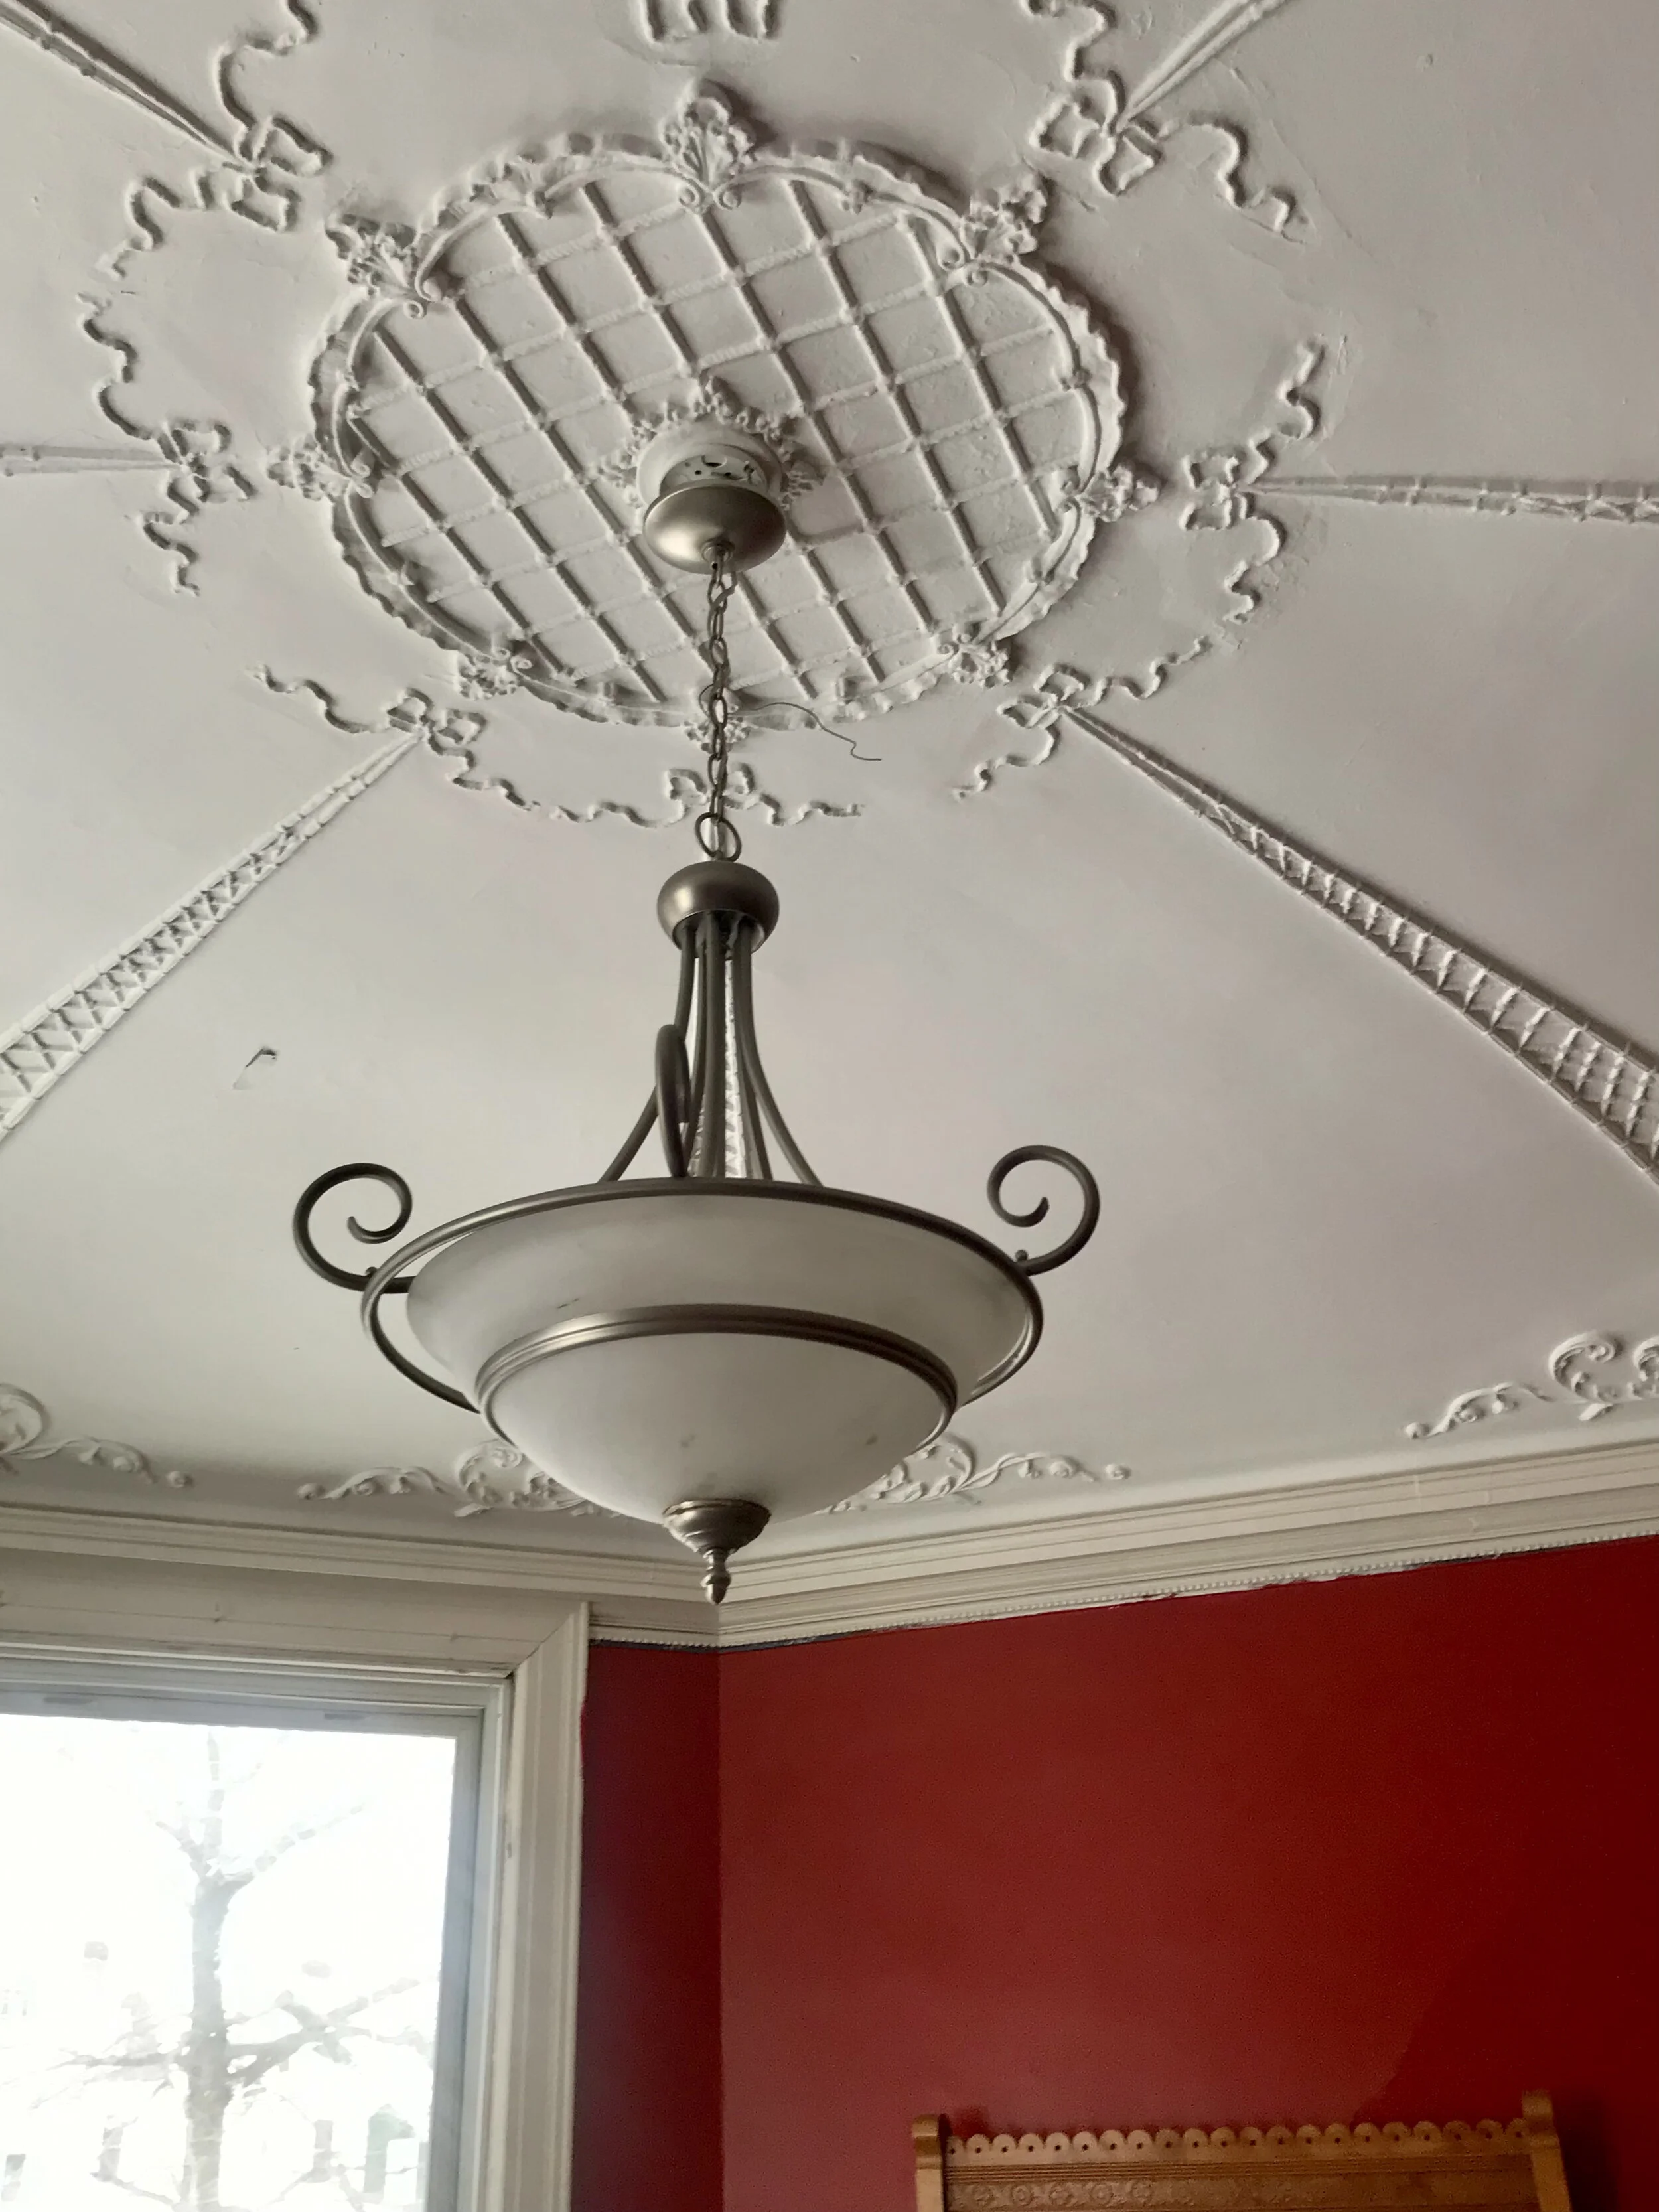
This Italian made antique chandelier originated from an apartment in the upper floors of an iconic brick warehouse in the Old Market, the home of a beloved restaurant, “M’s Pub”. There was an explosion in the bowels of the building a few years ago which resulted in a near total loss of the cavernous brick structure. The building marked by many as unrepairable rose from ruin and was completely rebuilt and restored. The owner of the chandelier had it professionally restored as it was one of the few fixtures that survived the devastating conflagration. The apartment was then sold and the new owner sold the beautiful fixture to me. I feel lucky to have it; it is a talisman of rebirth.
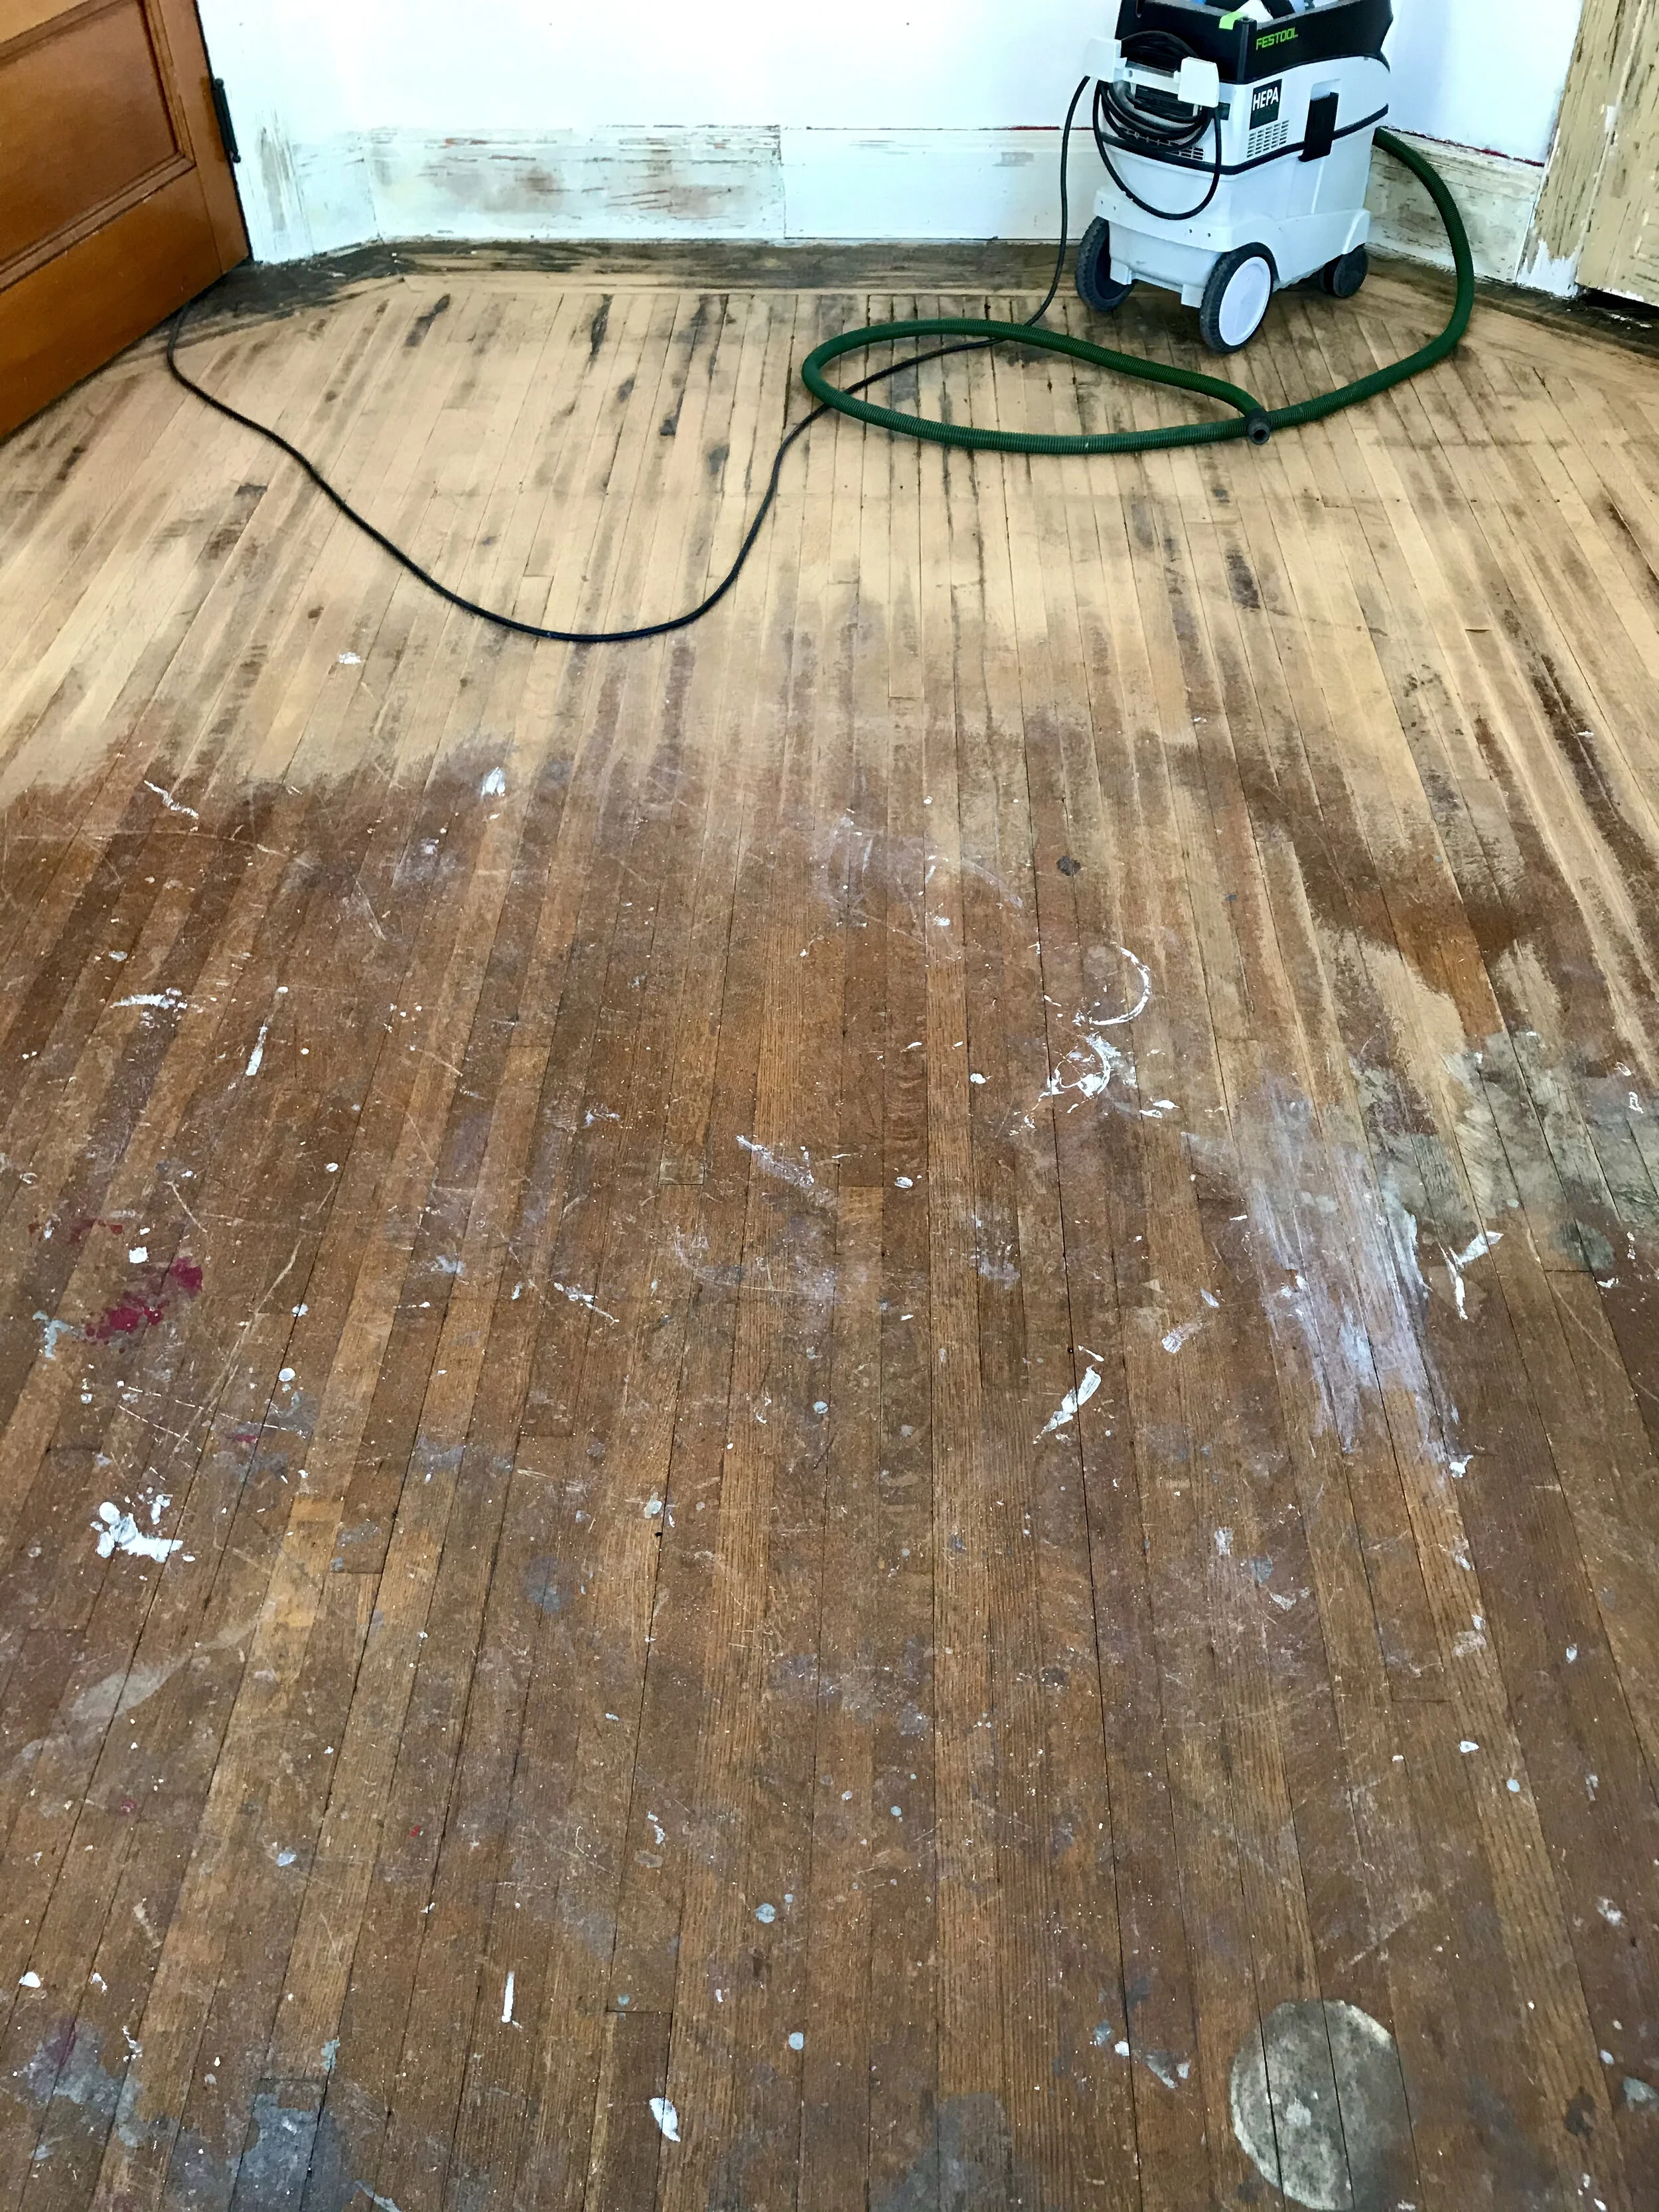
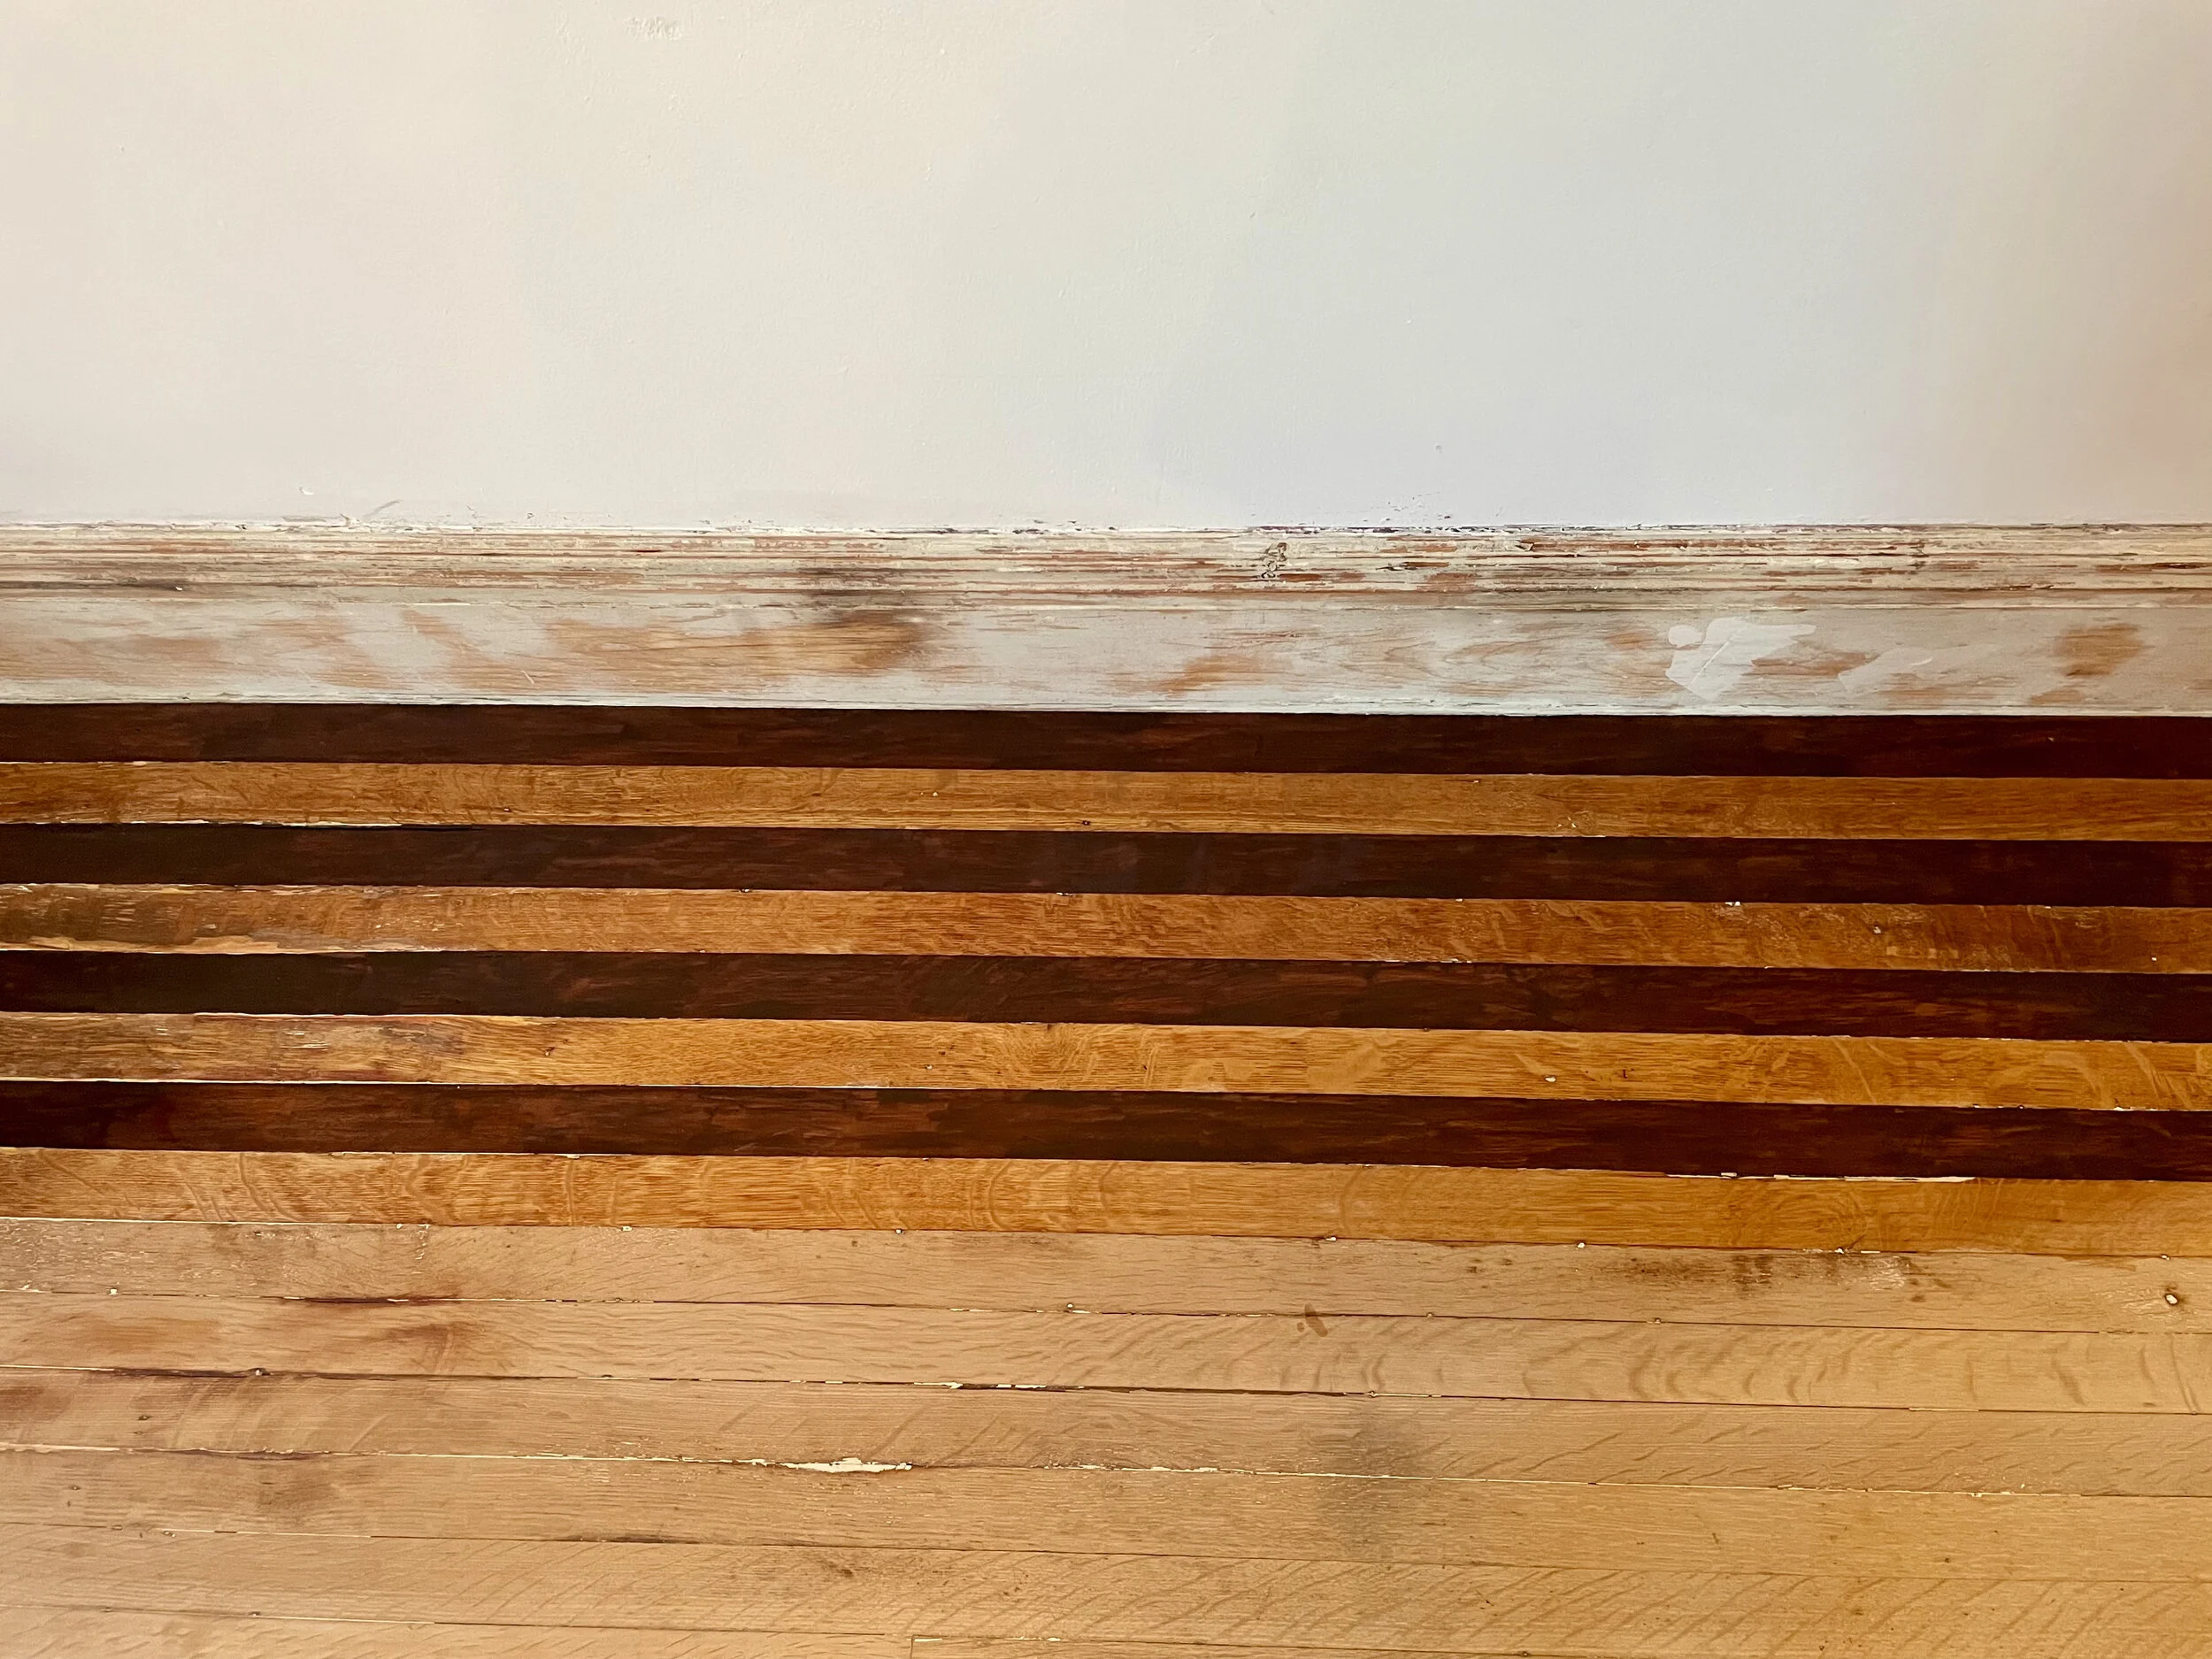
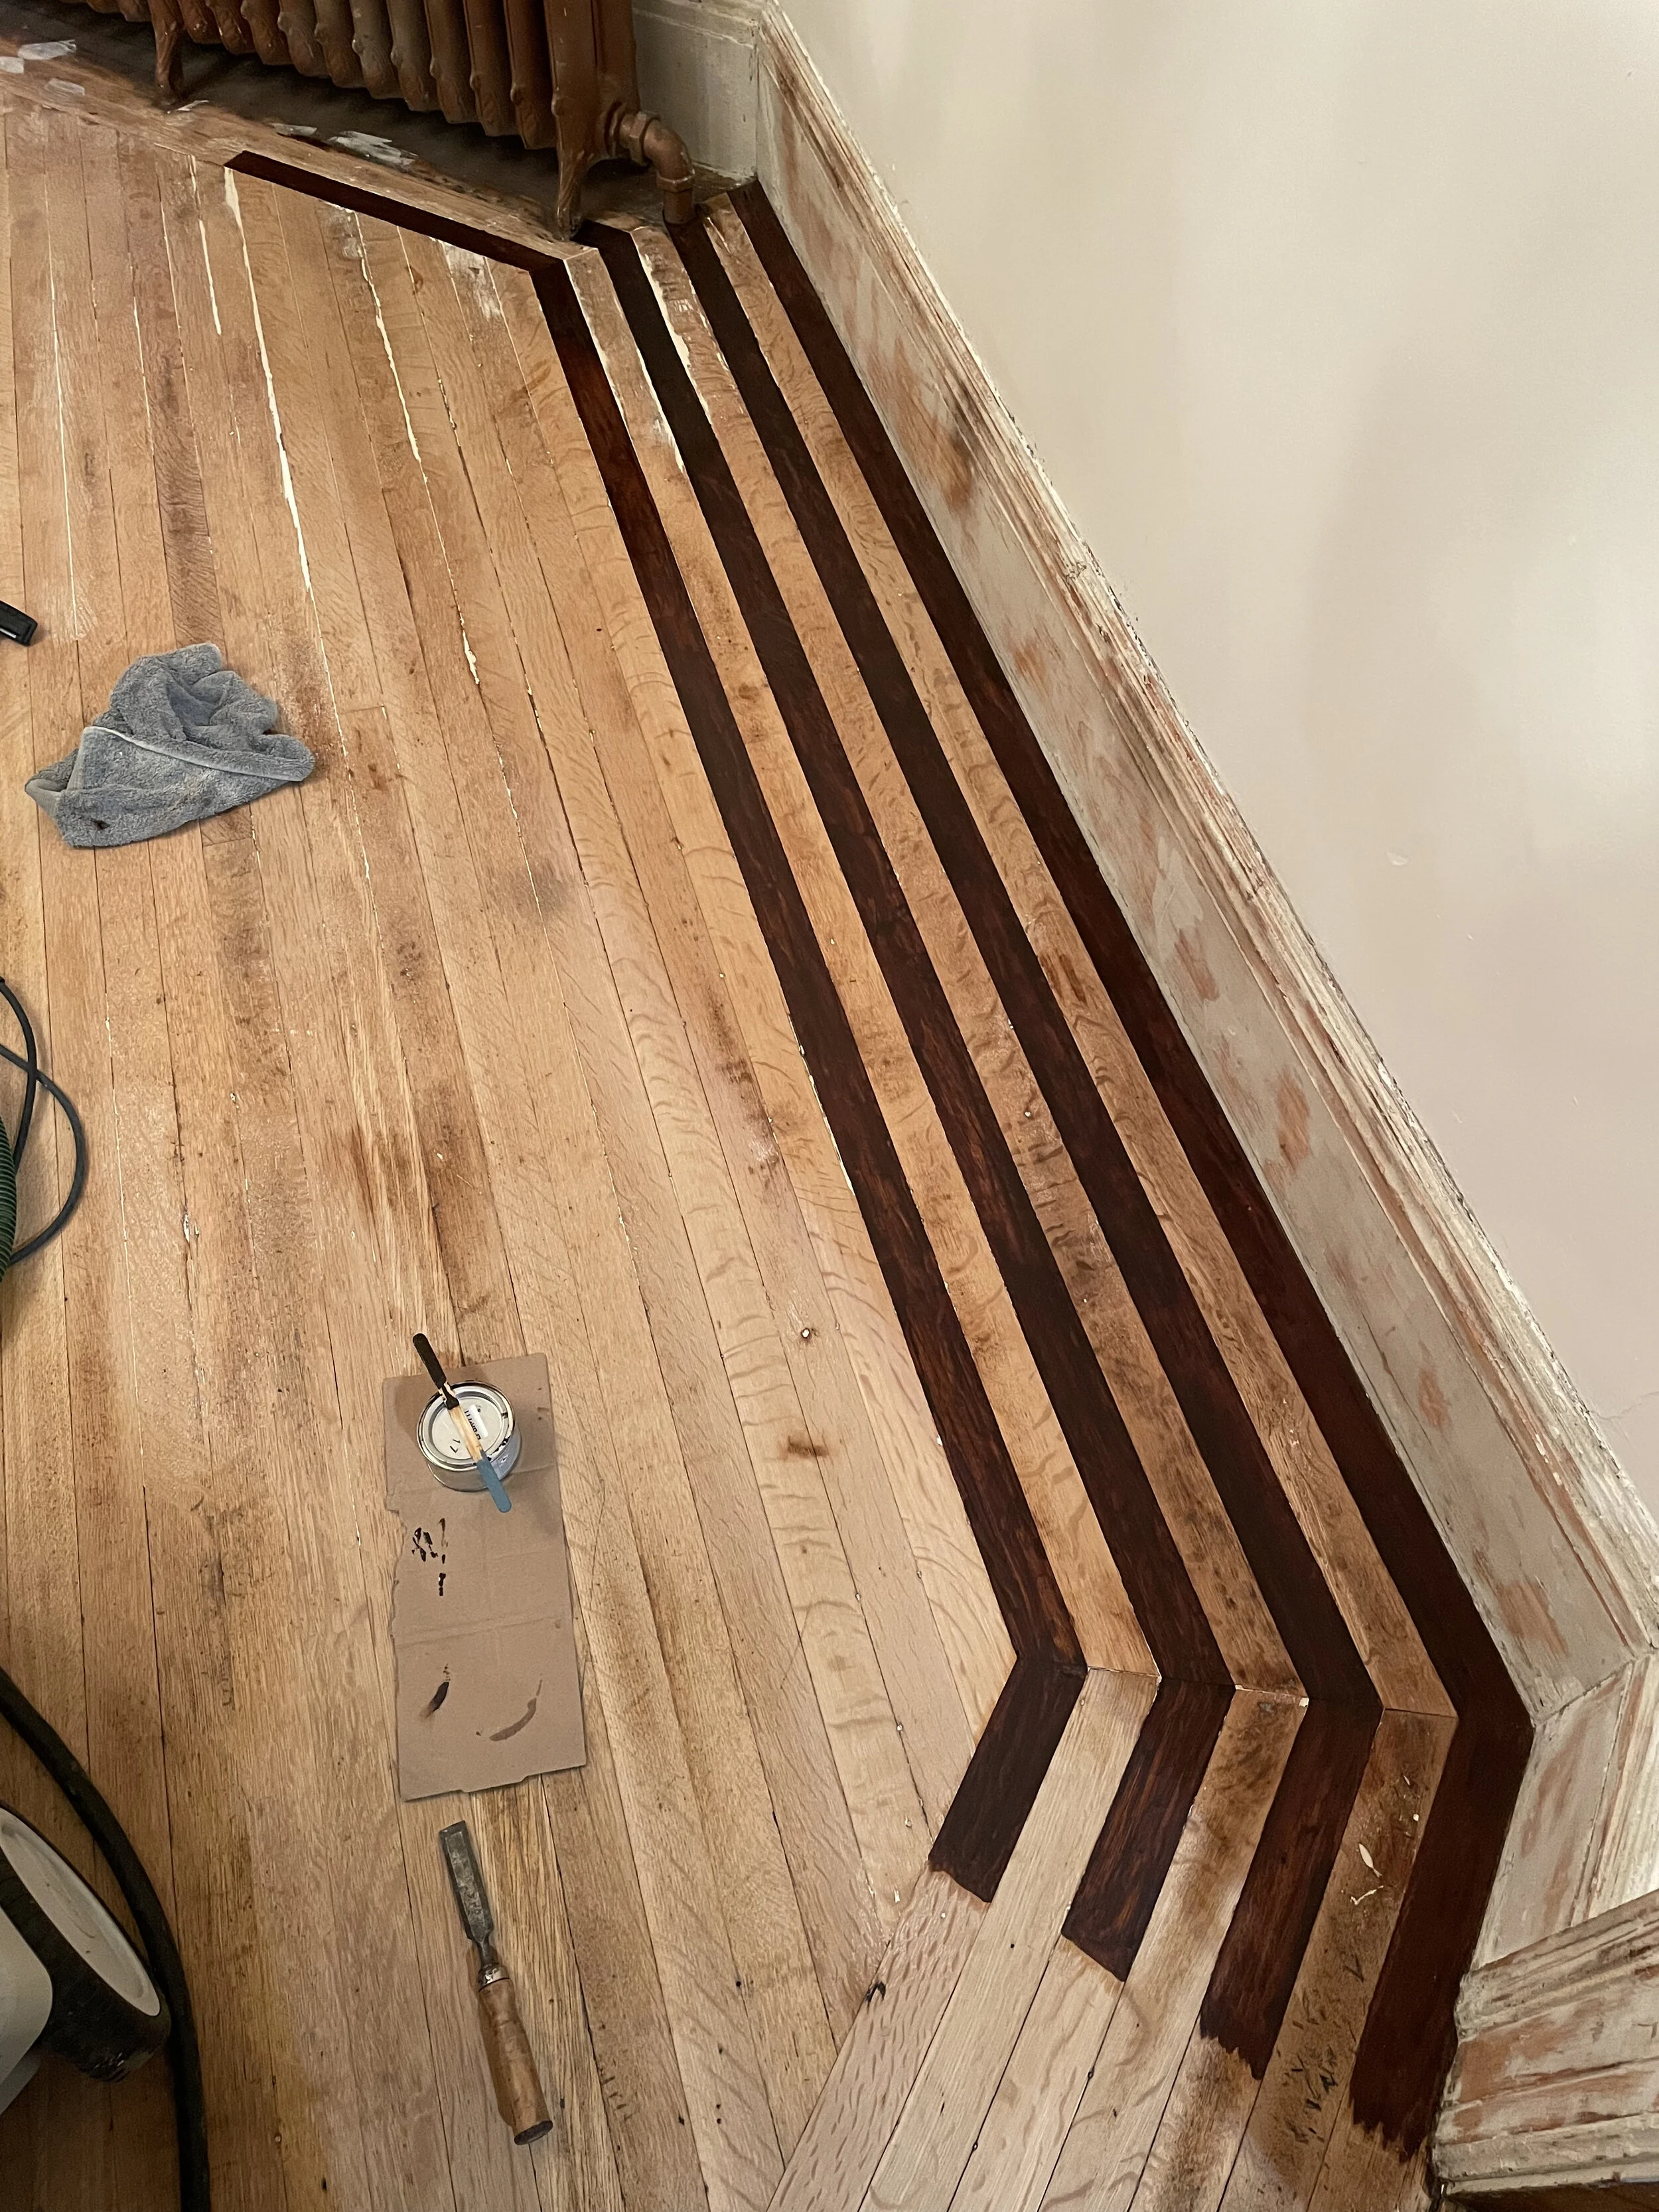
A look at my attempts to restore and enliven the baseboard moulding. Additionally you can see closeup damage to the quarter sawn oak flooring.
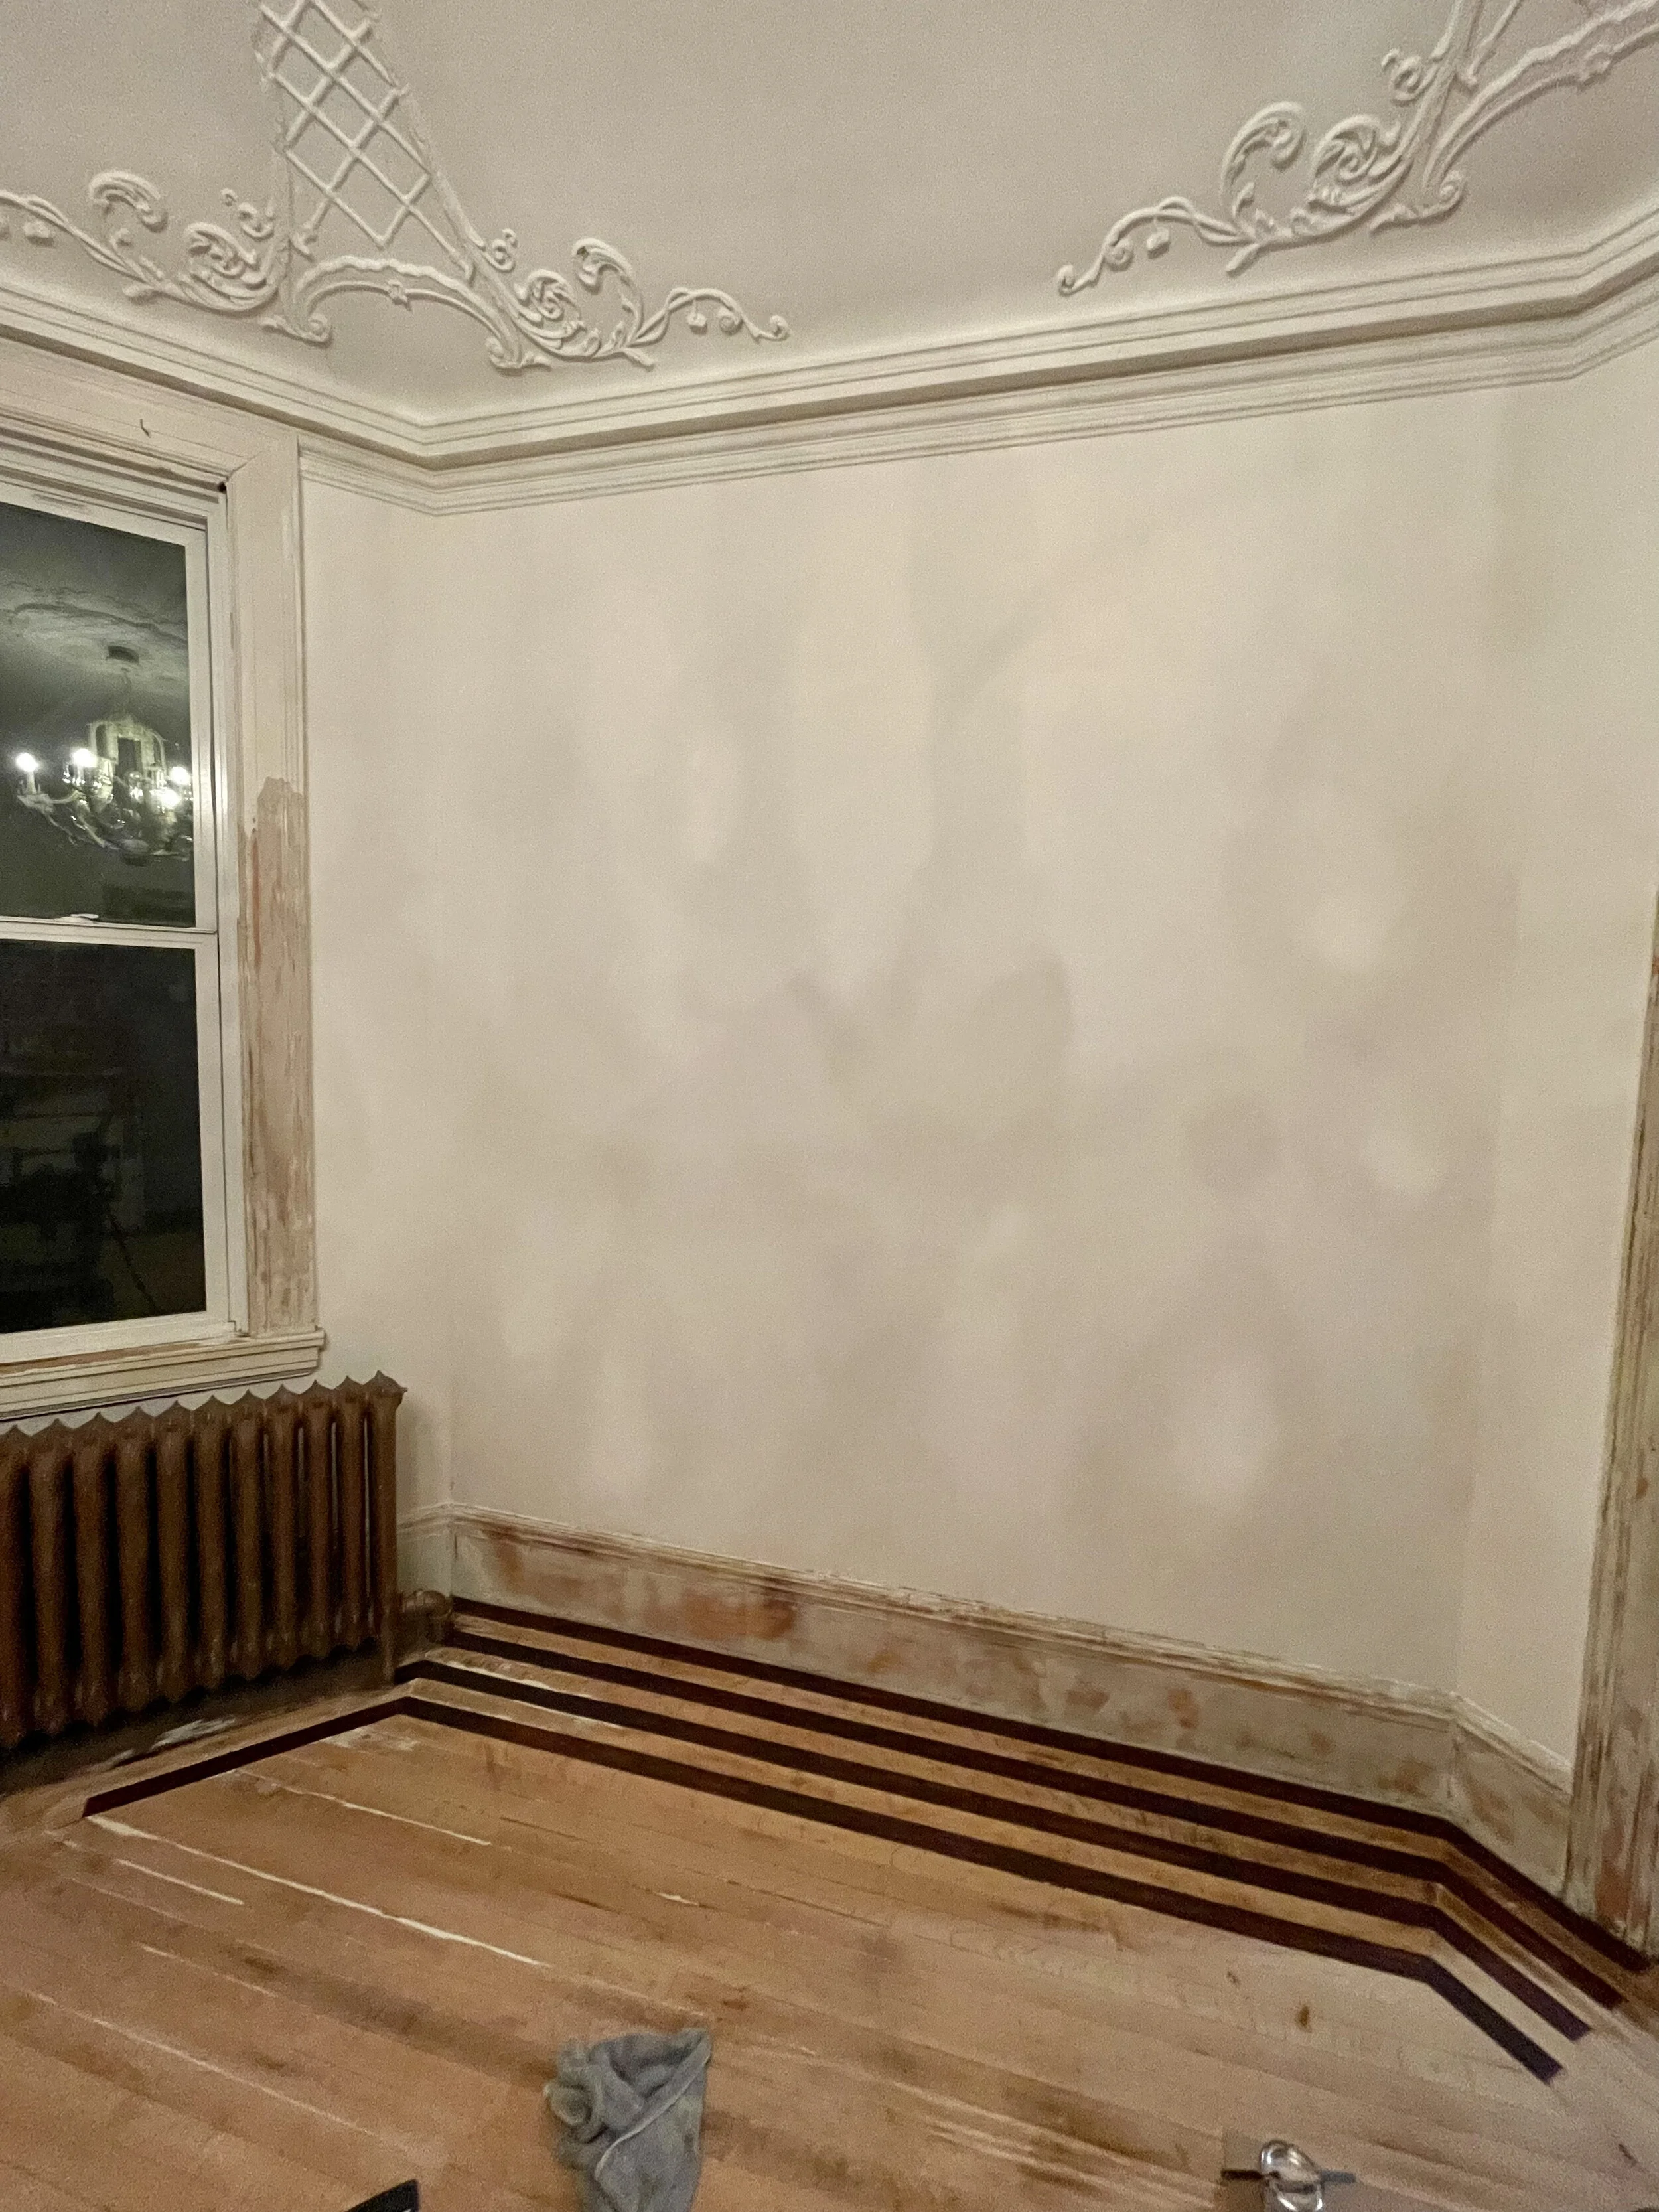
Things are beginning to feel lighter.

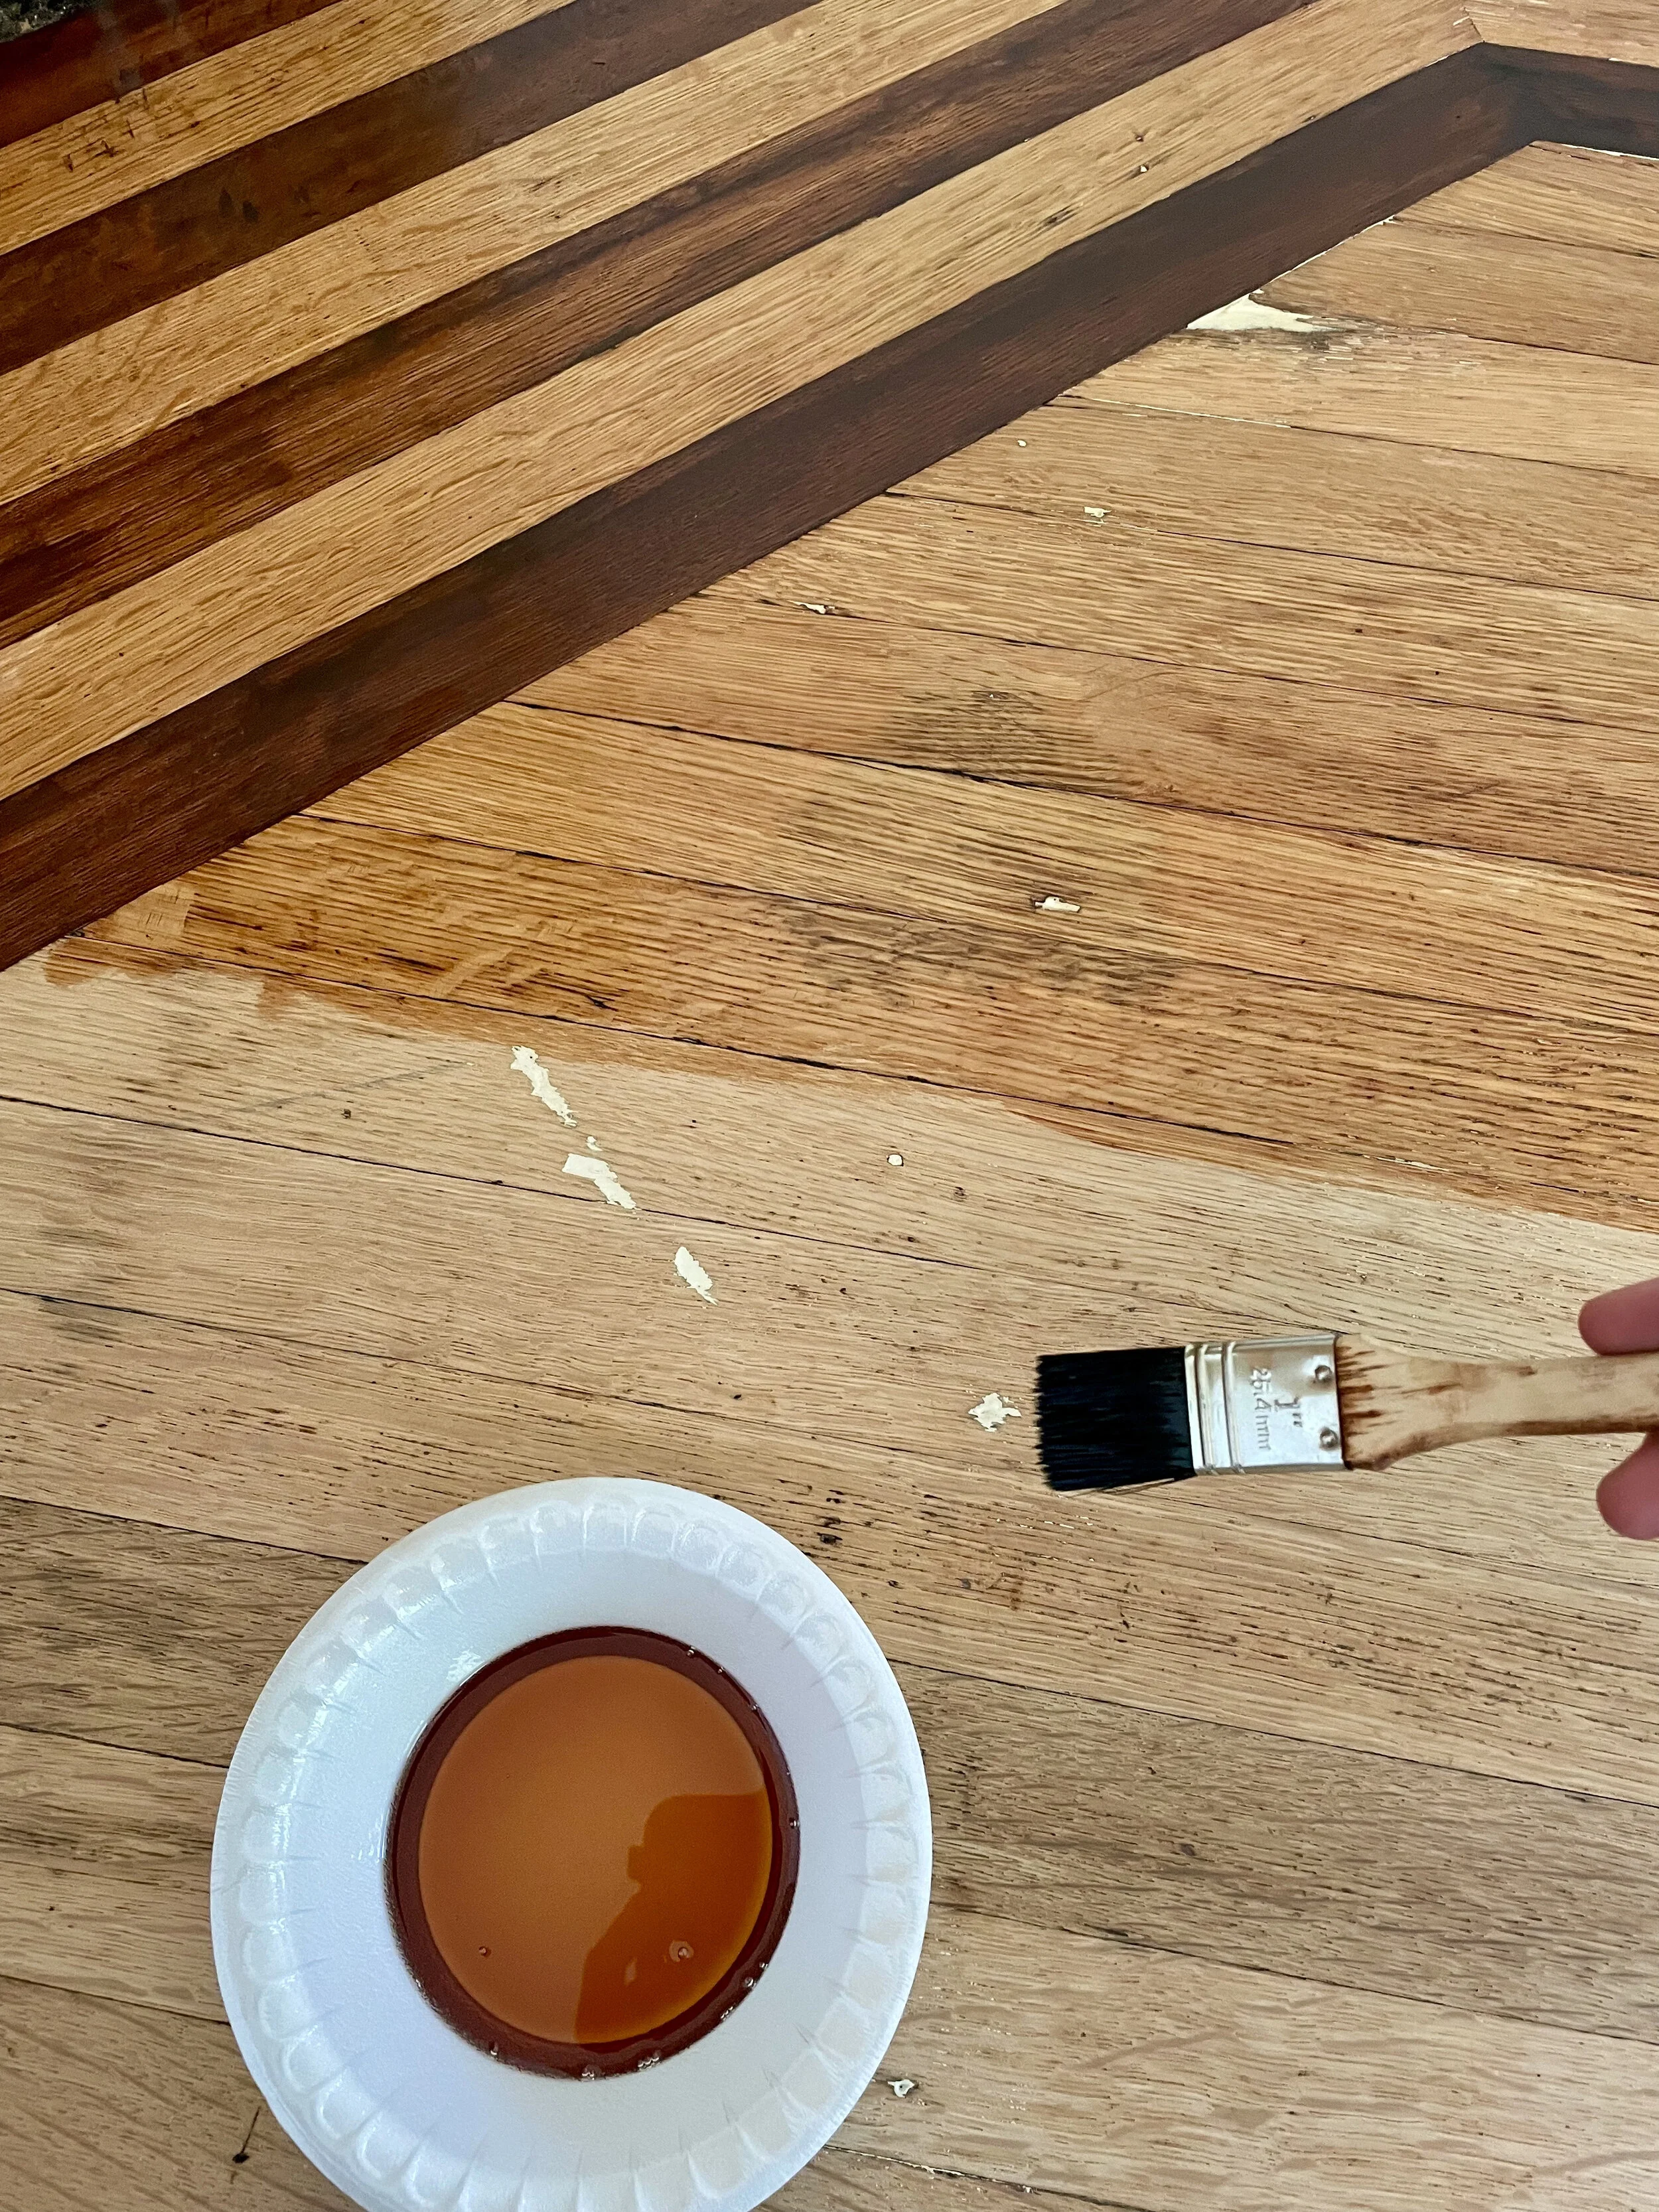
I employed this Linseed Oil Interior Wood Filler to fill the smaller gaps and cracks in the tongue and groove oak. I did not dye or stain the wood filler but this is something I would like to try on my next floor as it might blend better. I did not apply a stain to this oak floor, with the exception of the boarder, but the wood filler will take the stain.

I suspect there must have been a sink along this wall at one time as there was water damaged rotted voids and dark stains between the oak boards. I engaged an elastomeric repair compound epoxy consisting of Prime-A-Trate and 401 Flex-tec HV to fill the voids. I used the golden oak tint to colour the epoxy. I see that the company now offers pre-tinted Flex-tec in medium brown and dark brown. This is a brilliant offering and will be handy in a future project.
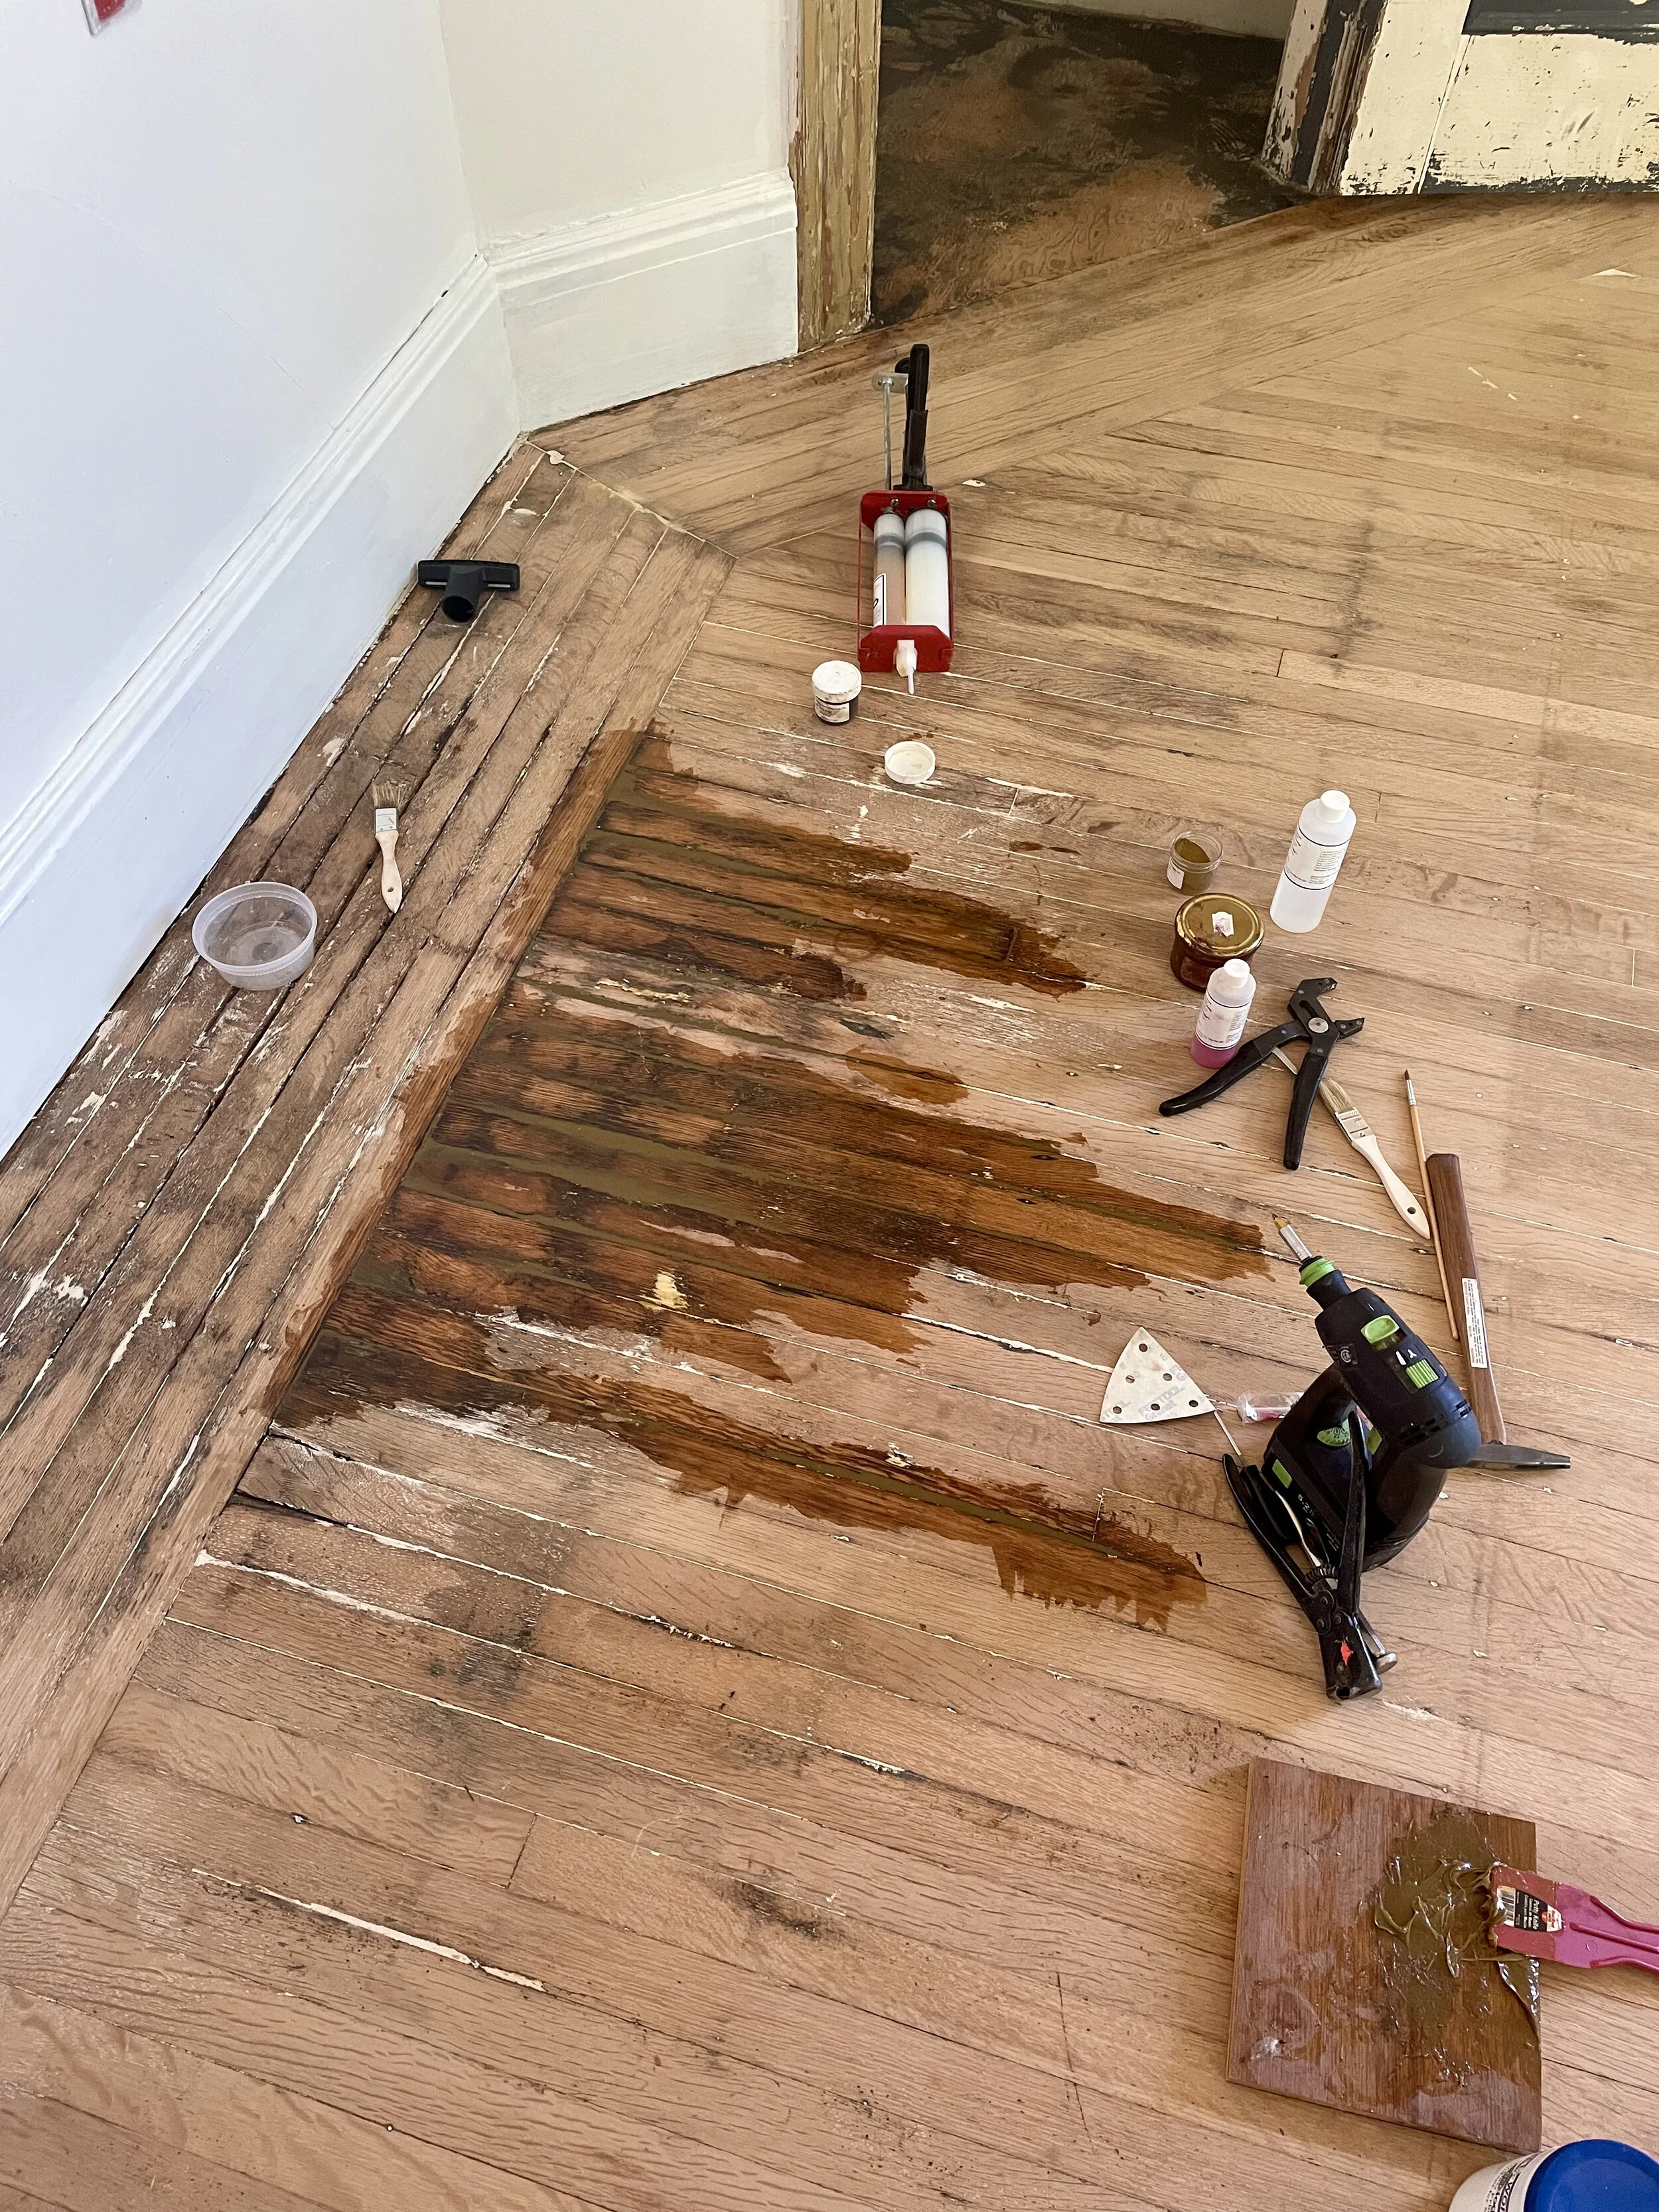
The cure time for Flex-tec is generally 24-hours in a moderate temperature and humidity after which it is sandable and paintable.
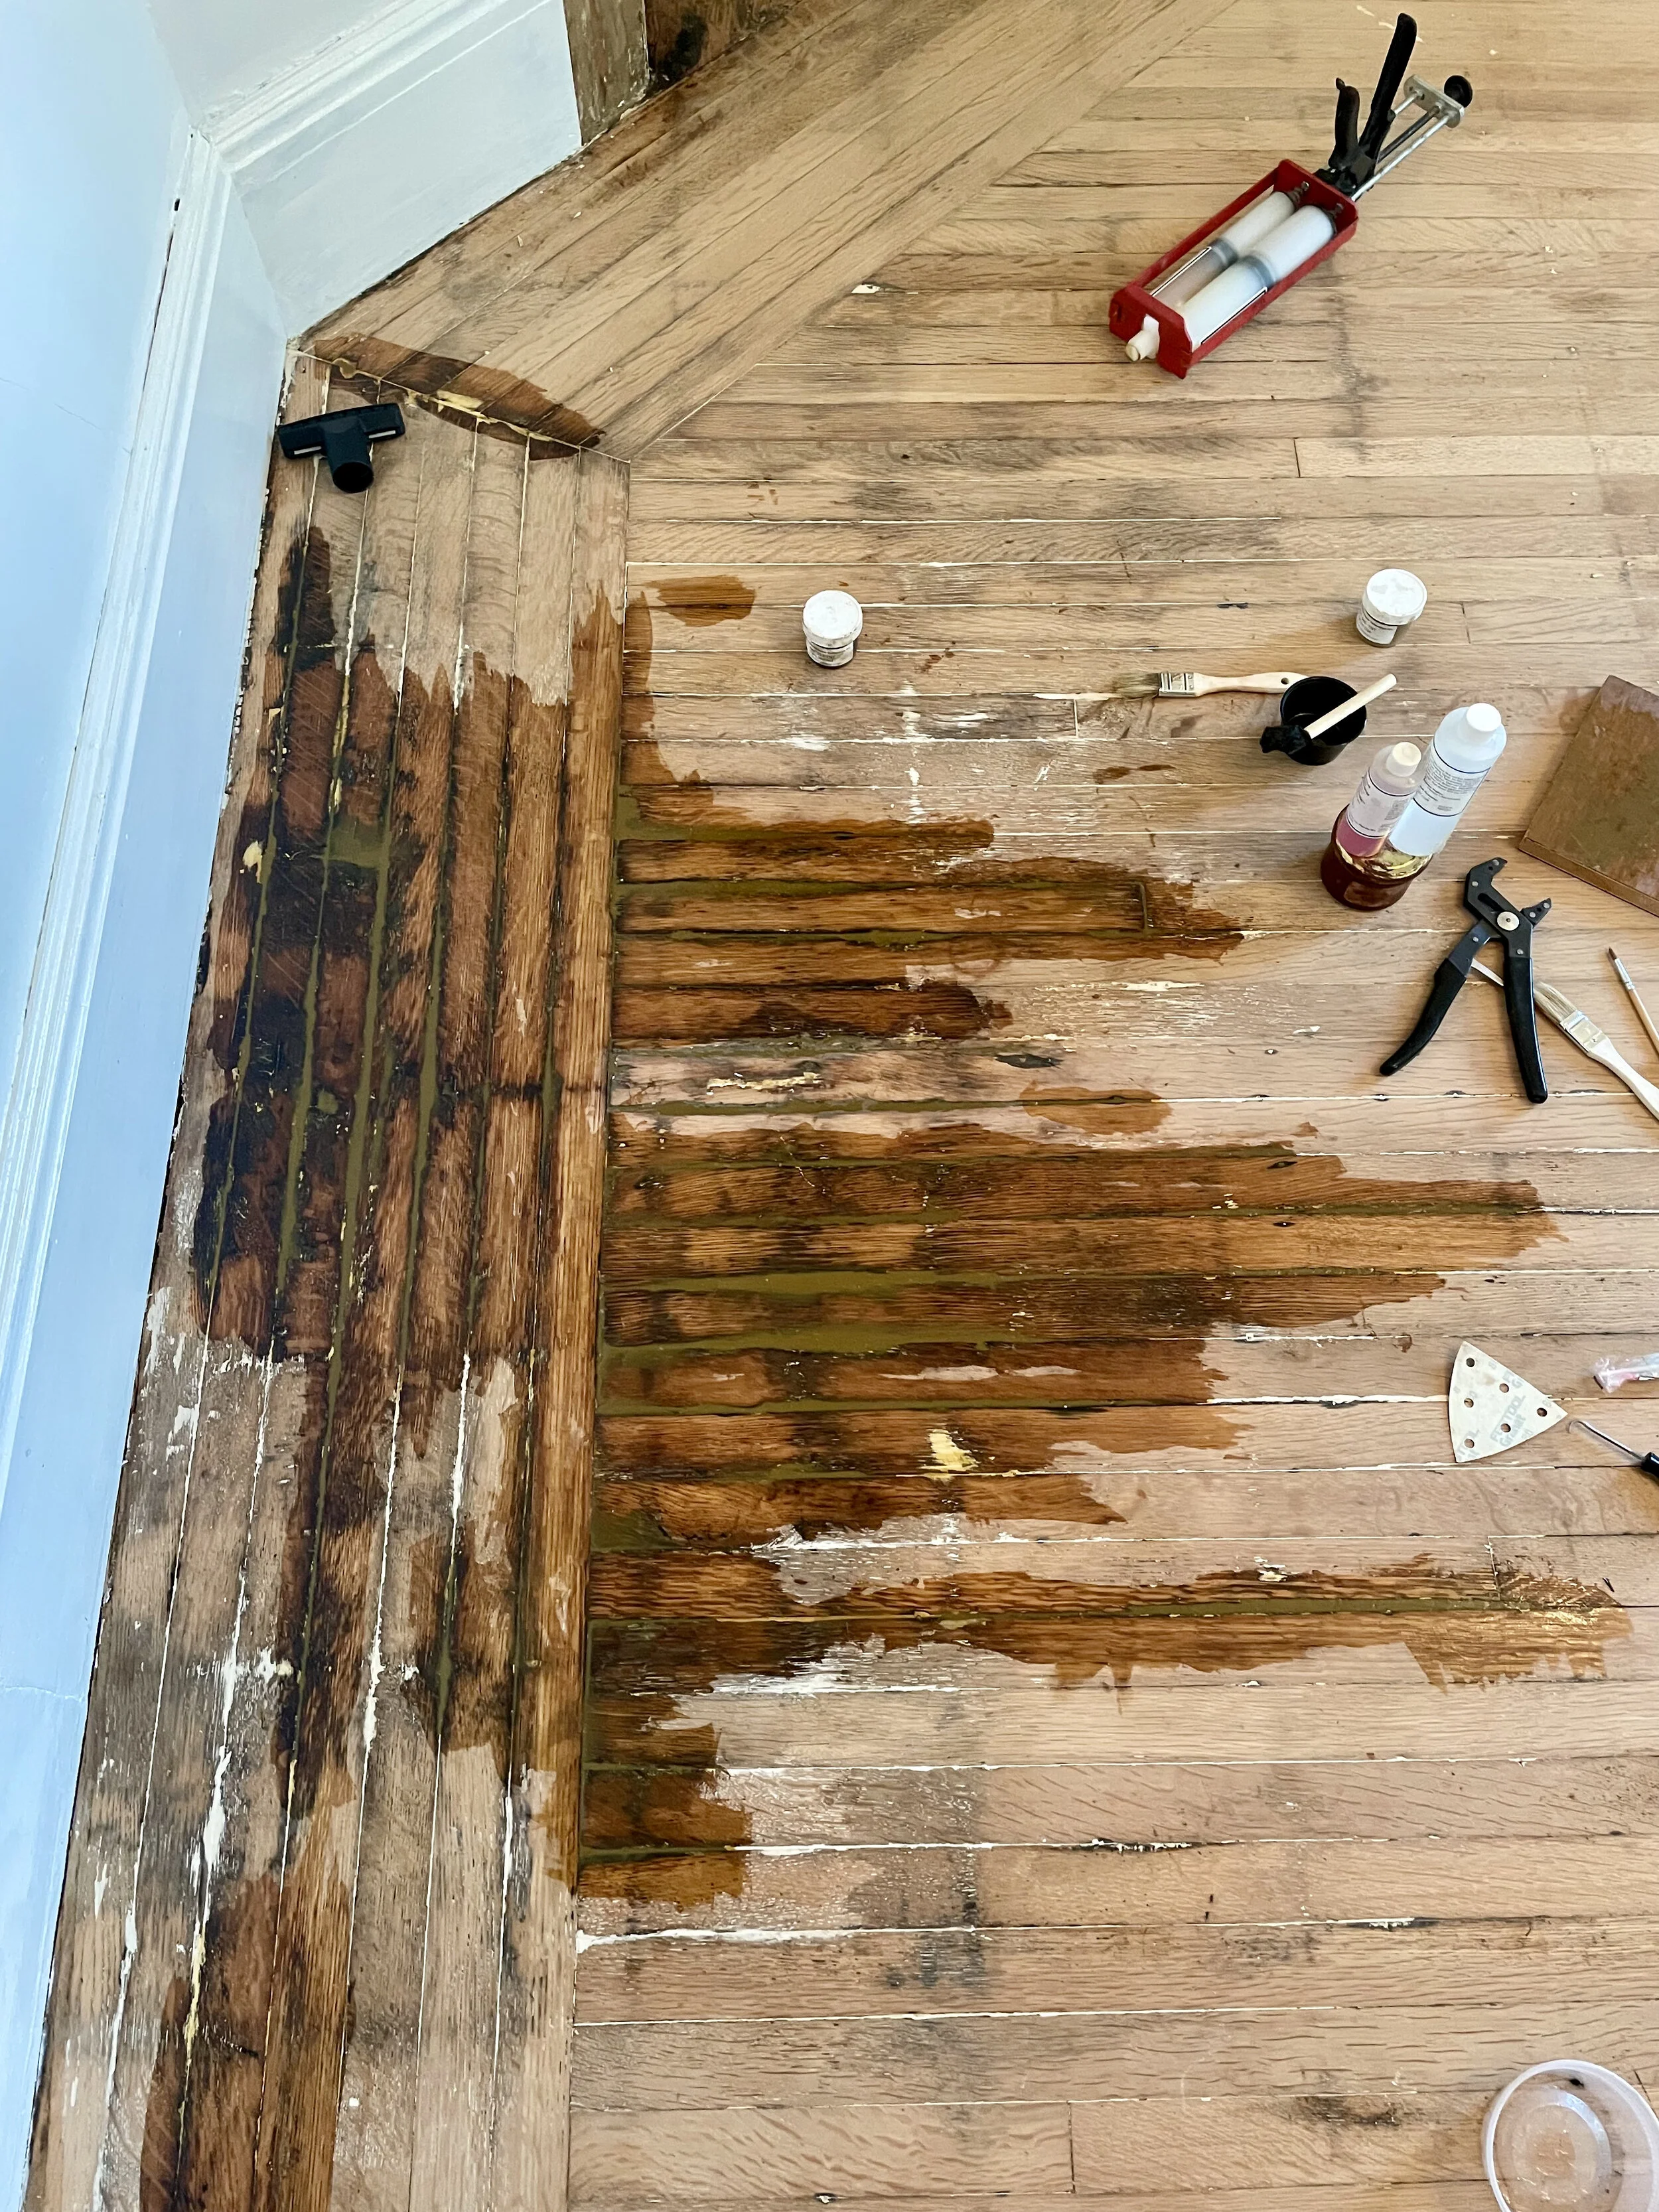
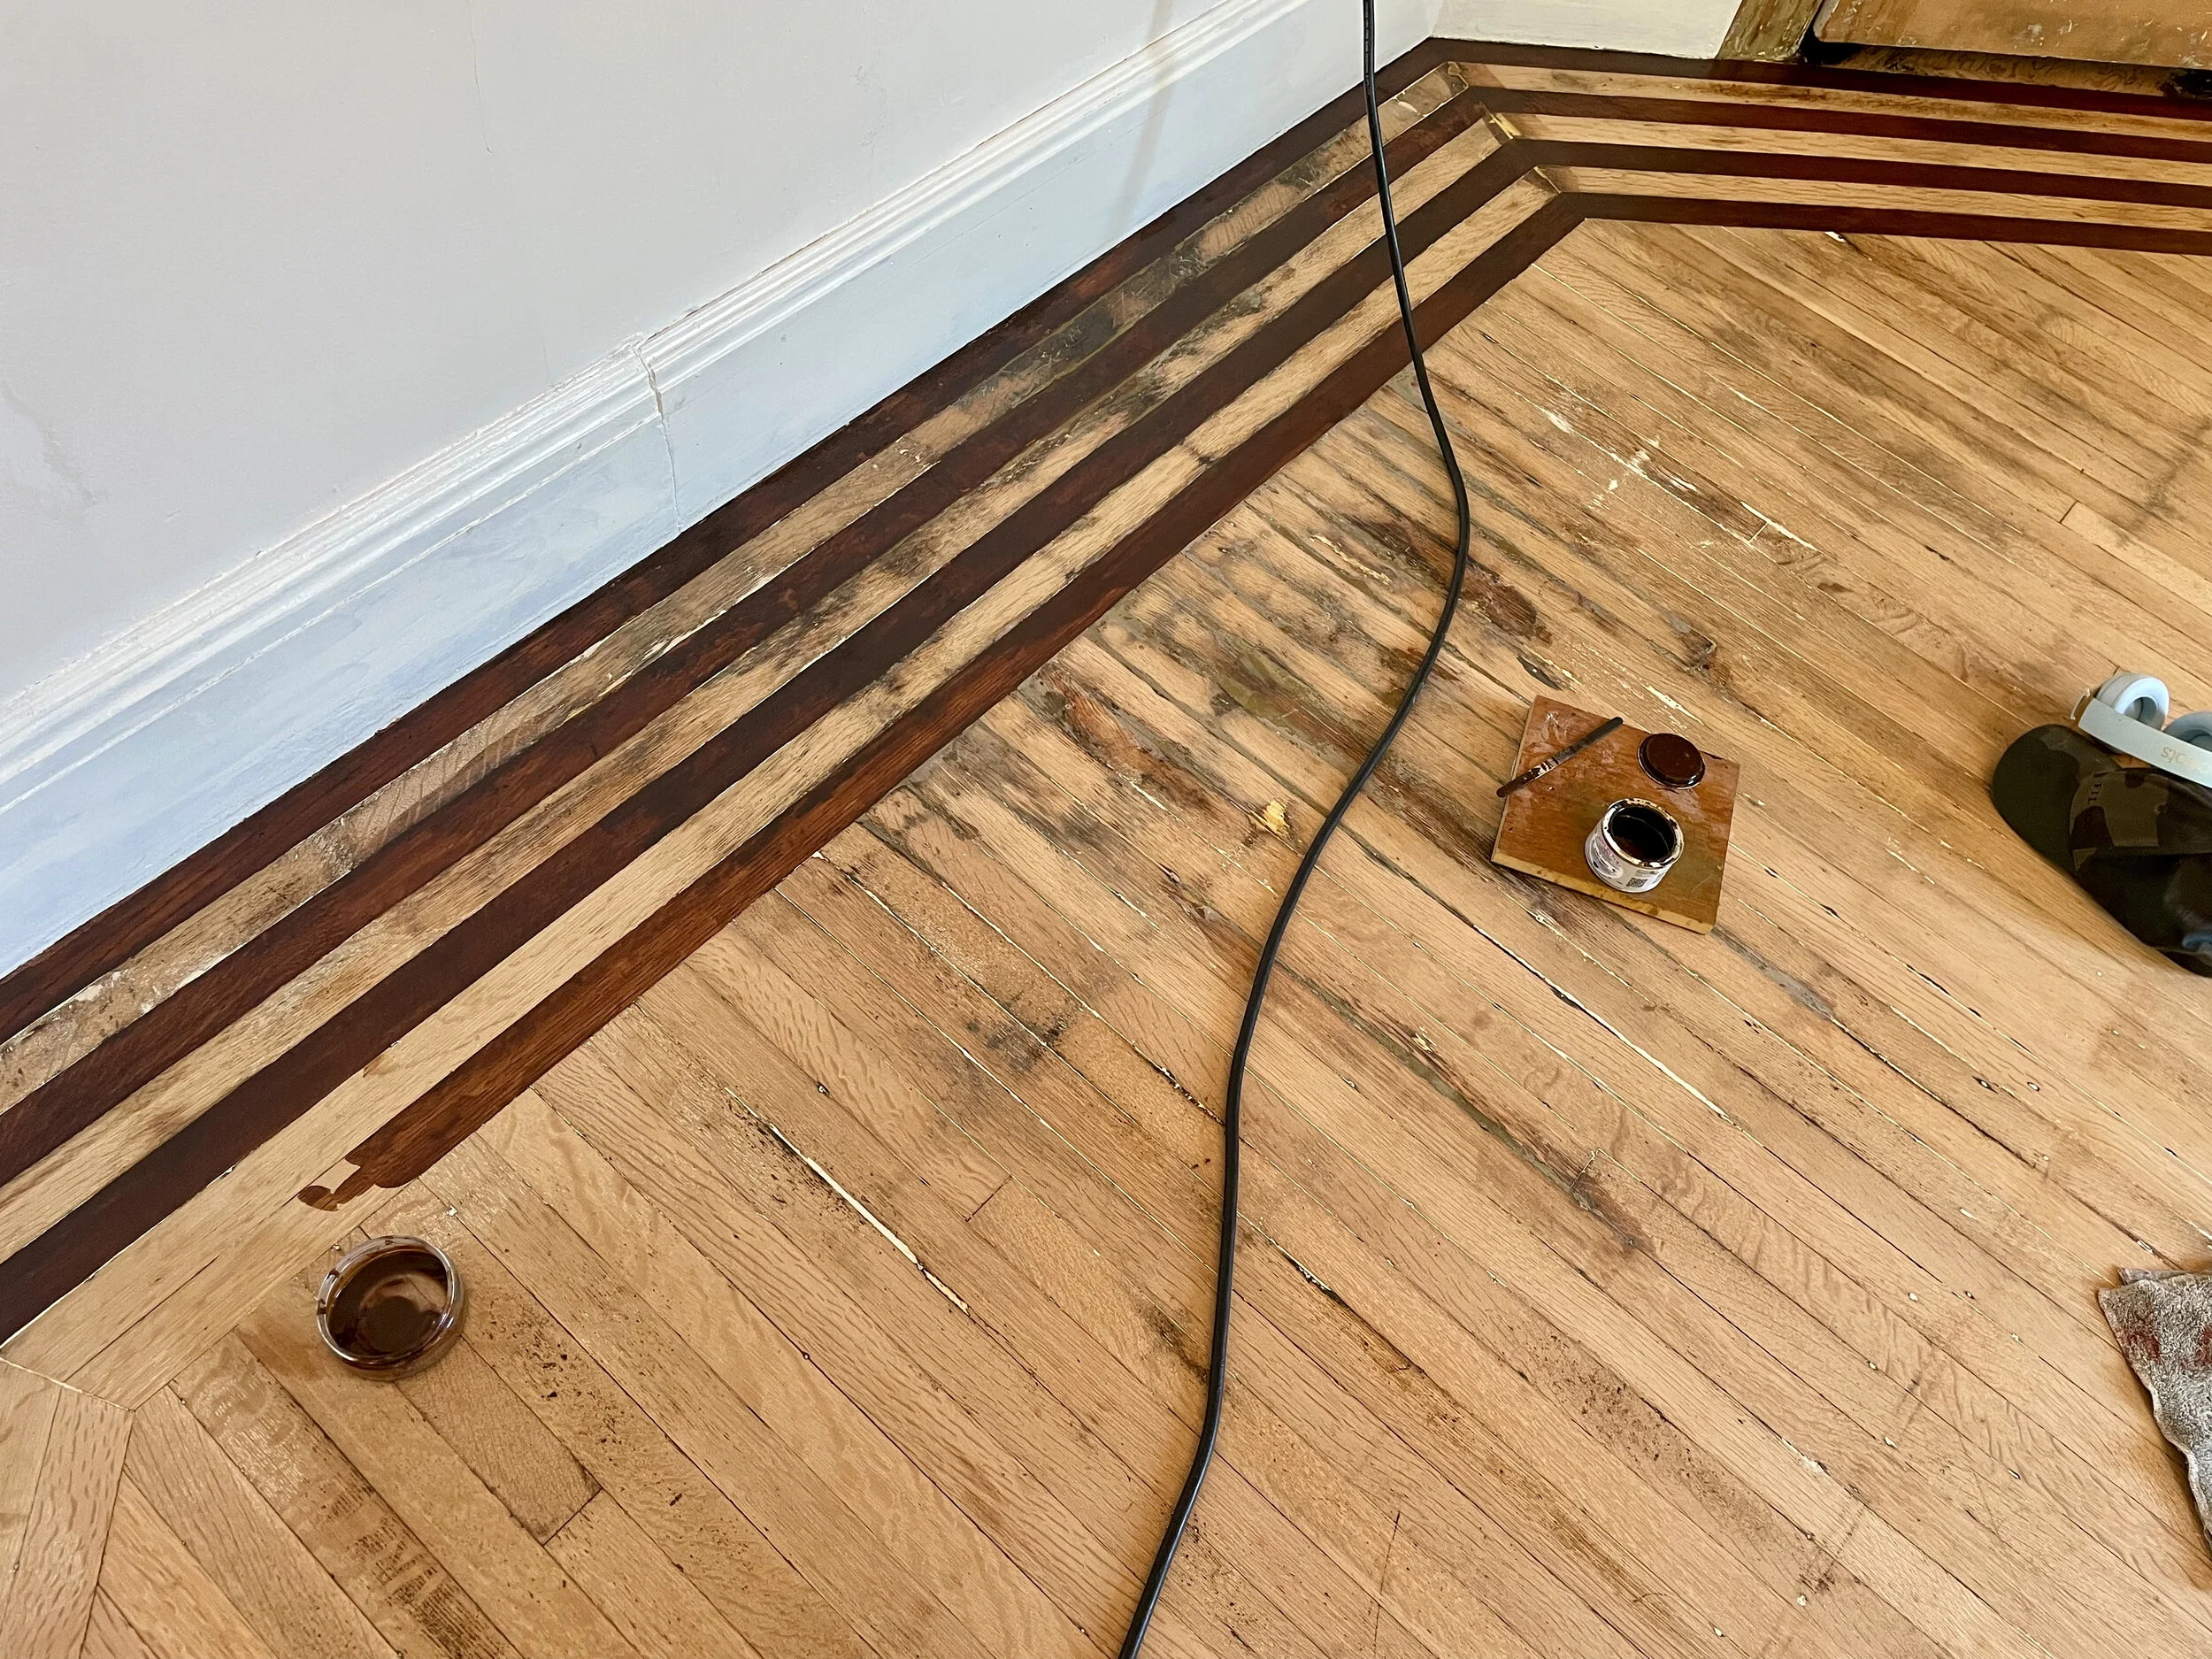
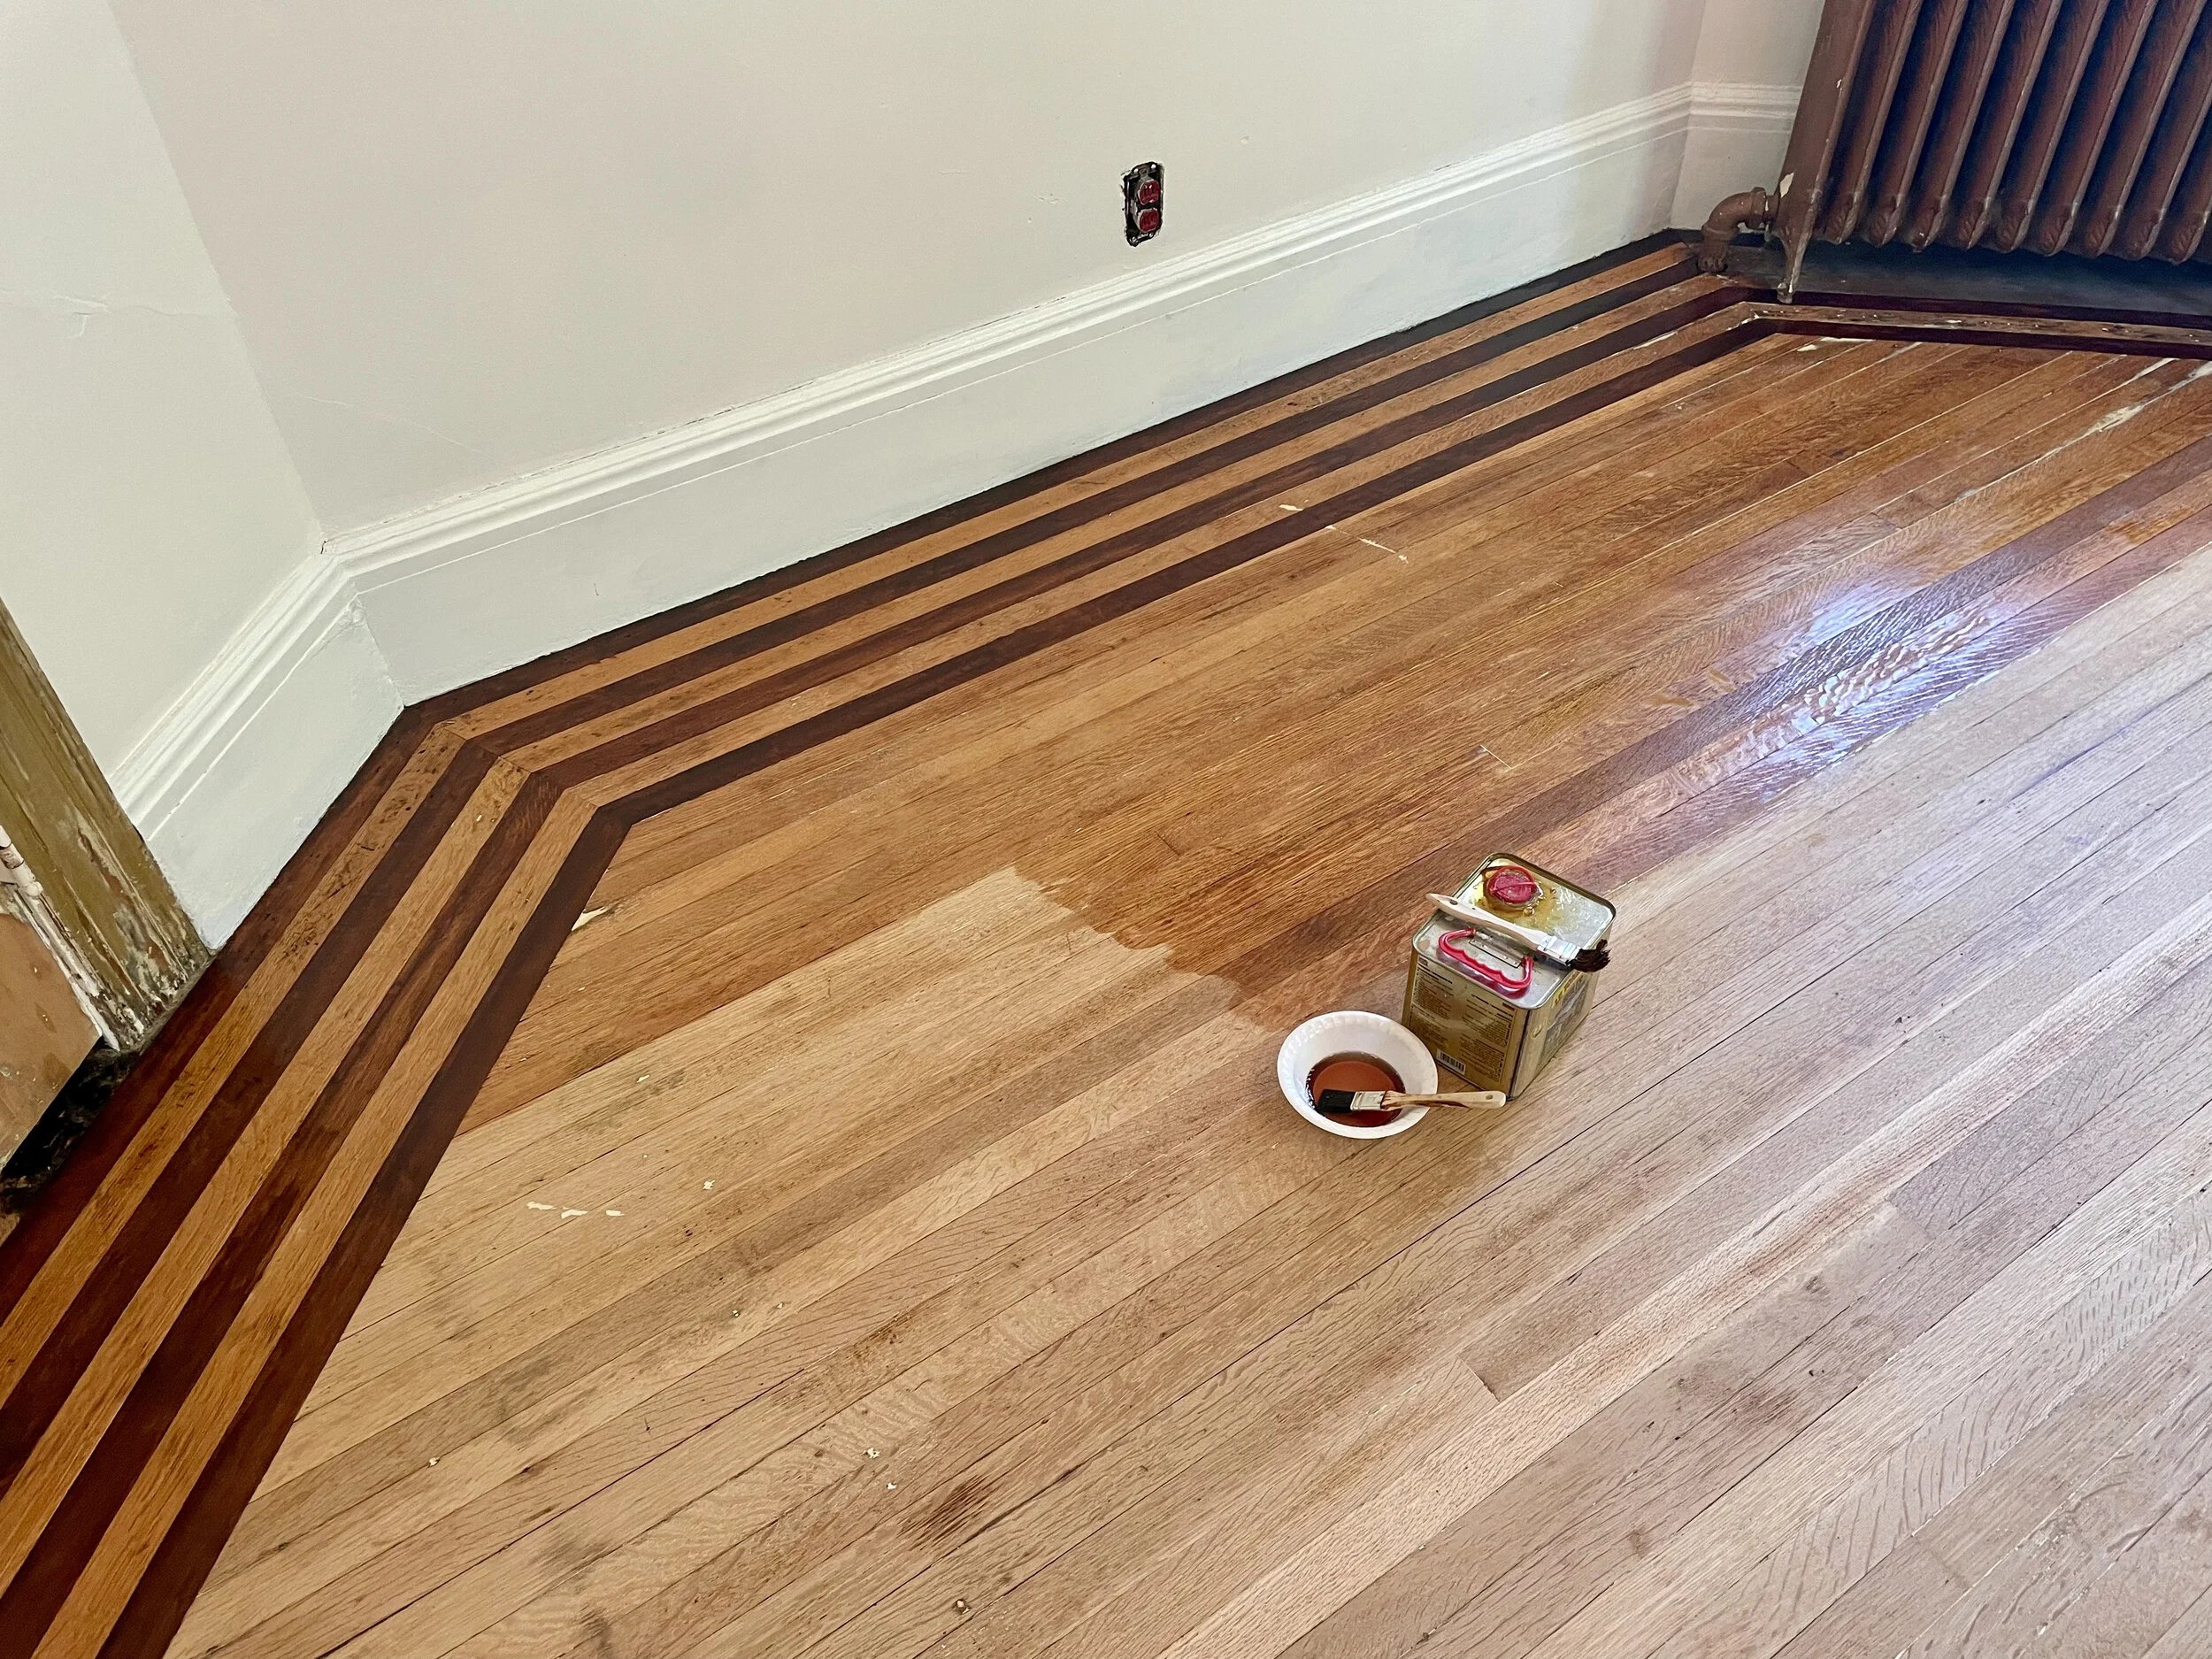
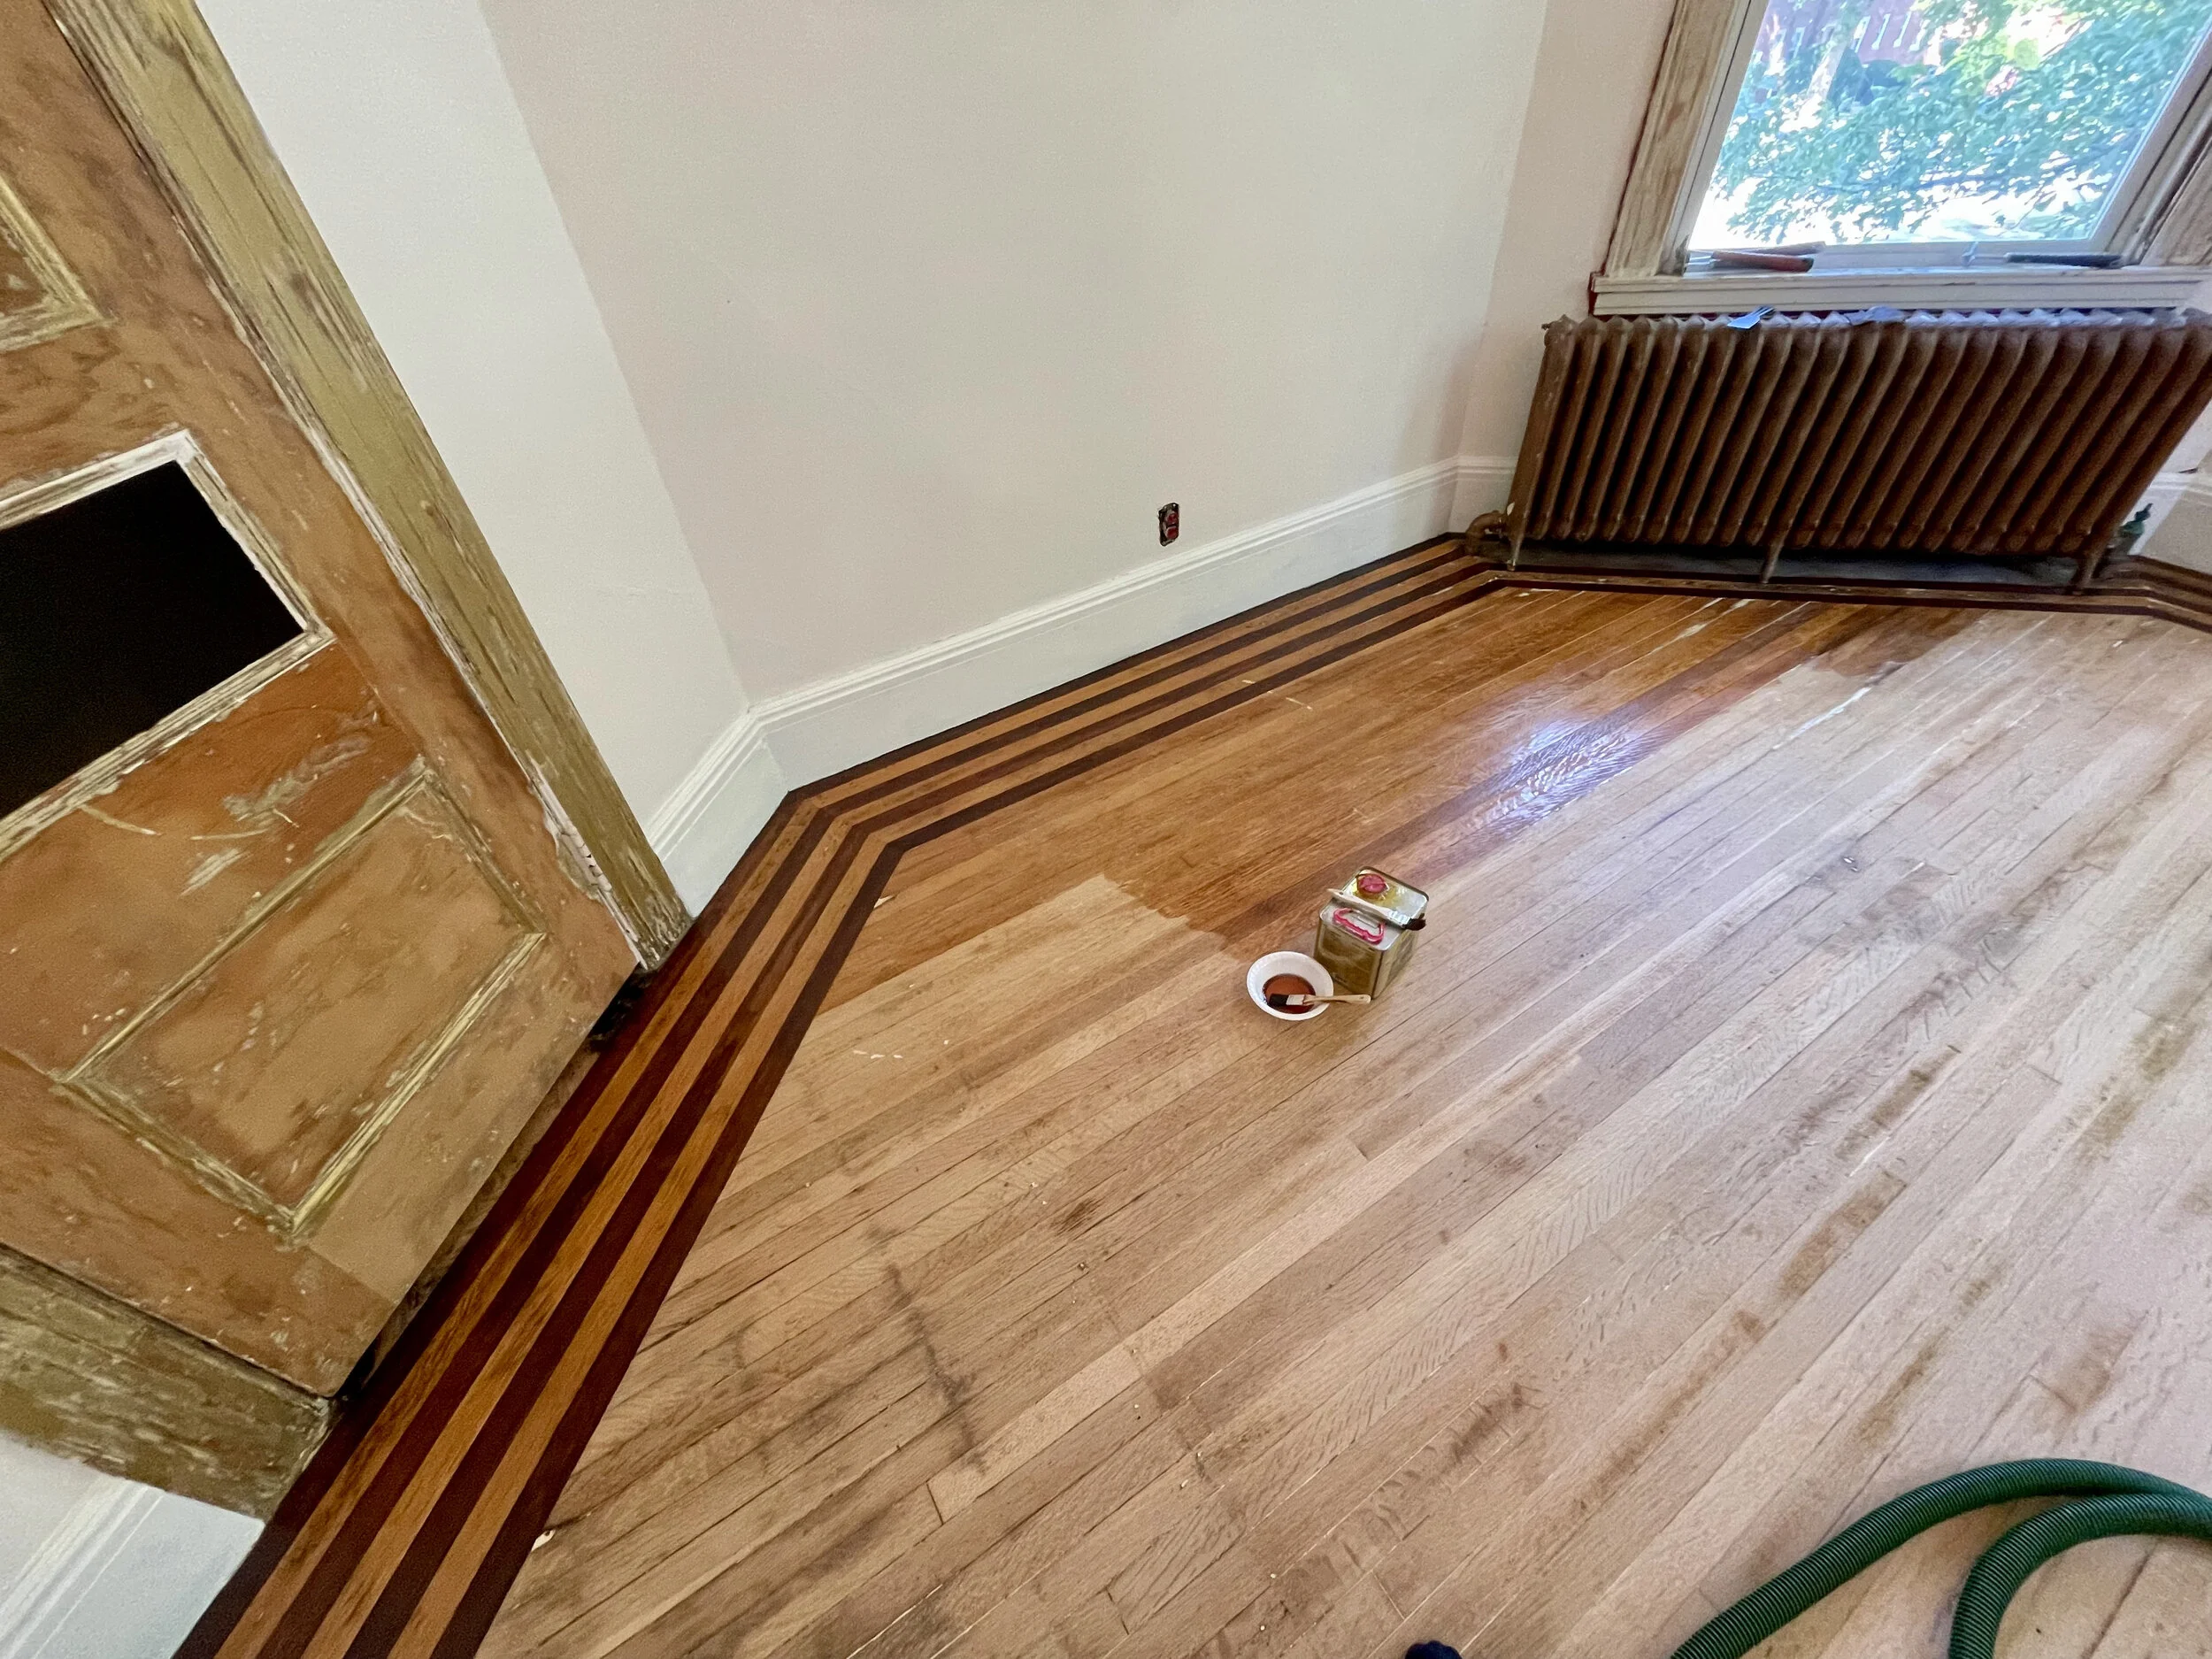
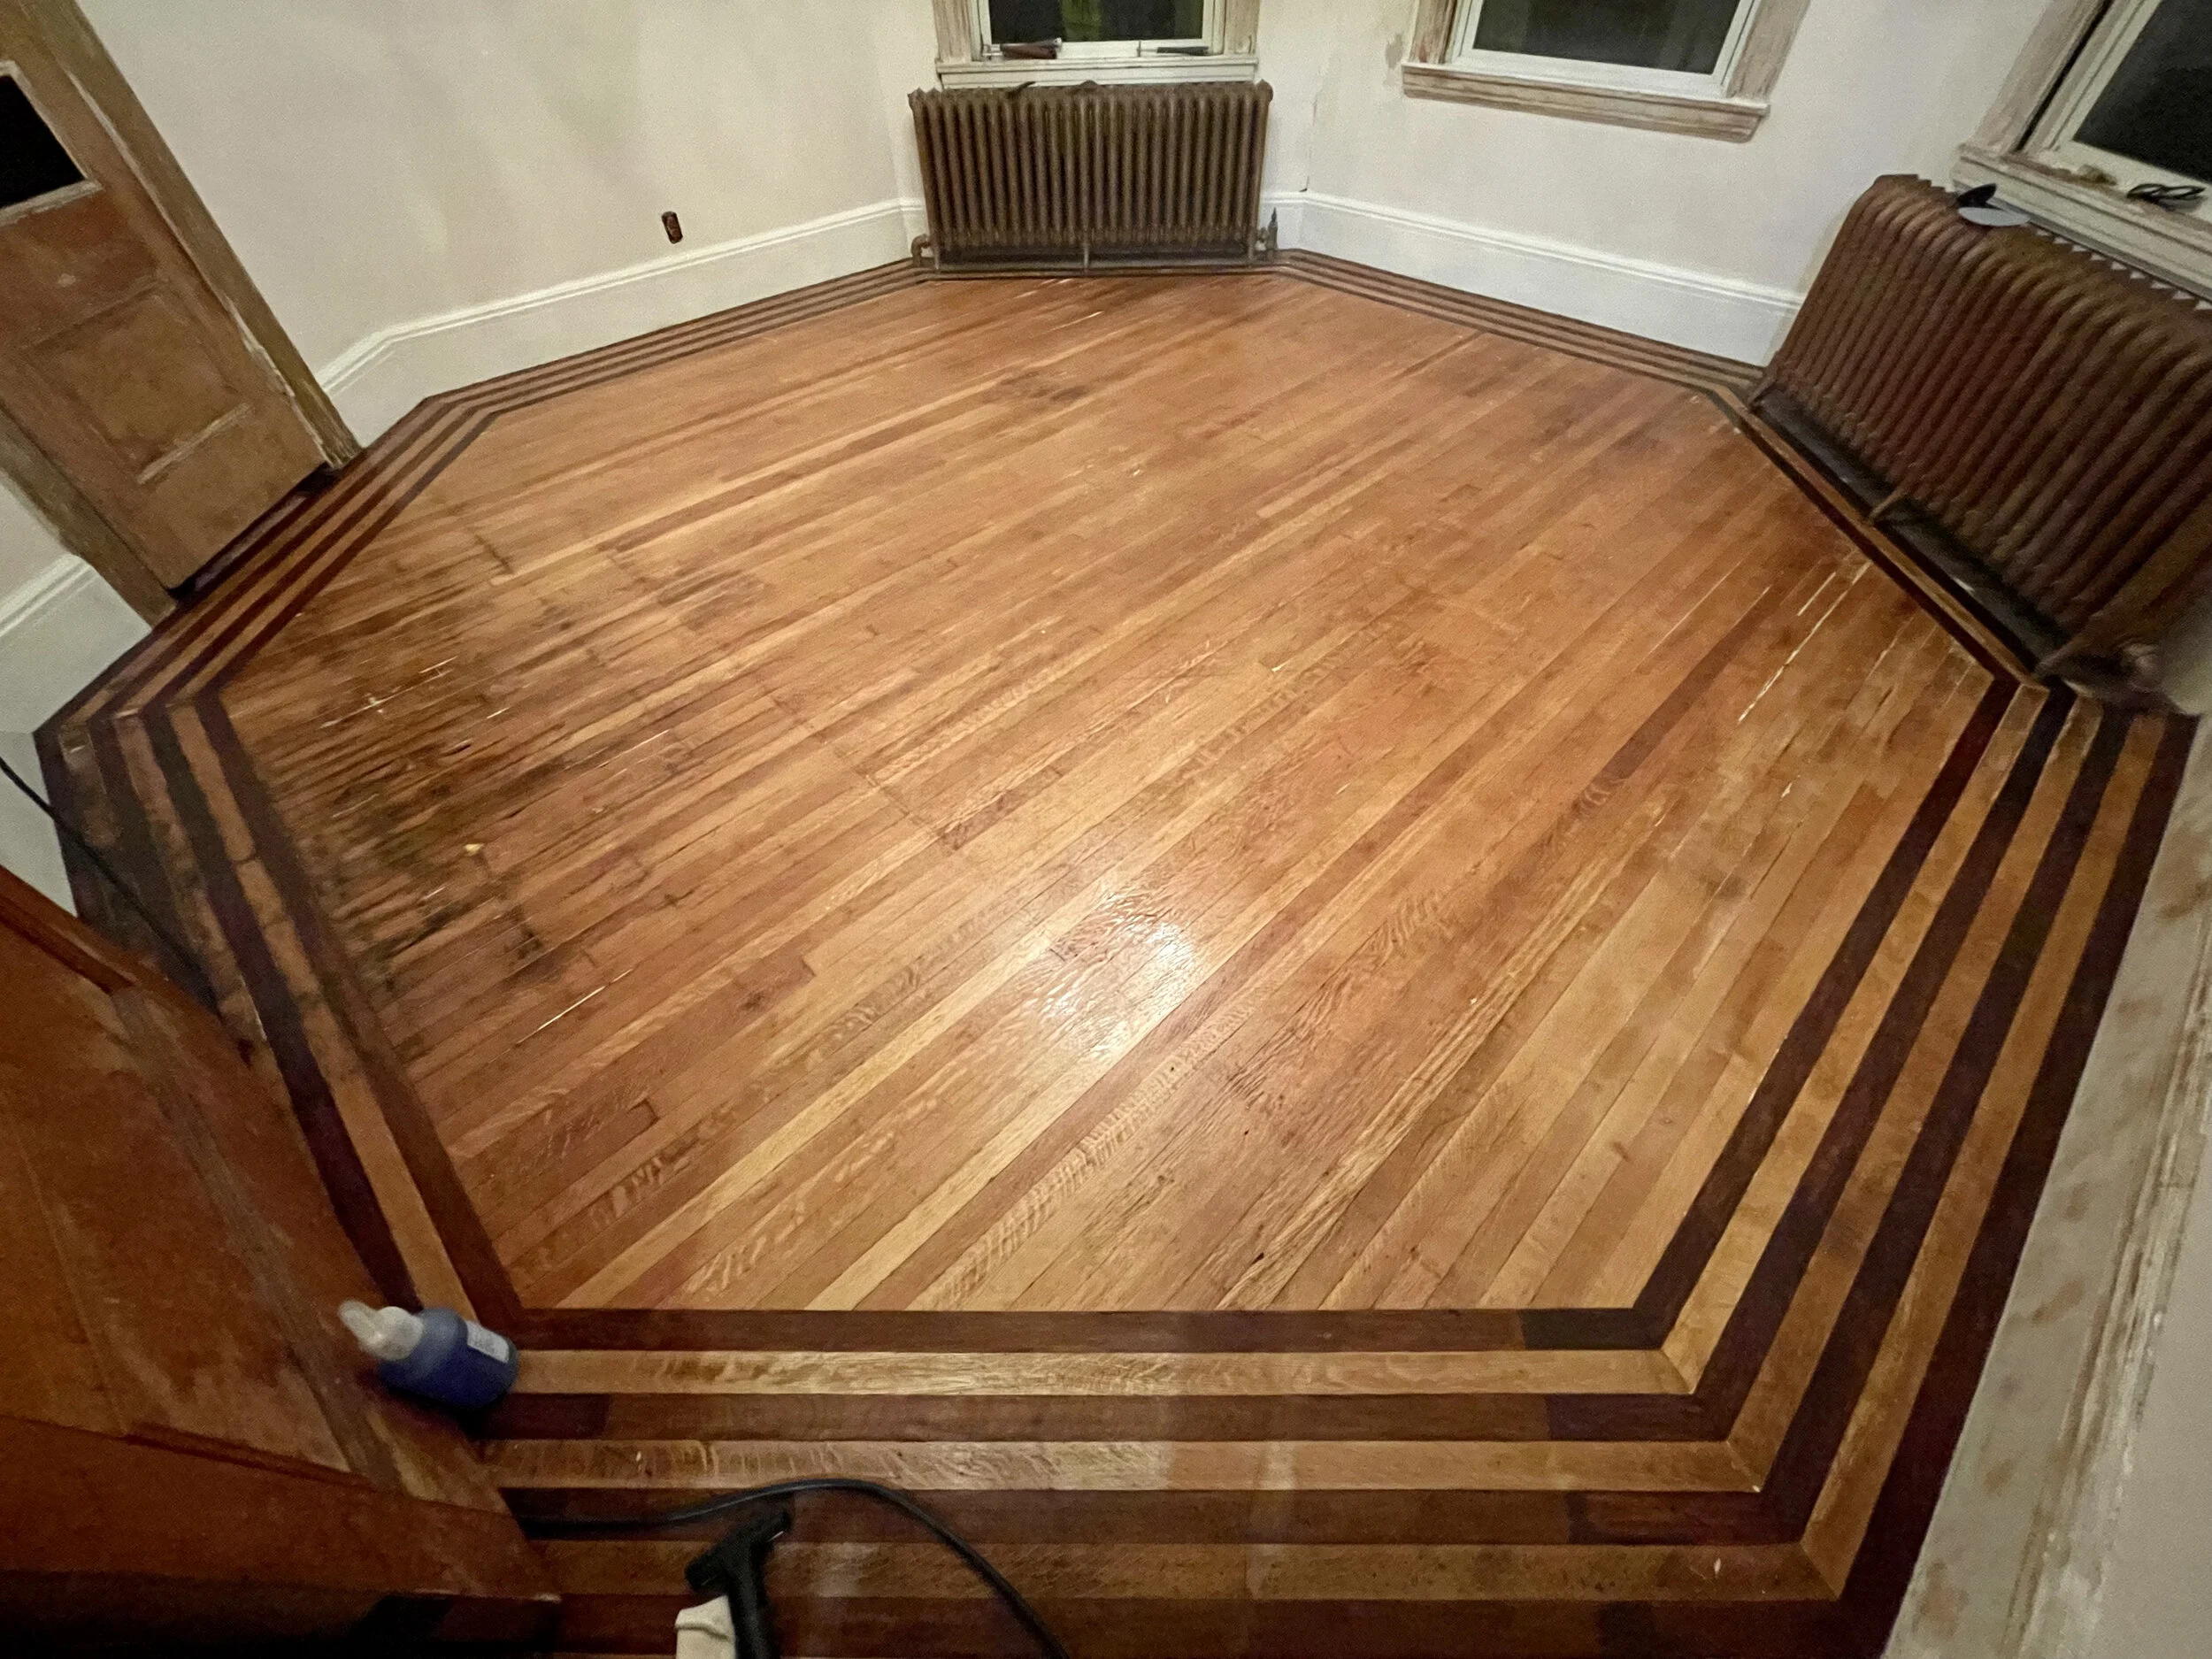
Epoxy is complete. Boarder stain is to be applied next.
I made my own stain using Ottosson Linseed oil paint in burnt umber mixed with Viking purified raw linseed oil and Le Tonkinois Bio Impression.
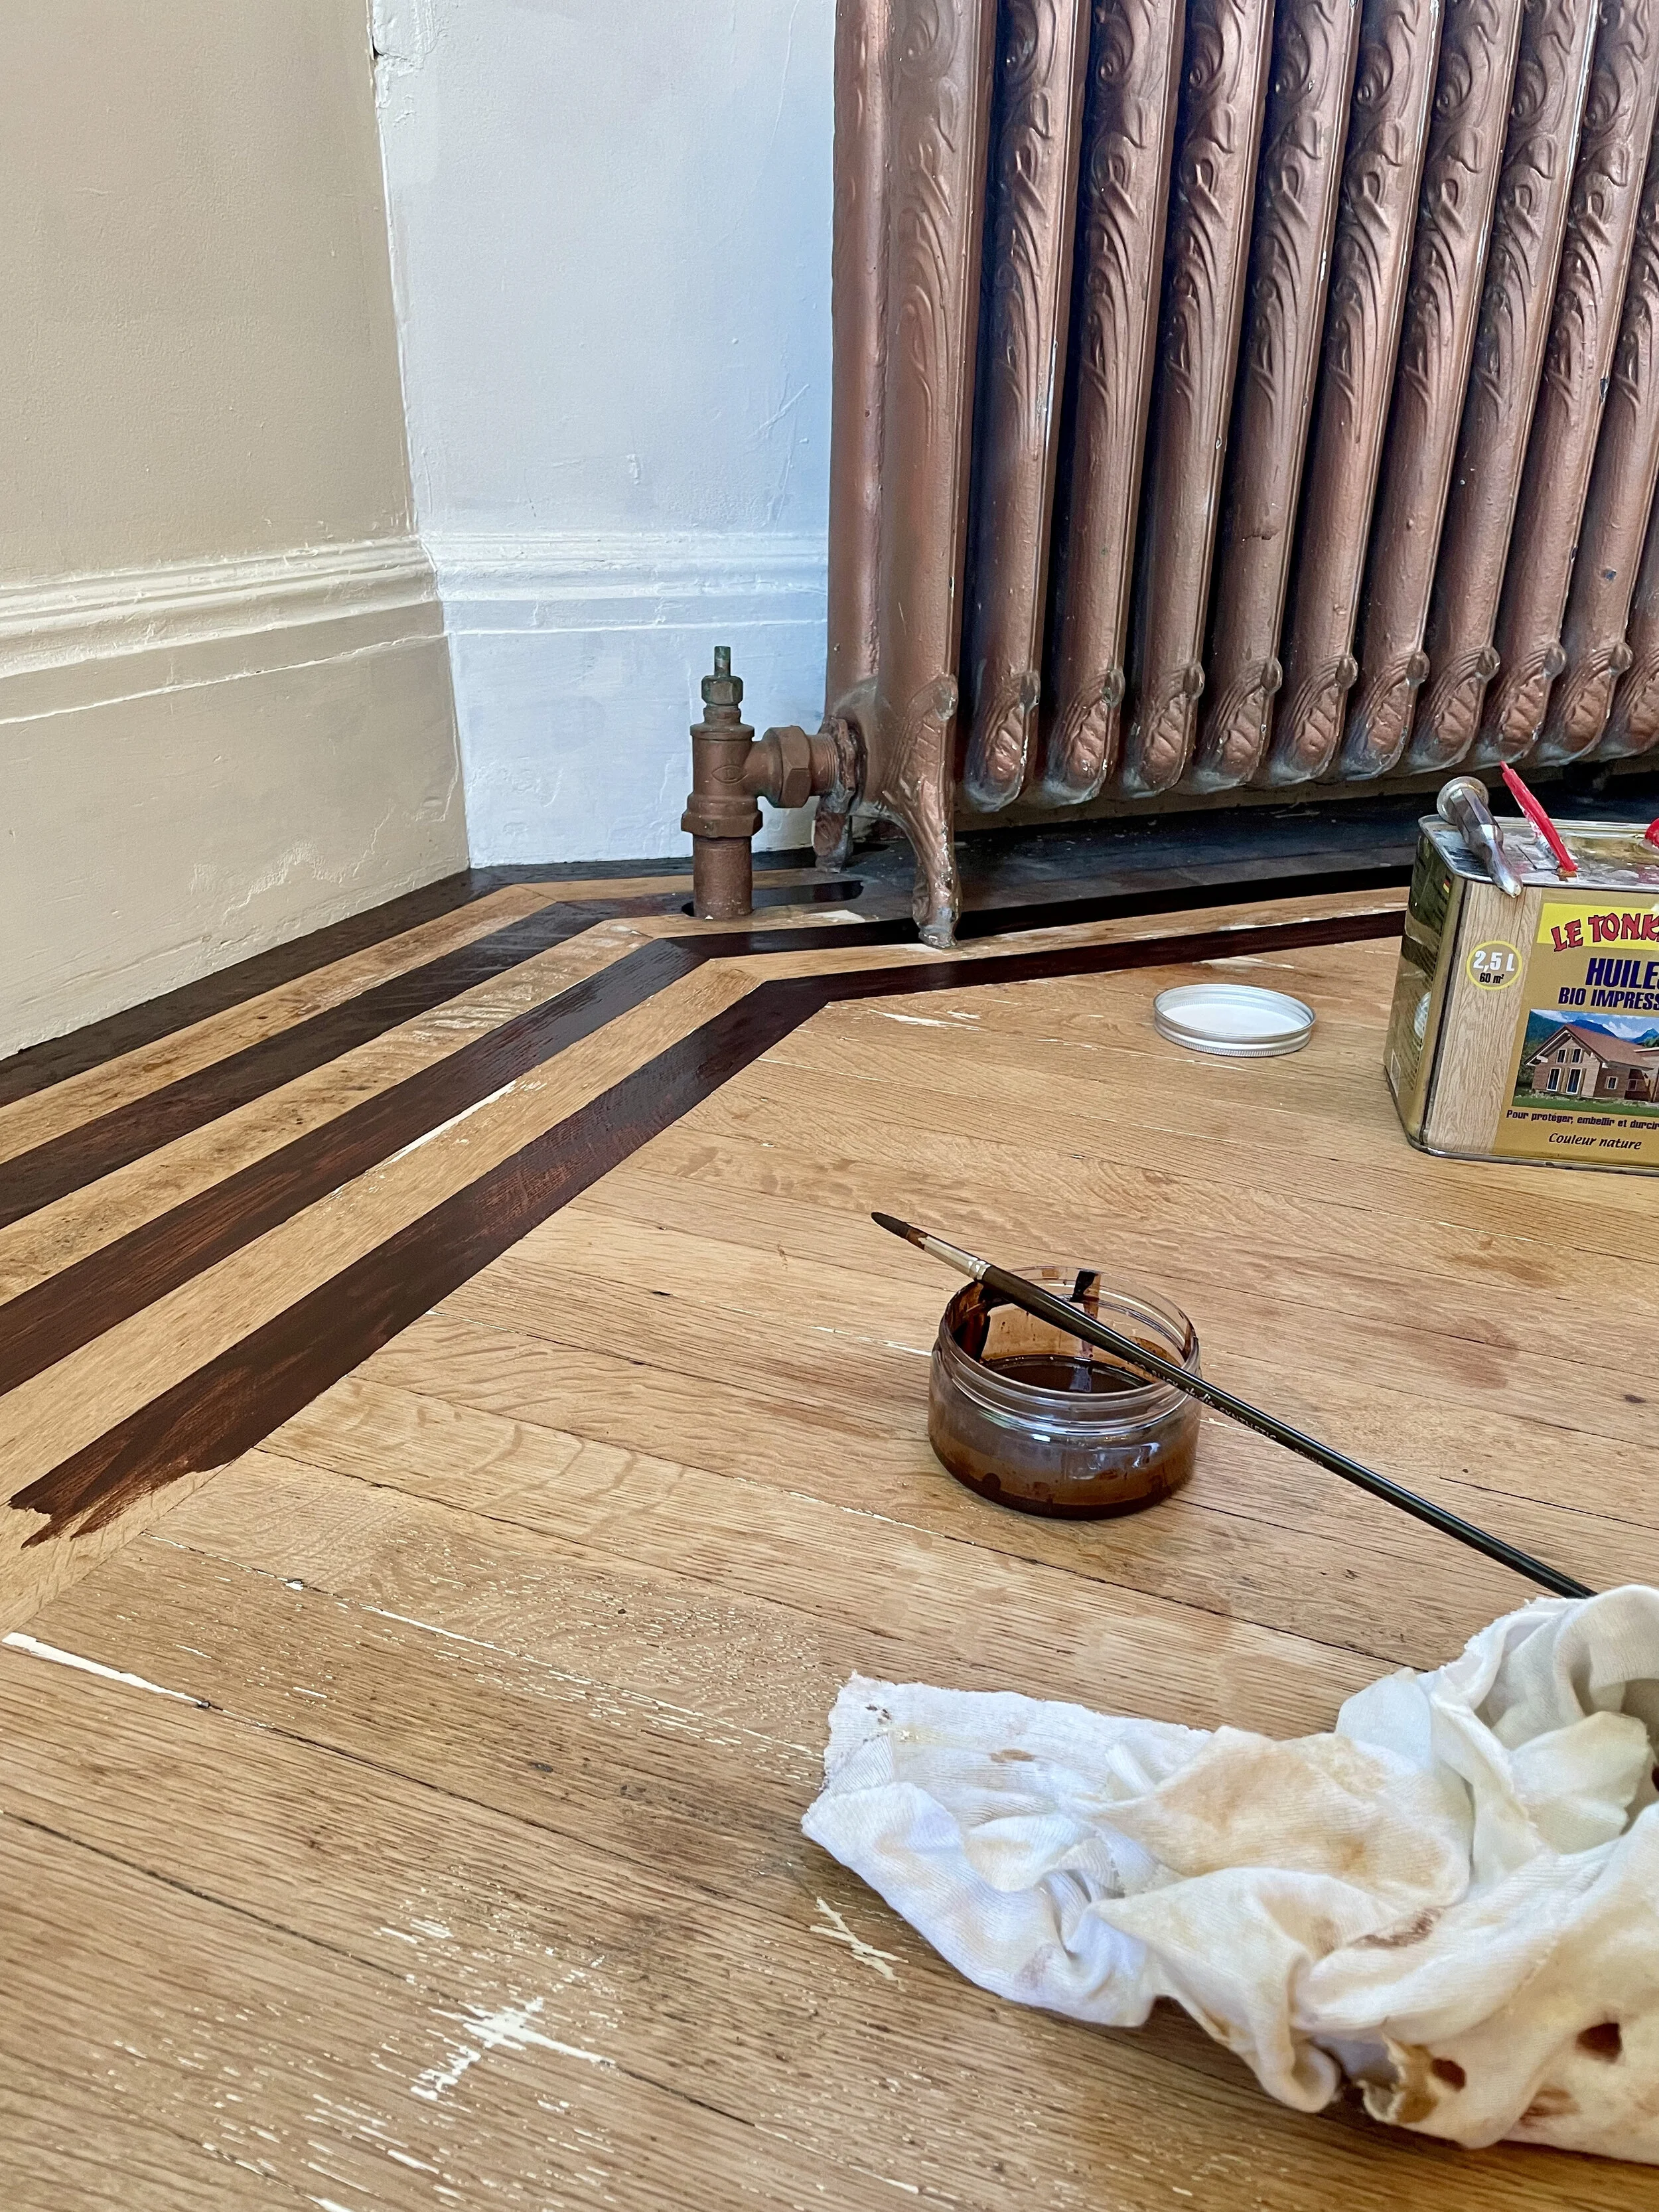
I applied Le Tonkinois Bio Impression to the boarder to get an idea of how the oak will deepen in colour and contrast with the burnt umber stain. .
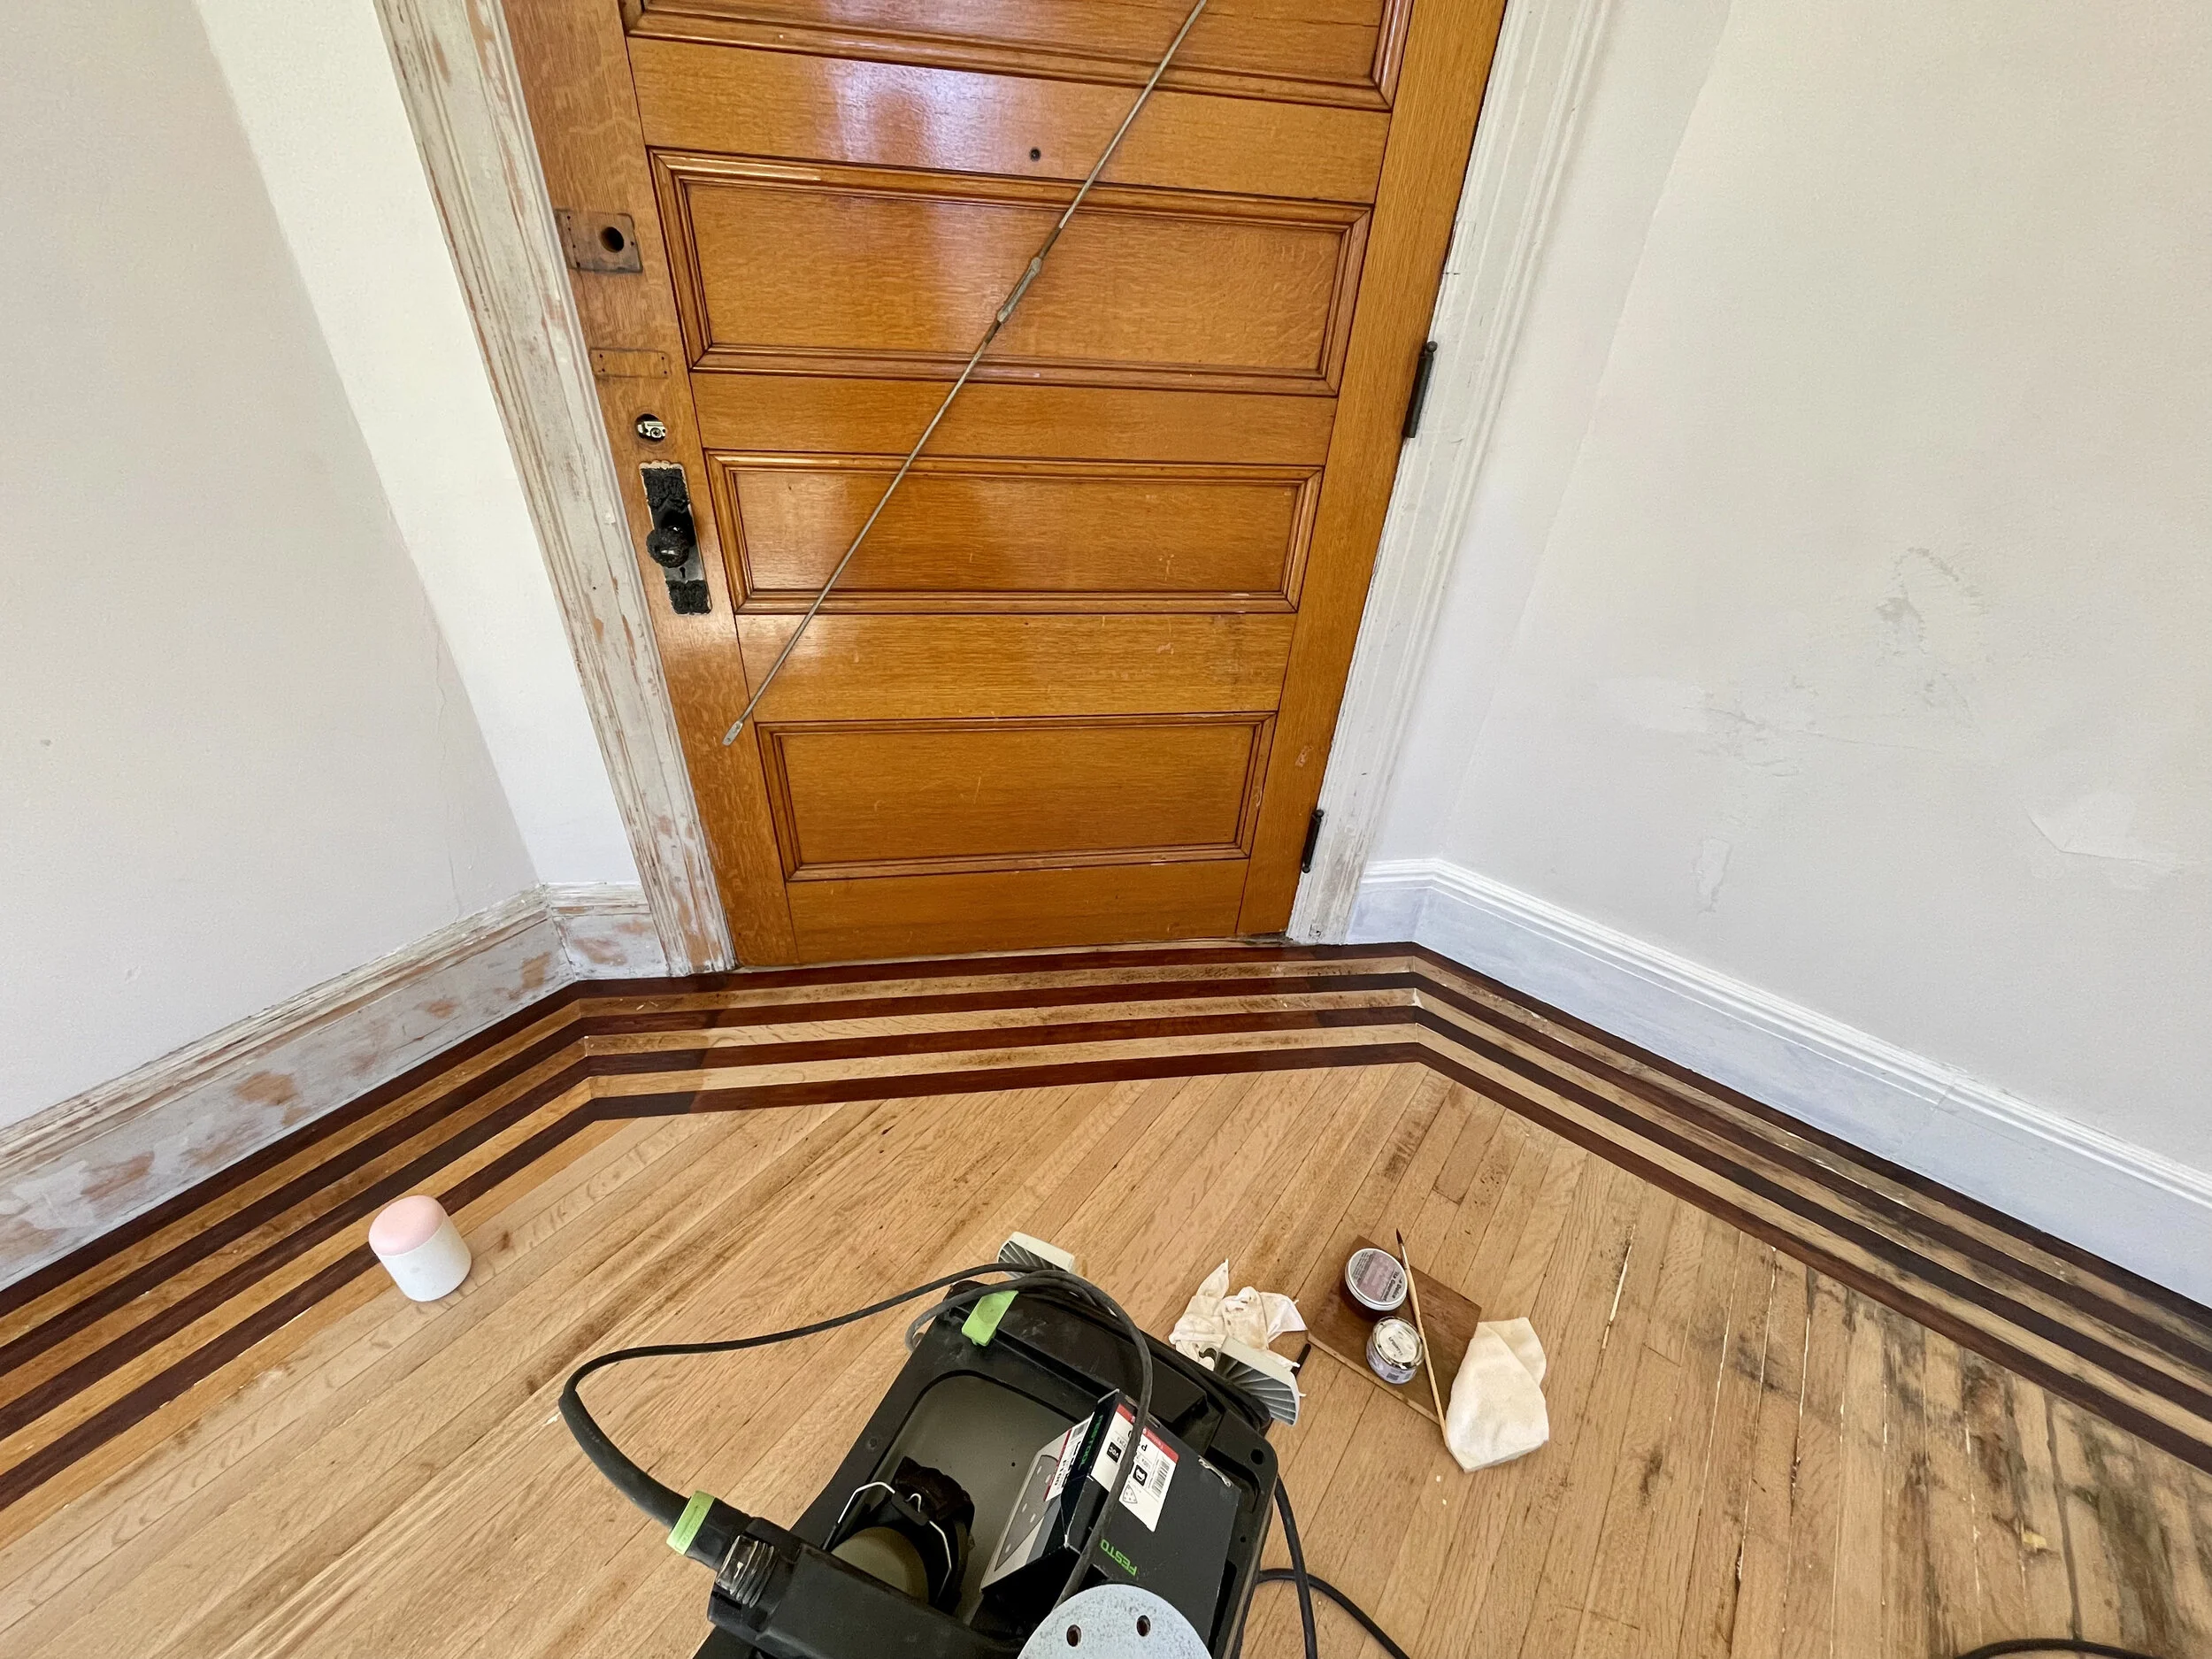
Next comes the full application of Le Tonkinois Bio Impression primer.

Beginning to apply first coat of Le Tonkinois No. 1 linseed oil varnish.
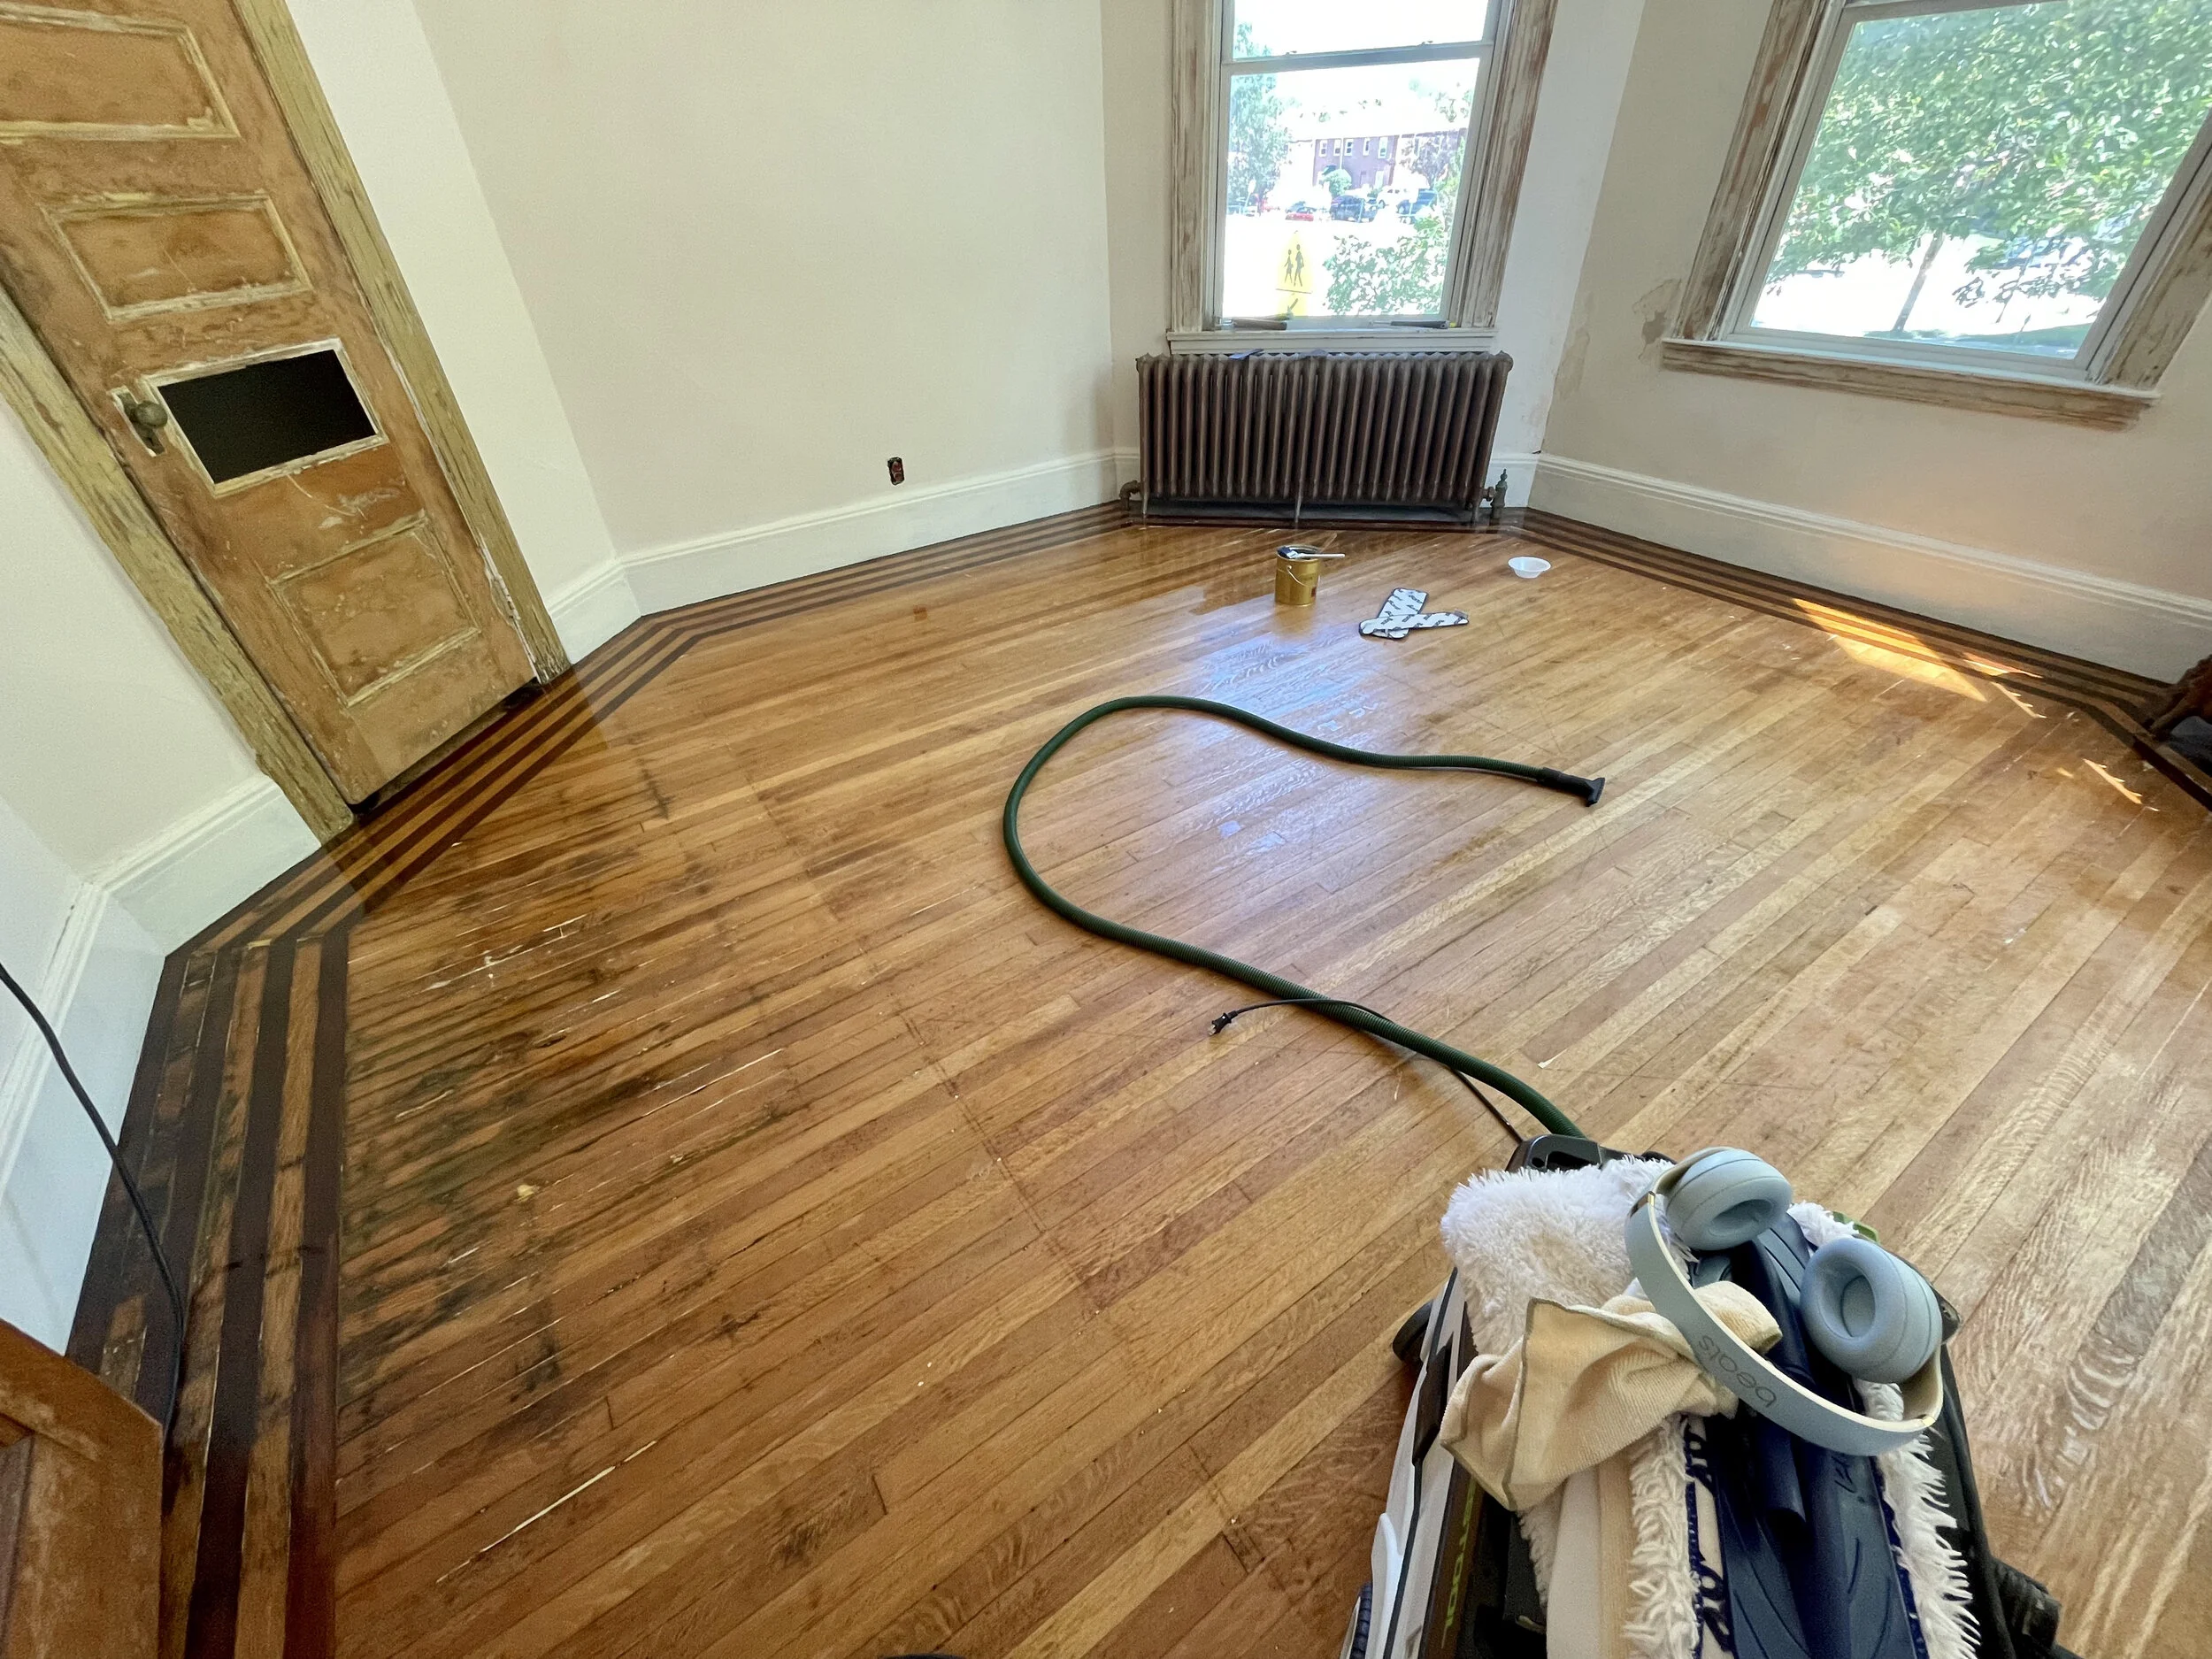
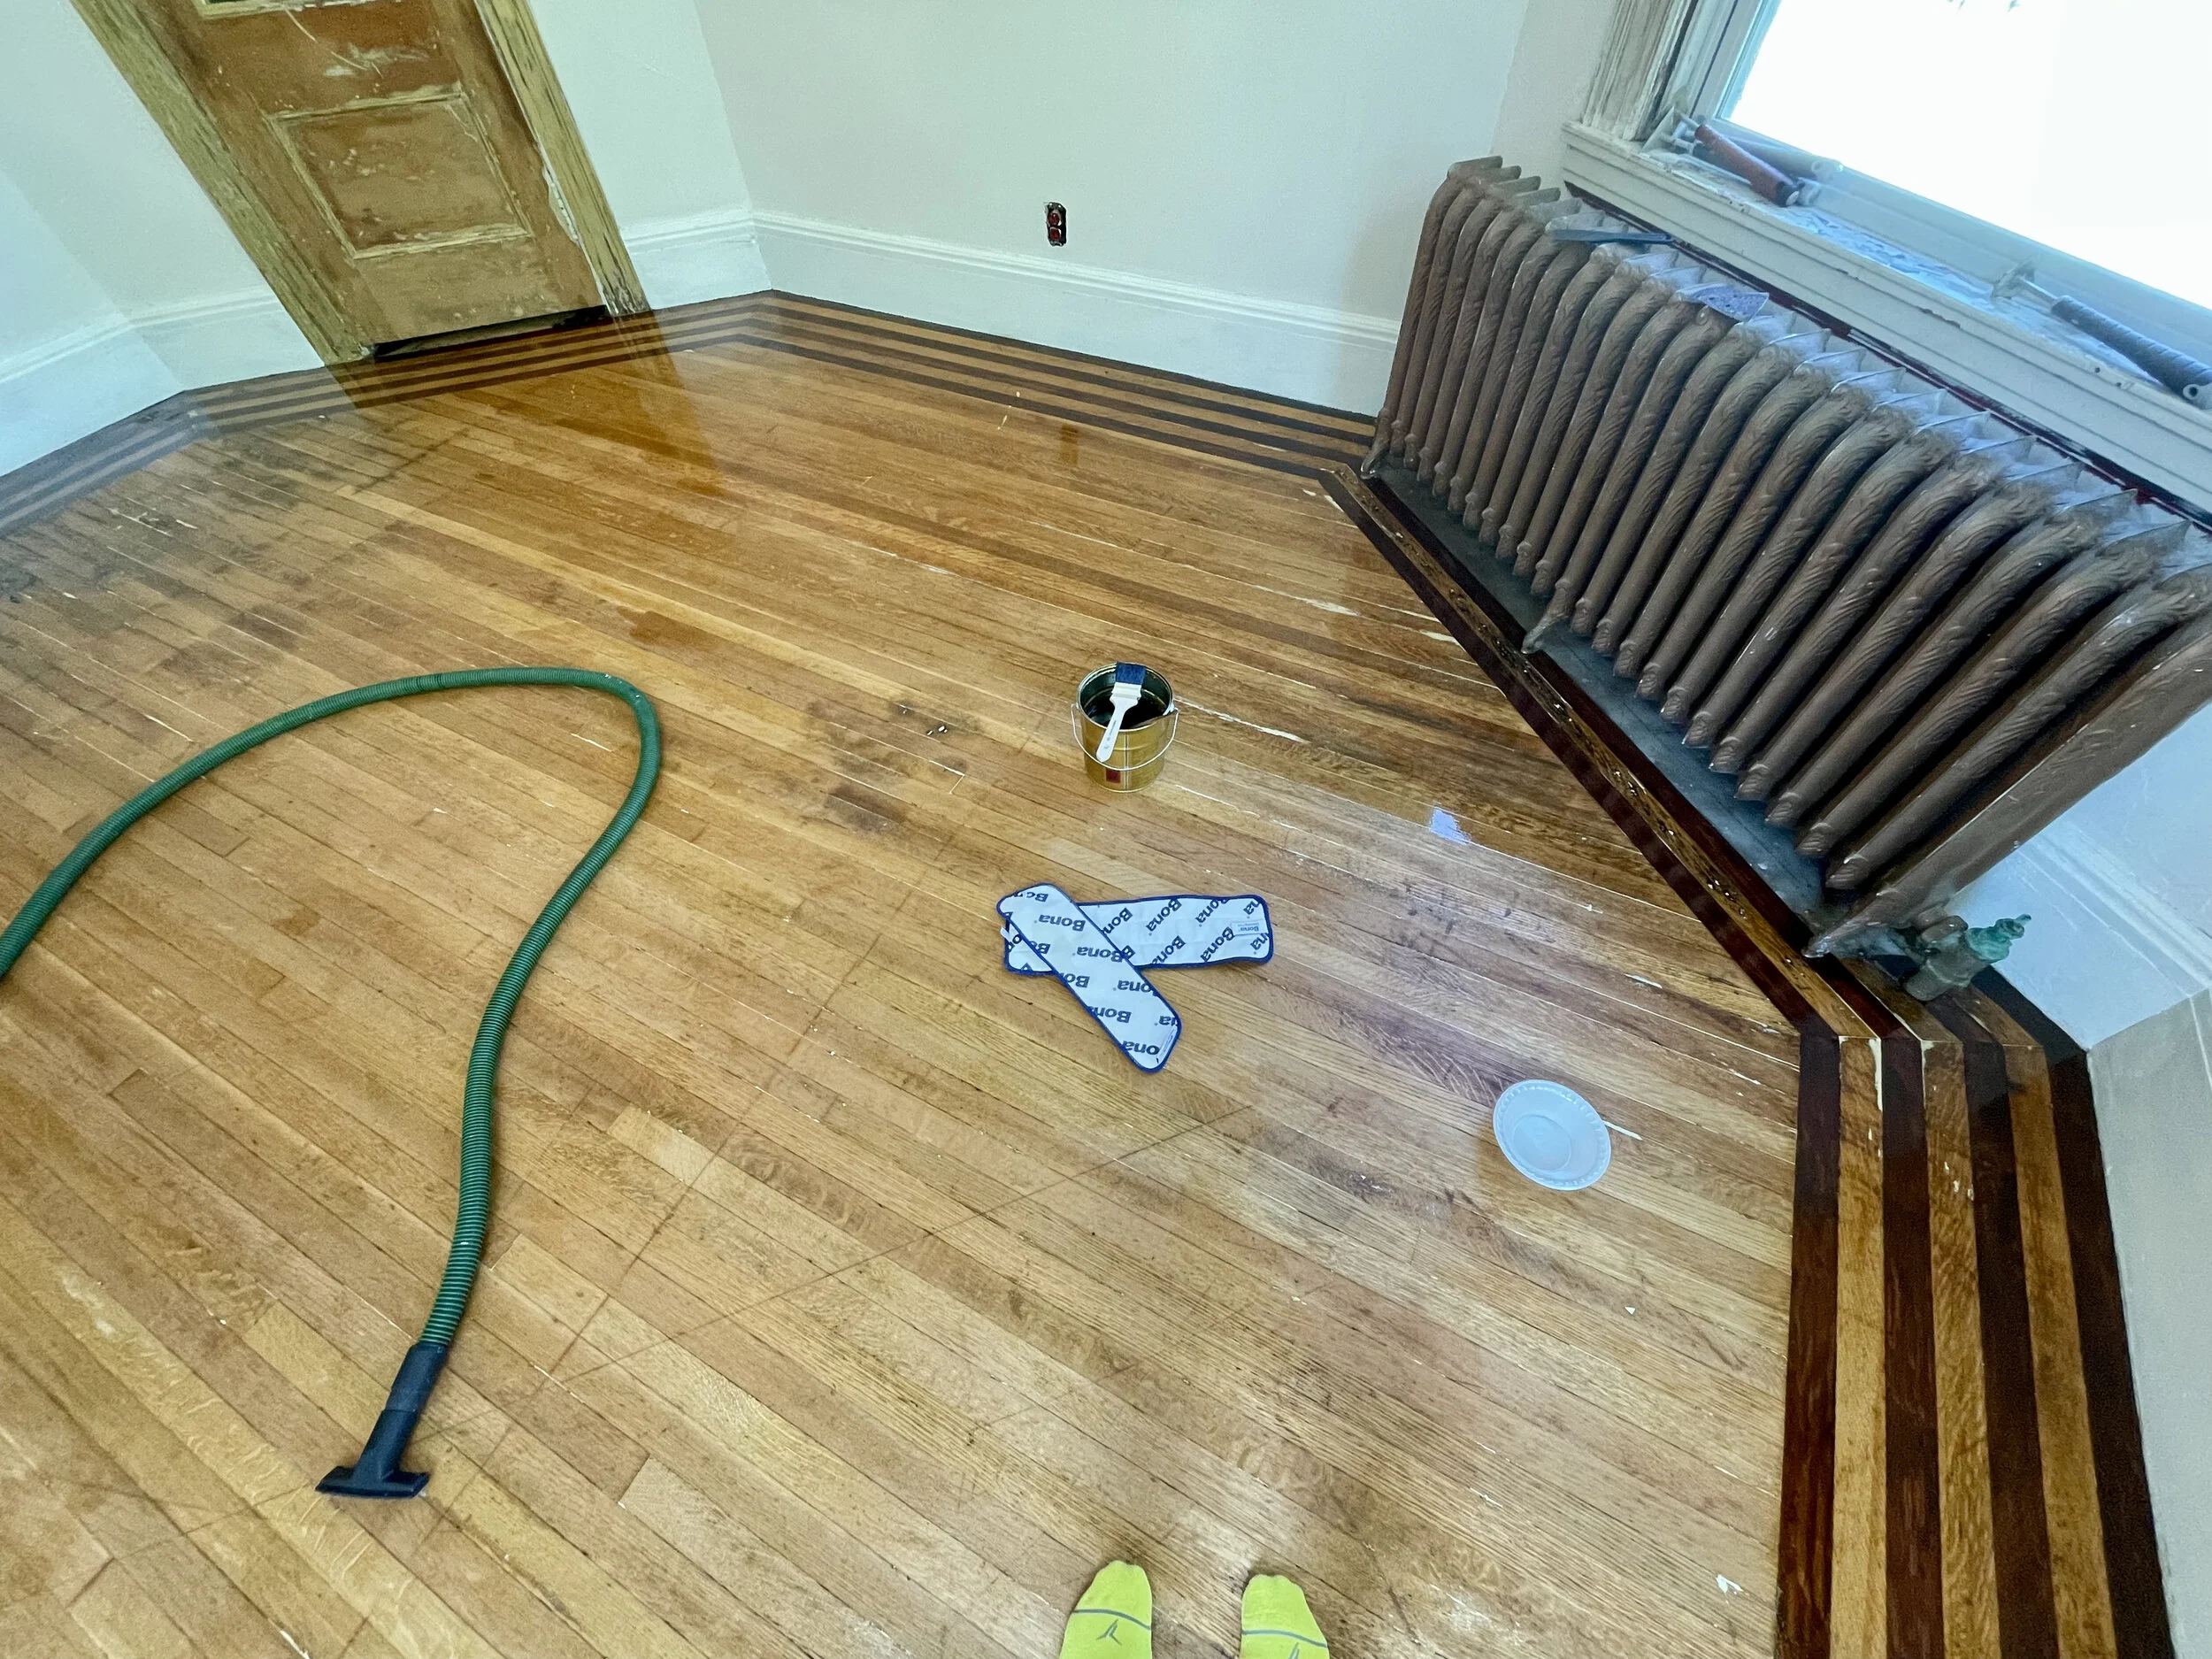
First application of Le Tonkinois No. 1 linseed oil varnish applied to floor.

Second application of Le Tonkinois No. 1 linseed oil varnish.
Third application of Le Tonkinois No. 1 linseed oil varnish.
Fourth application of Le Tonkinois No. 1 linseed oil varnish.

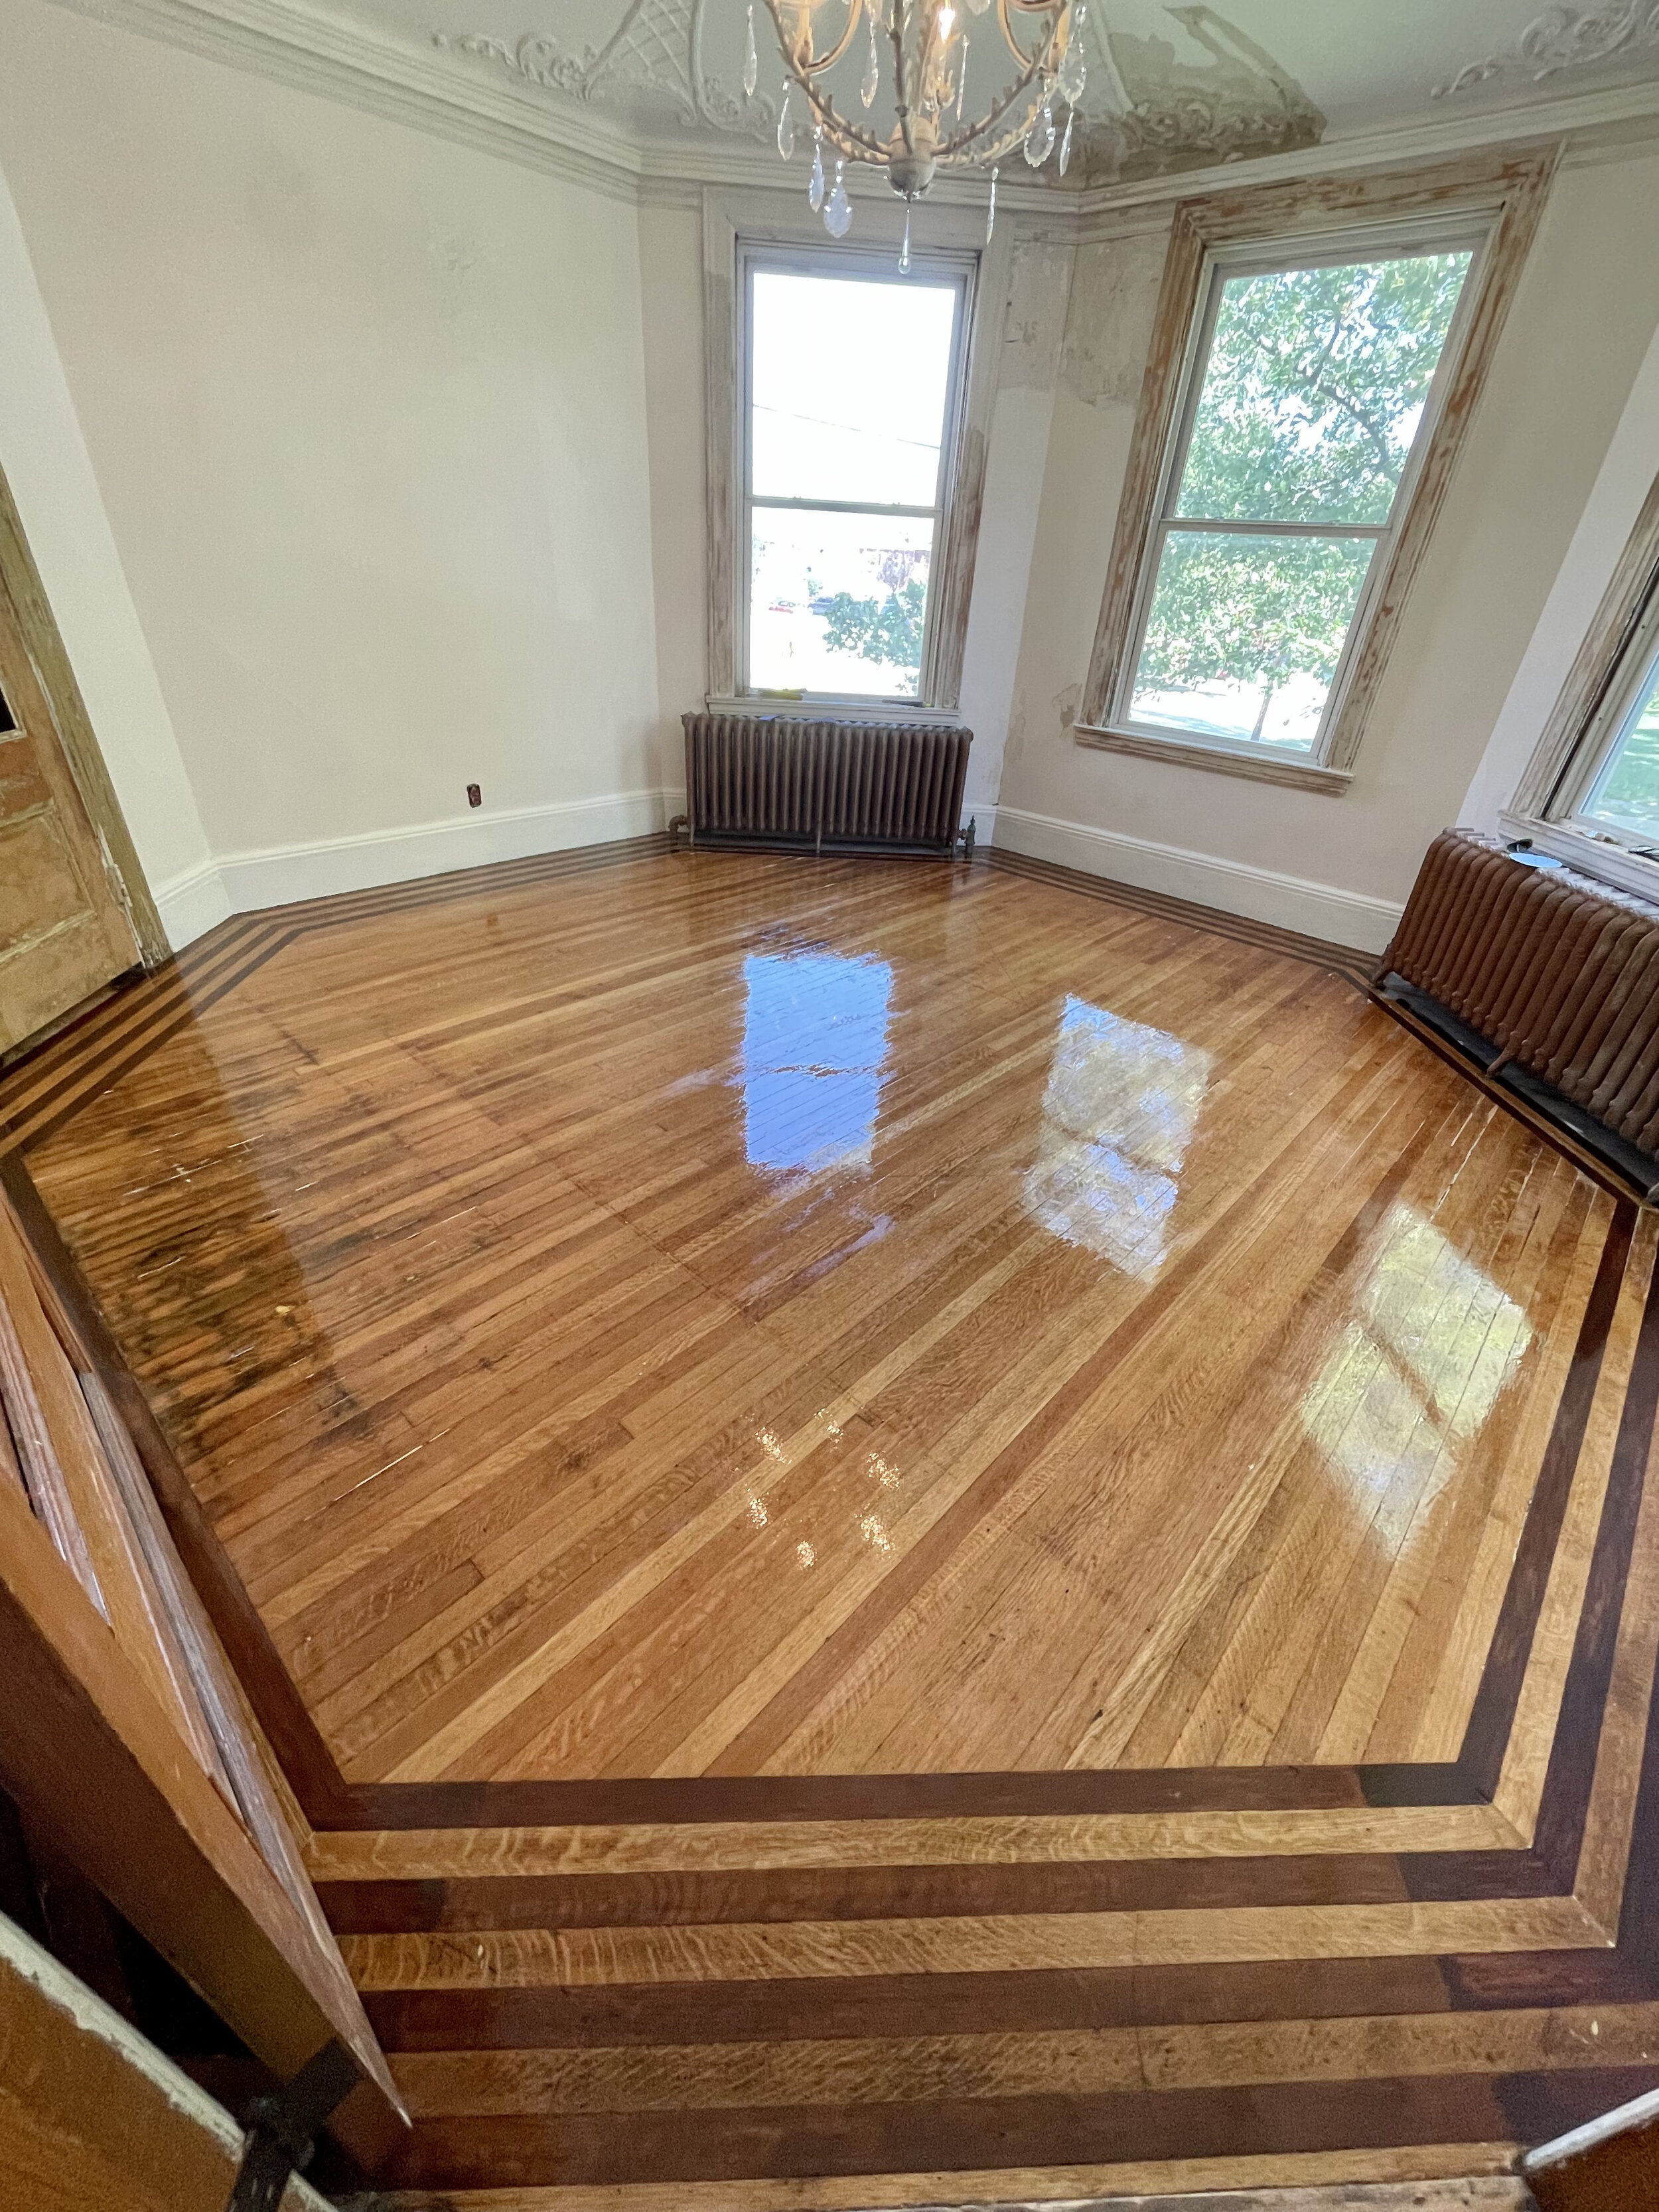
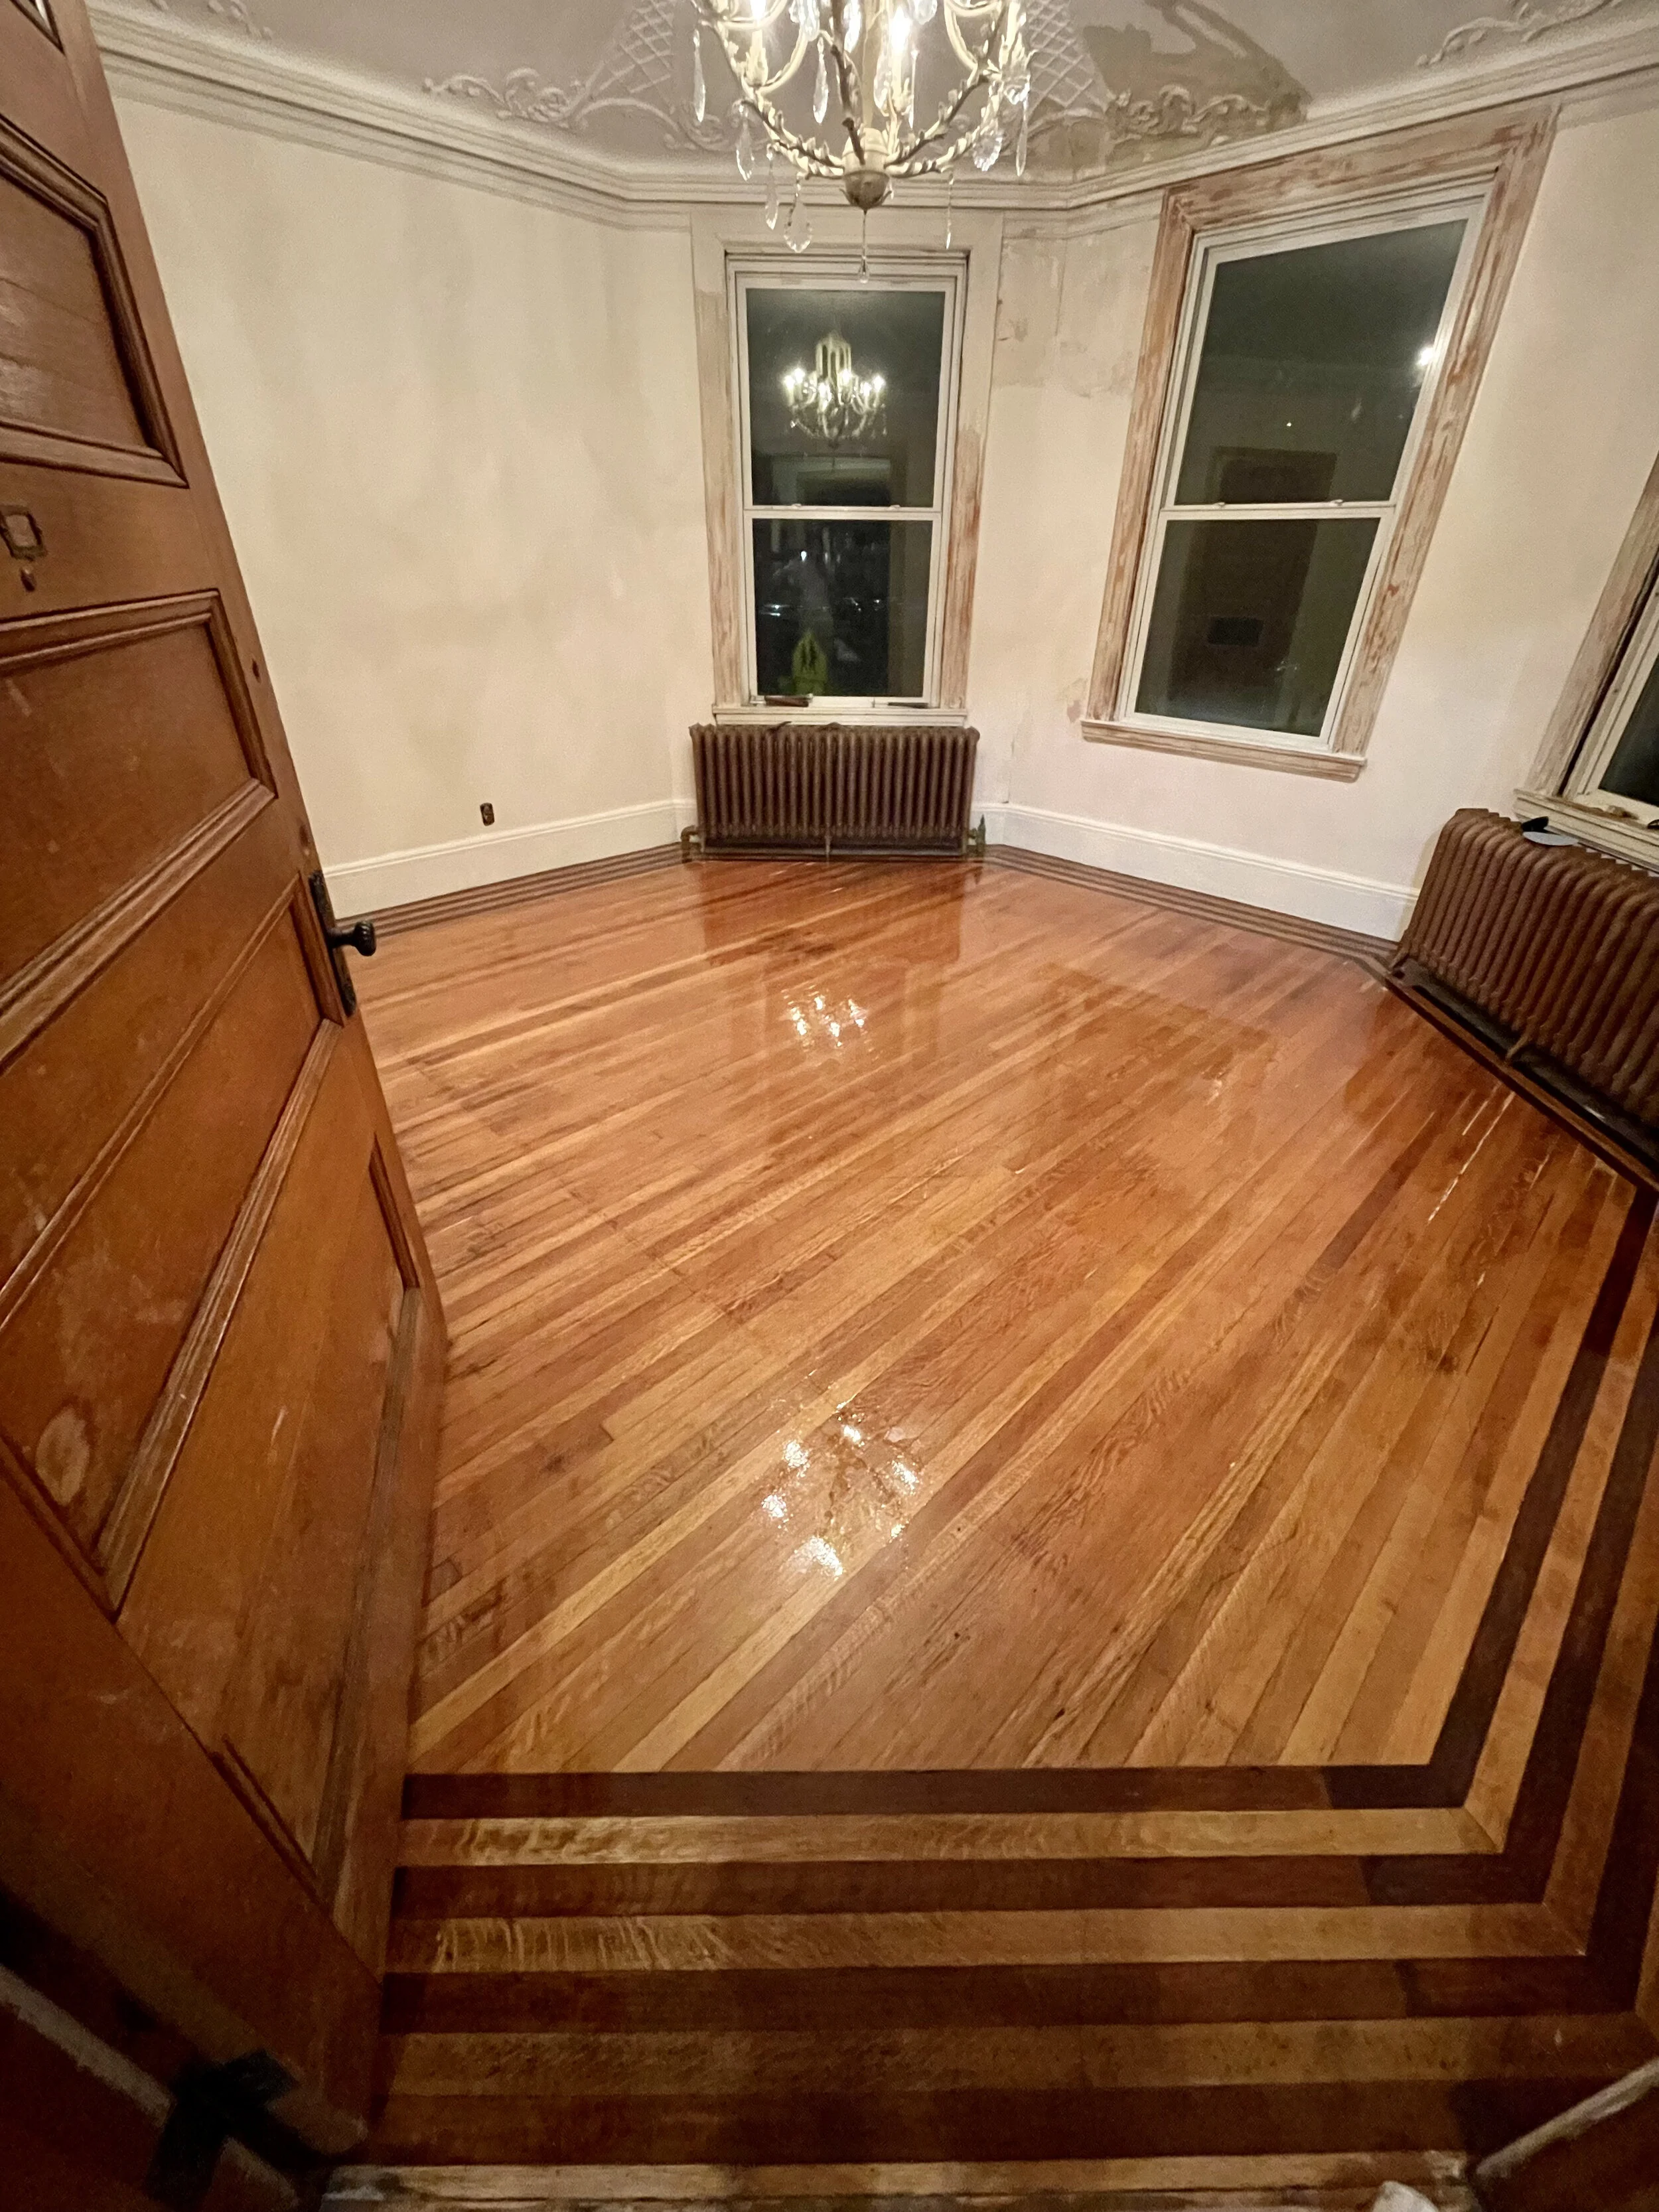
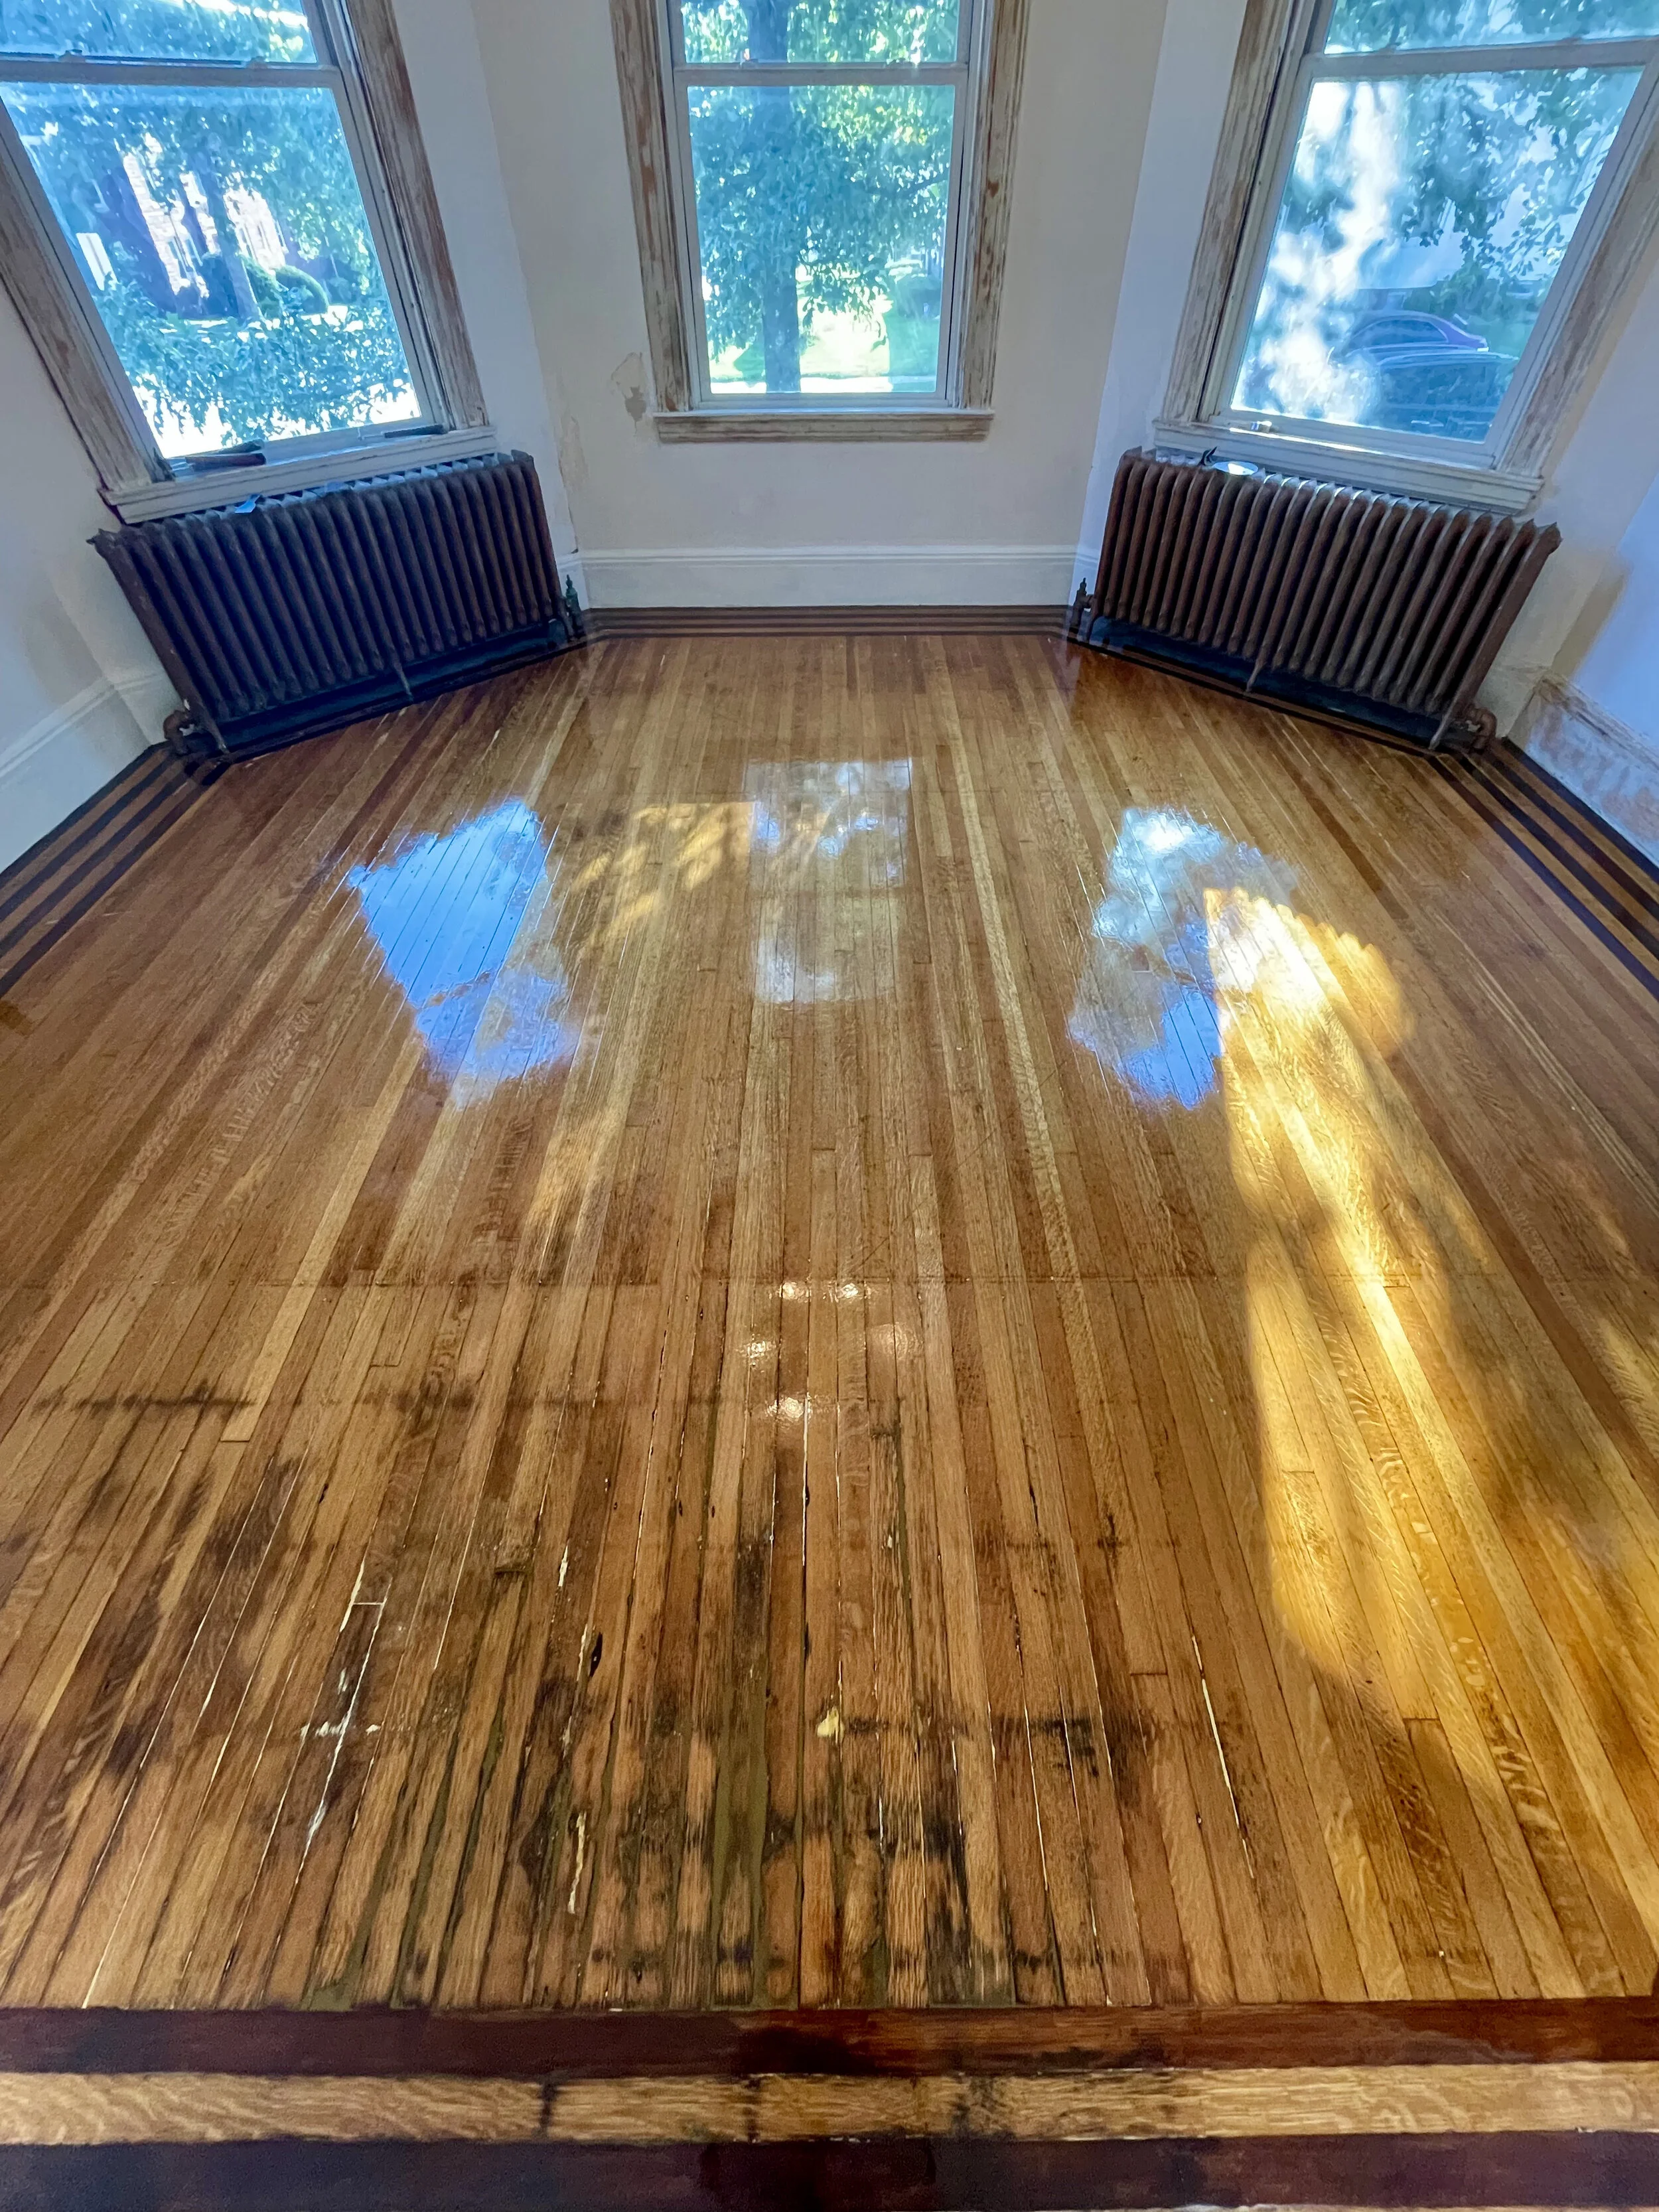
Here is the current result after 4 applications of varnish. I used two 2.5 liter cans in the first four coats and plan to apply a fifth and possibly sixth coat but I ran out of varnish and await the arrival of additional supplies. The colour has deepened significantly from the first layer of varnish to the fourth. The goal for this room was a classical finish that matches the grand staircase and quarter sawn paneling still extant in the 1886 manse which features the same deep gold oak gloss finish achieved in the eight sided parlour. I have aspirations for creating different effects on wood floors, such as non-classical treatments, but in this space I was striving to recreate a look similar to what may have been the original finish whilst retaining the deep scars and gouges that are the souvenirs of time. I smoothed and filled these crevices but did not attempt to hide or obscure them.
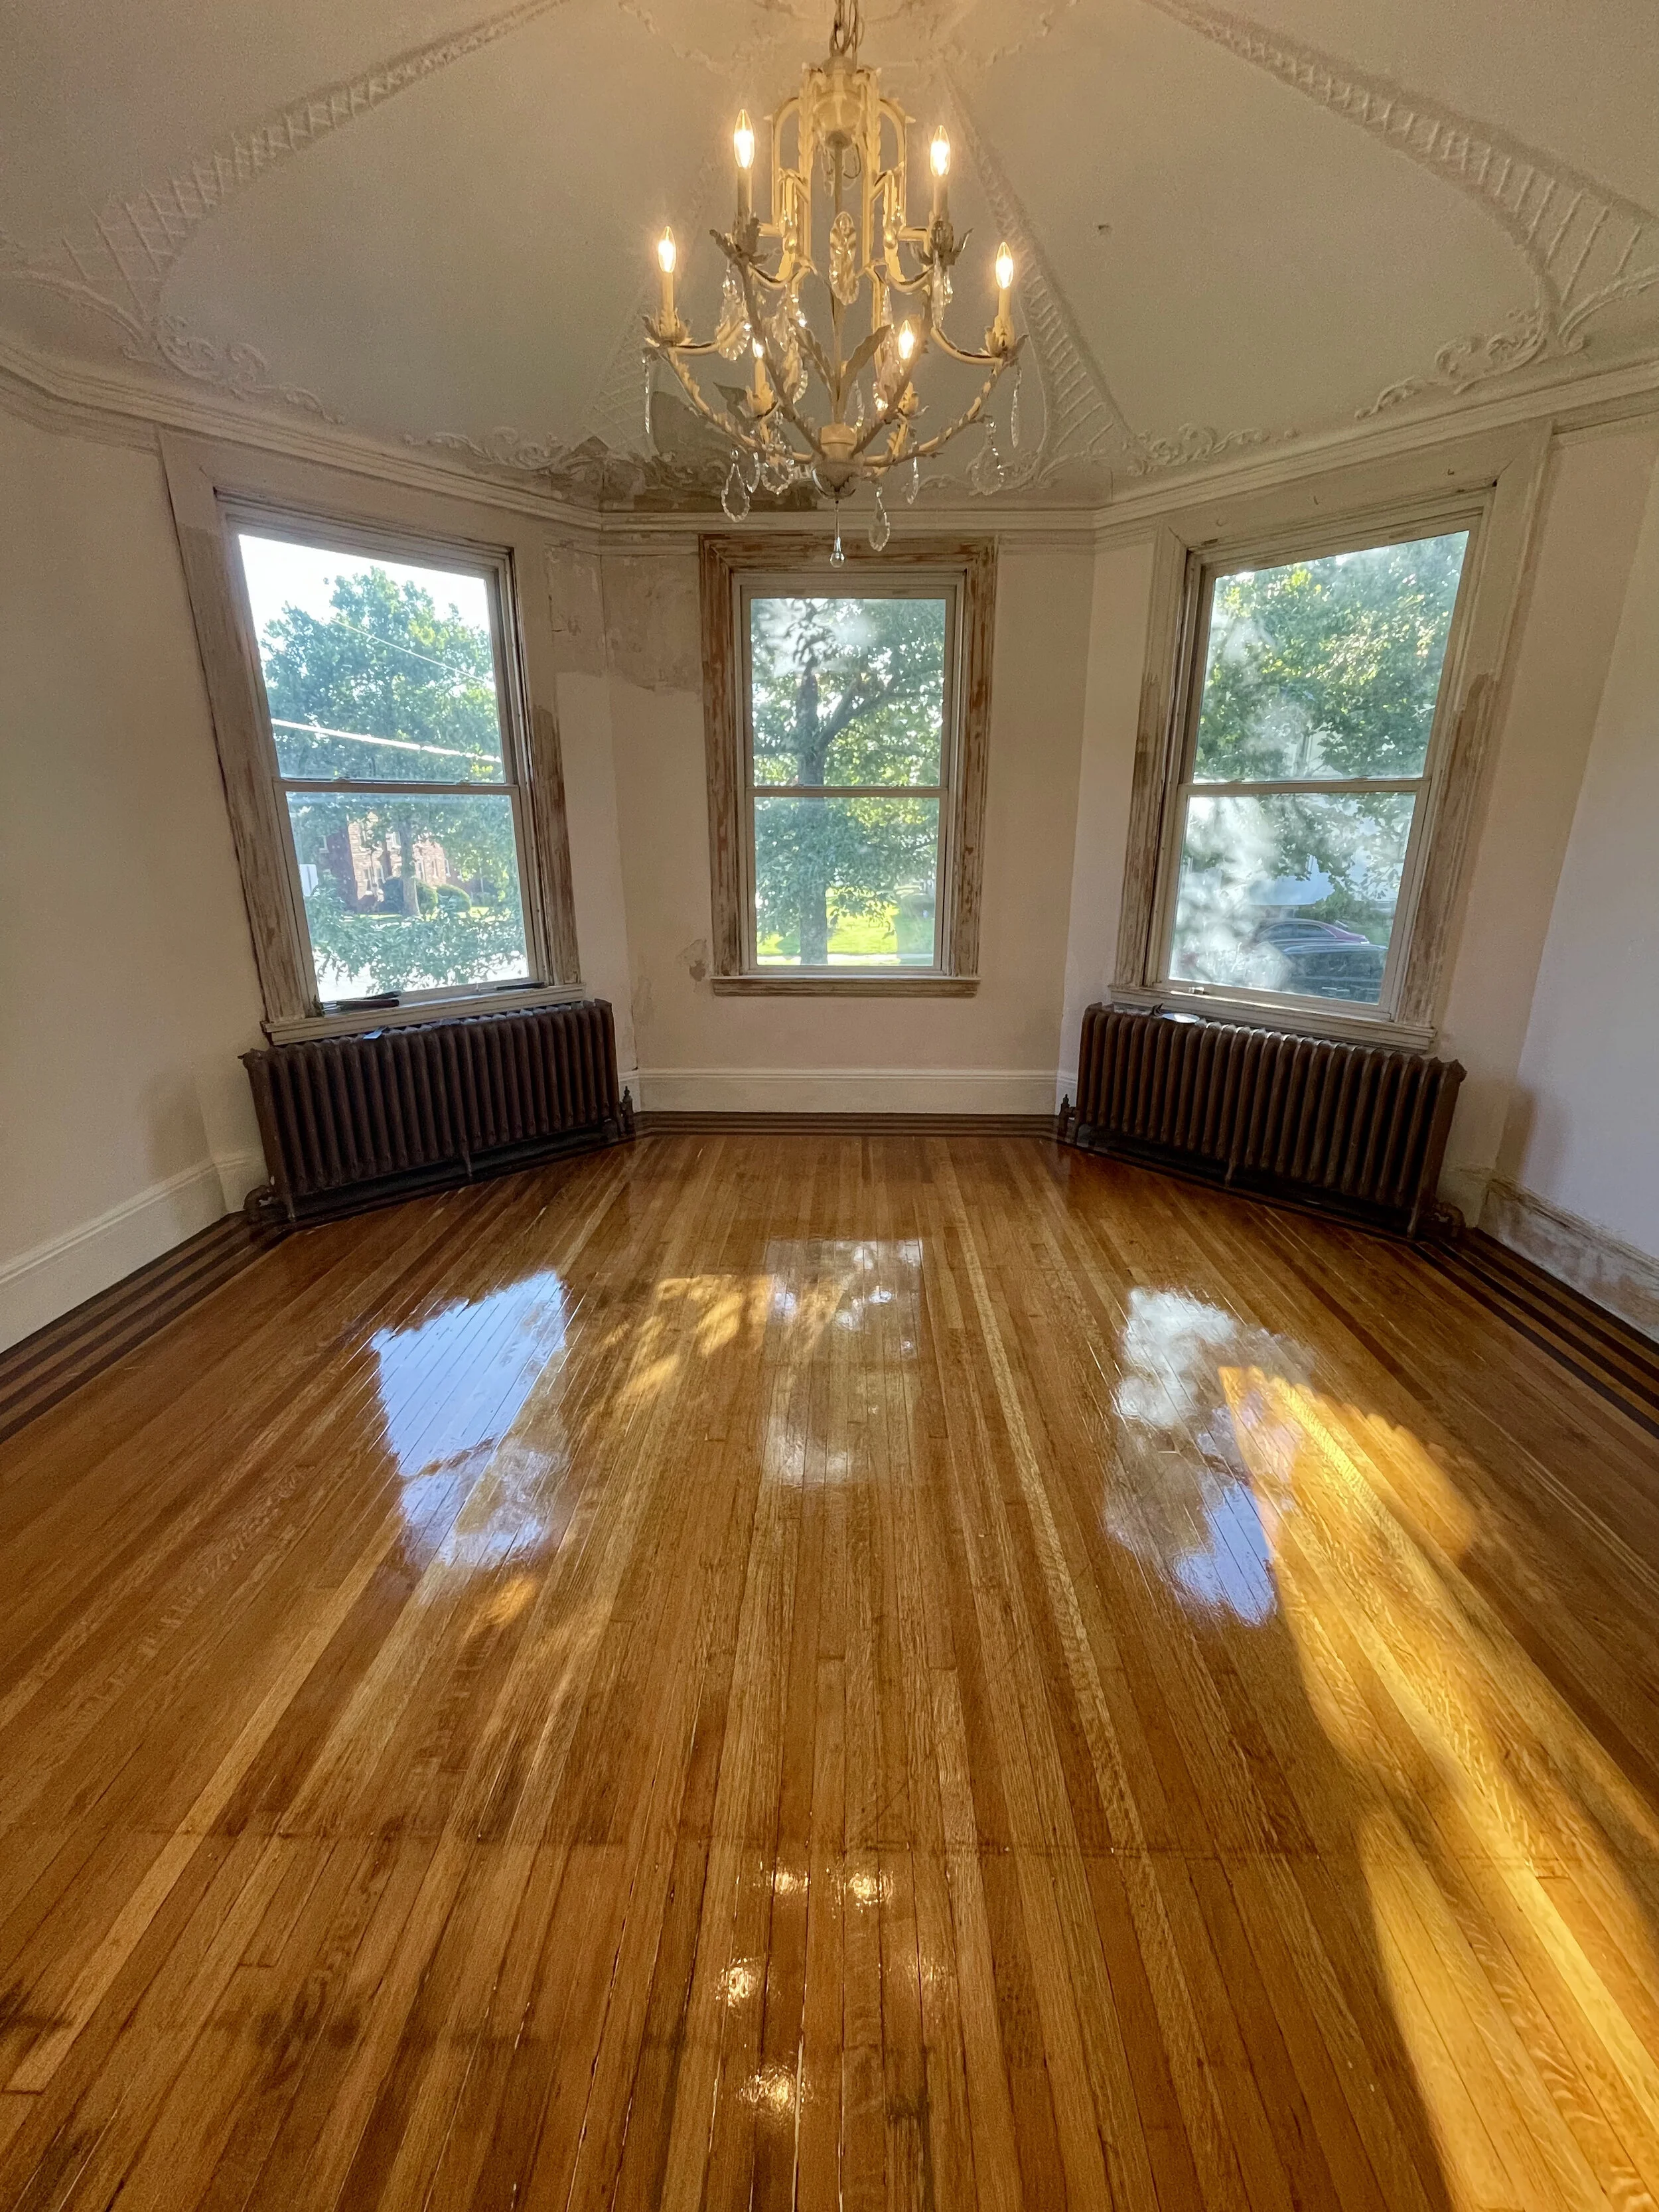
There is much more work to be done but herein presented is the current state of things for this wondrous eight sided domed chamber.
XO Emma