Kitchen Dreams vol. 11
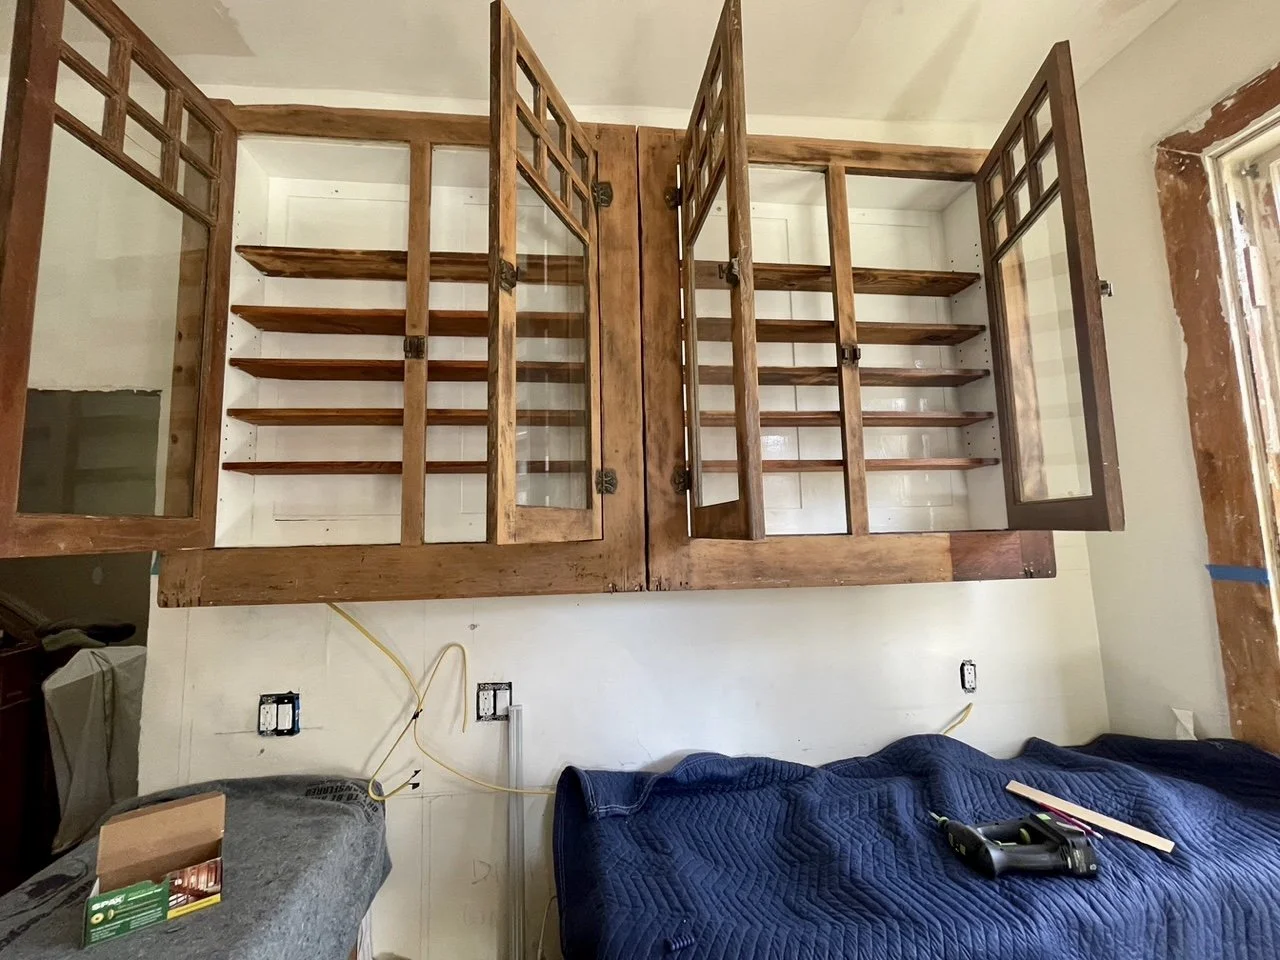
I cut, sanded and stained shelves for the antique upper kitchen cabinets I installed. I was quite pleased with them. I painted the interior of the cabinets a beautiful gloss white enamel and had plans to add a plate rack and additional shelving in the corner near the window.
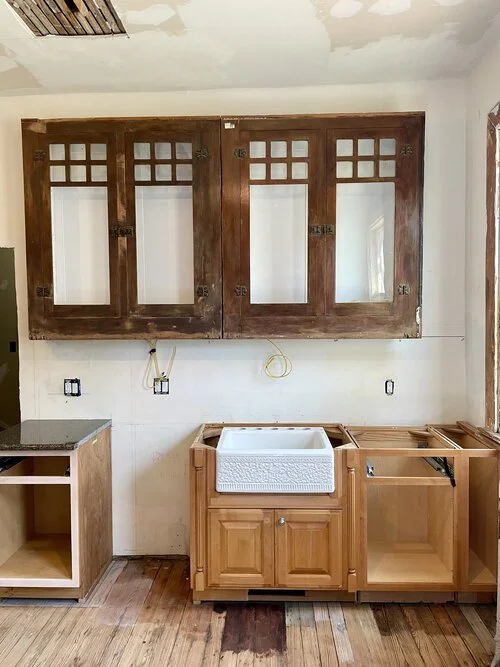
I finished the antique cabinets and filled them with treasure.

They are only 8.5” in depth, not deep enough for a plate, however, I was happily enjoying these upper cabinets in the kitchen.
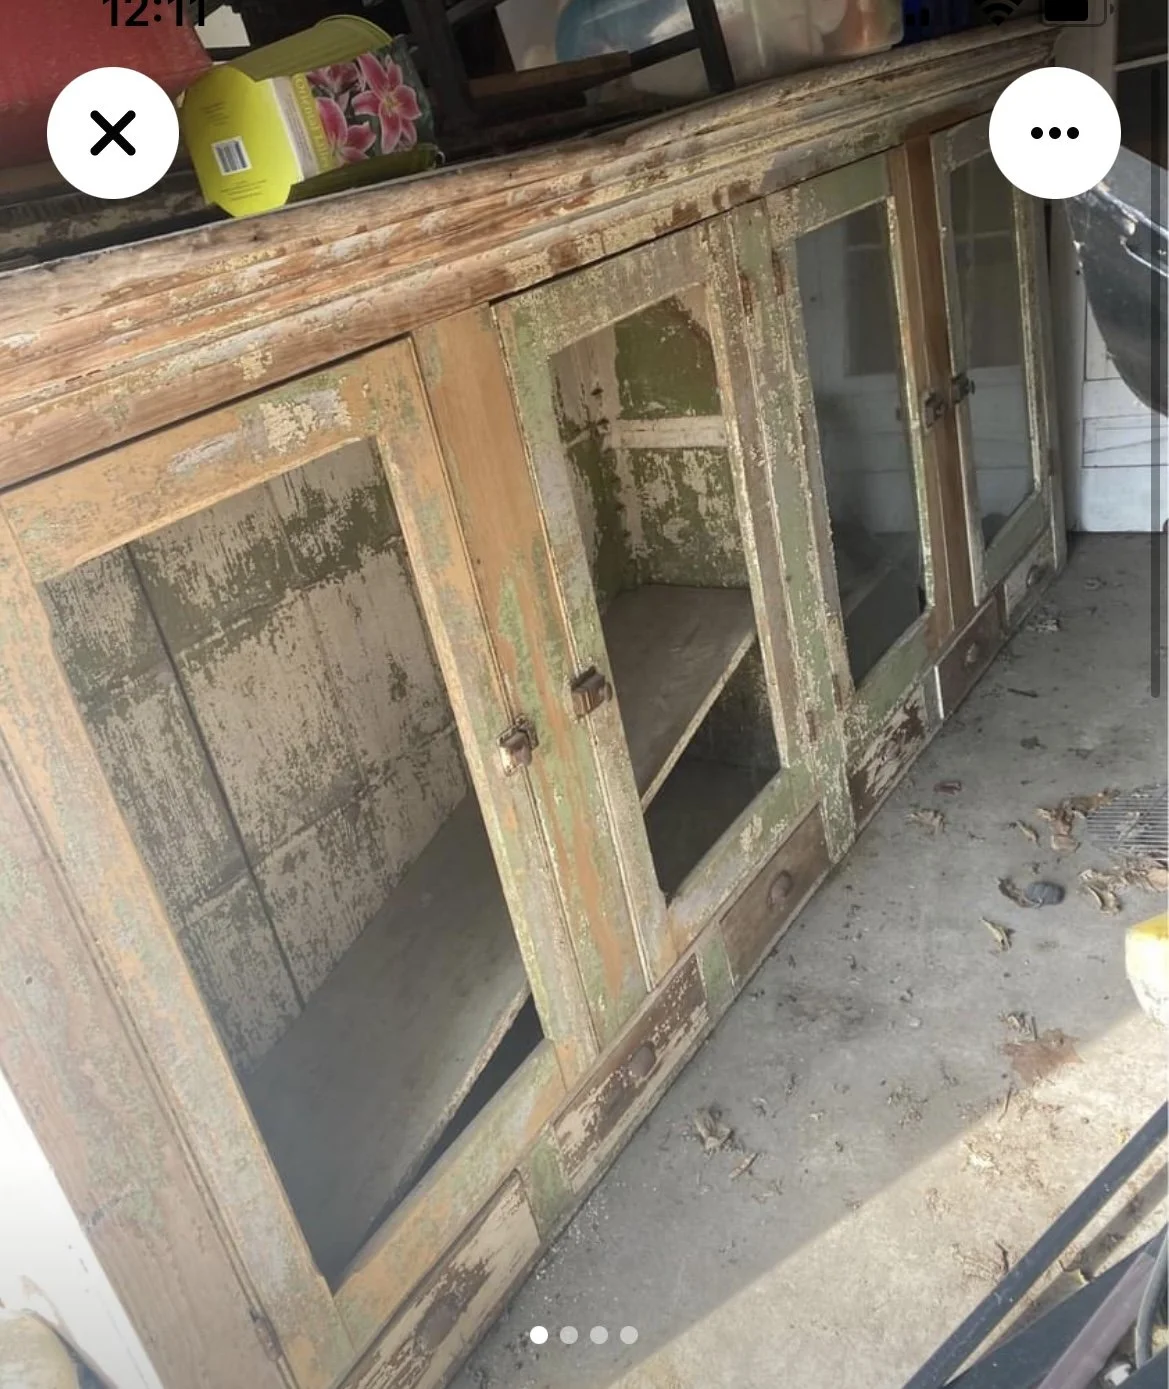
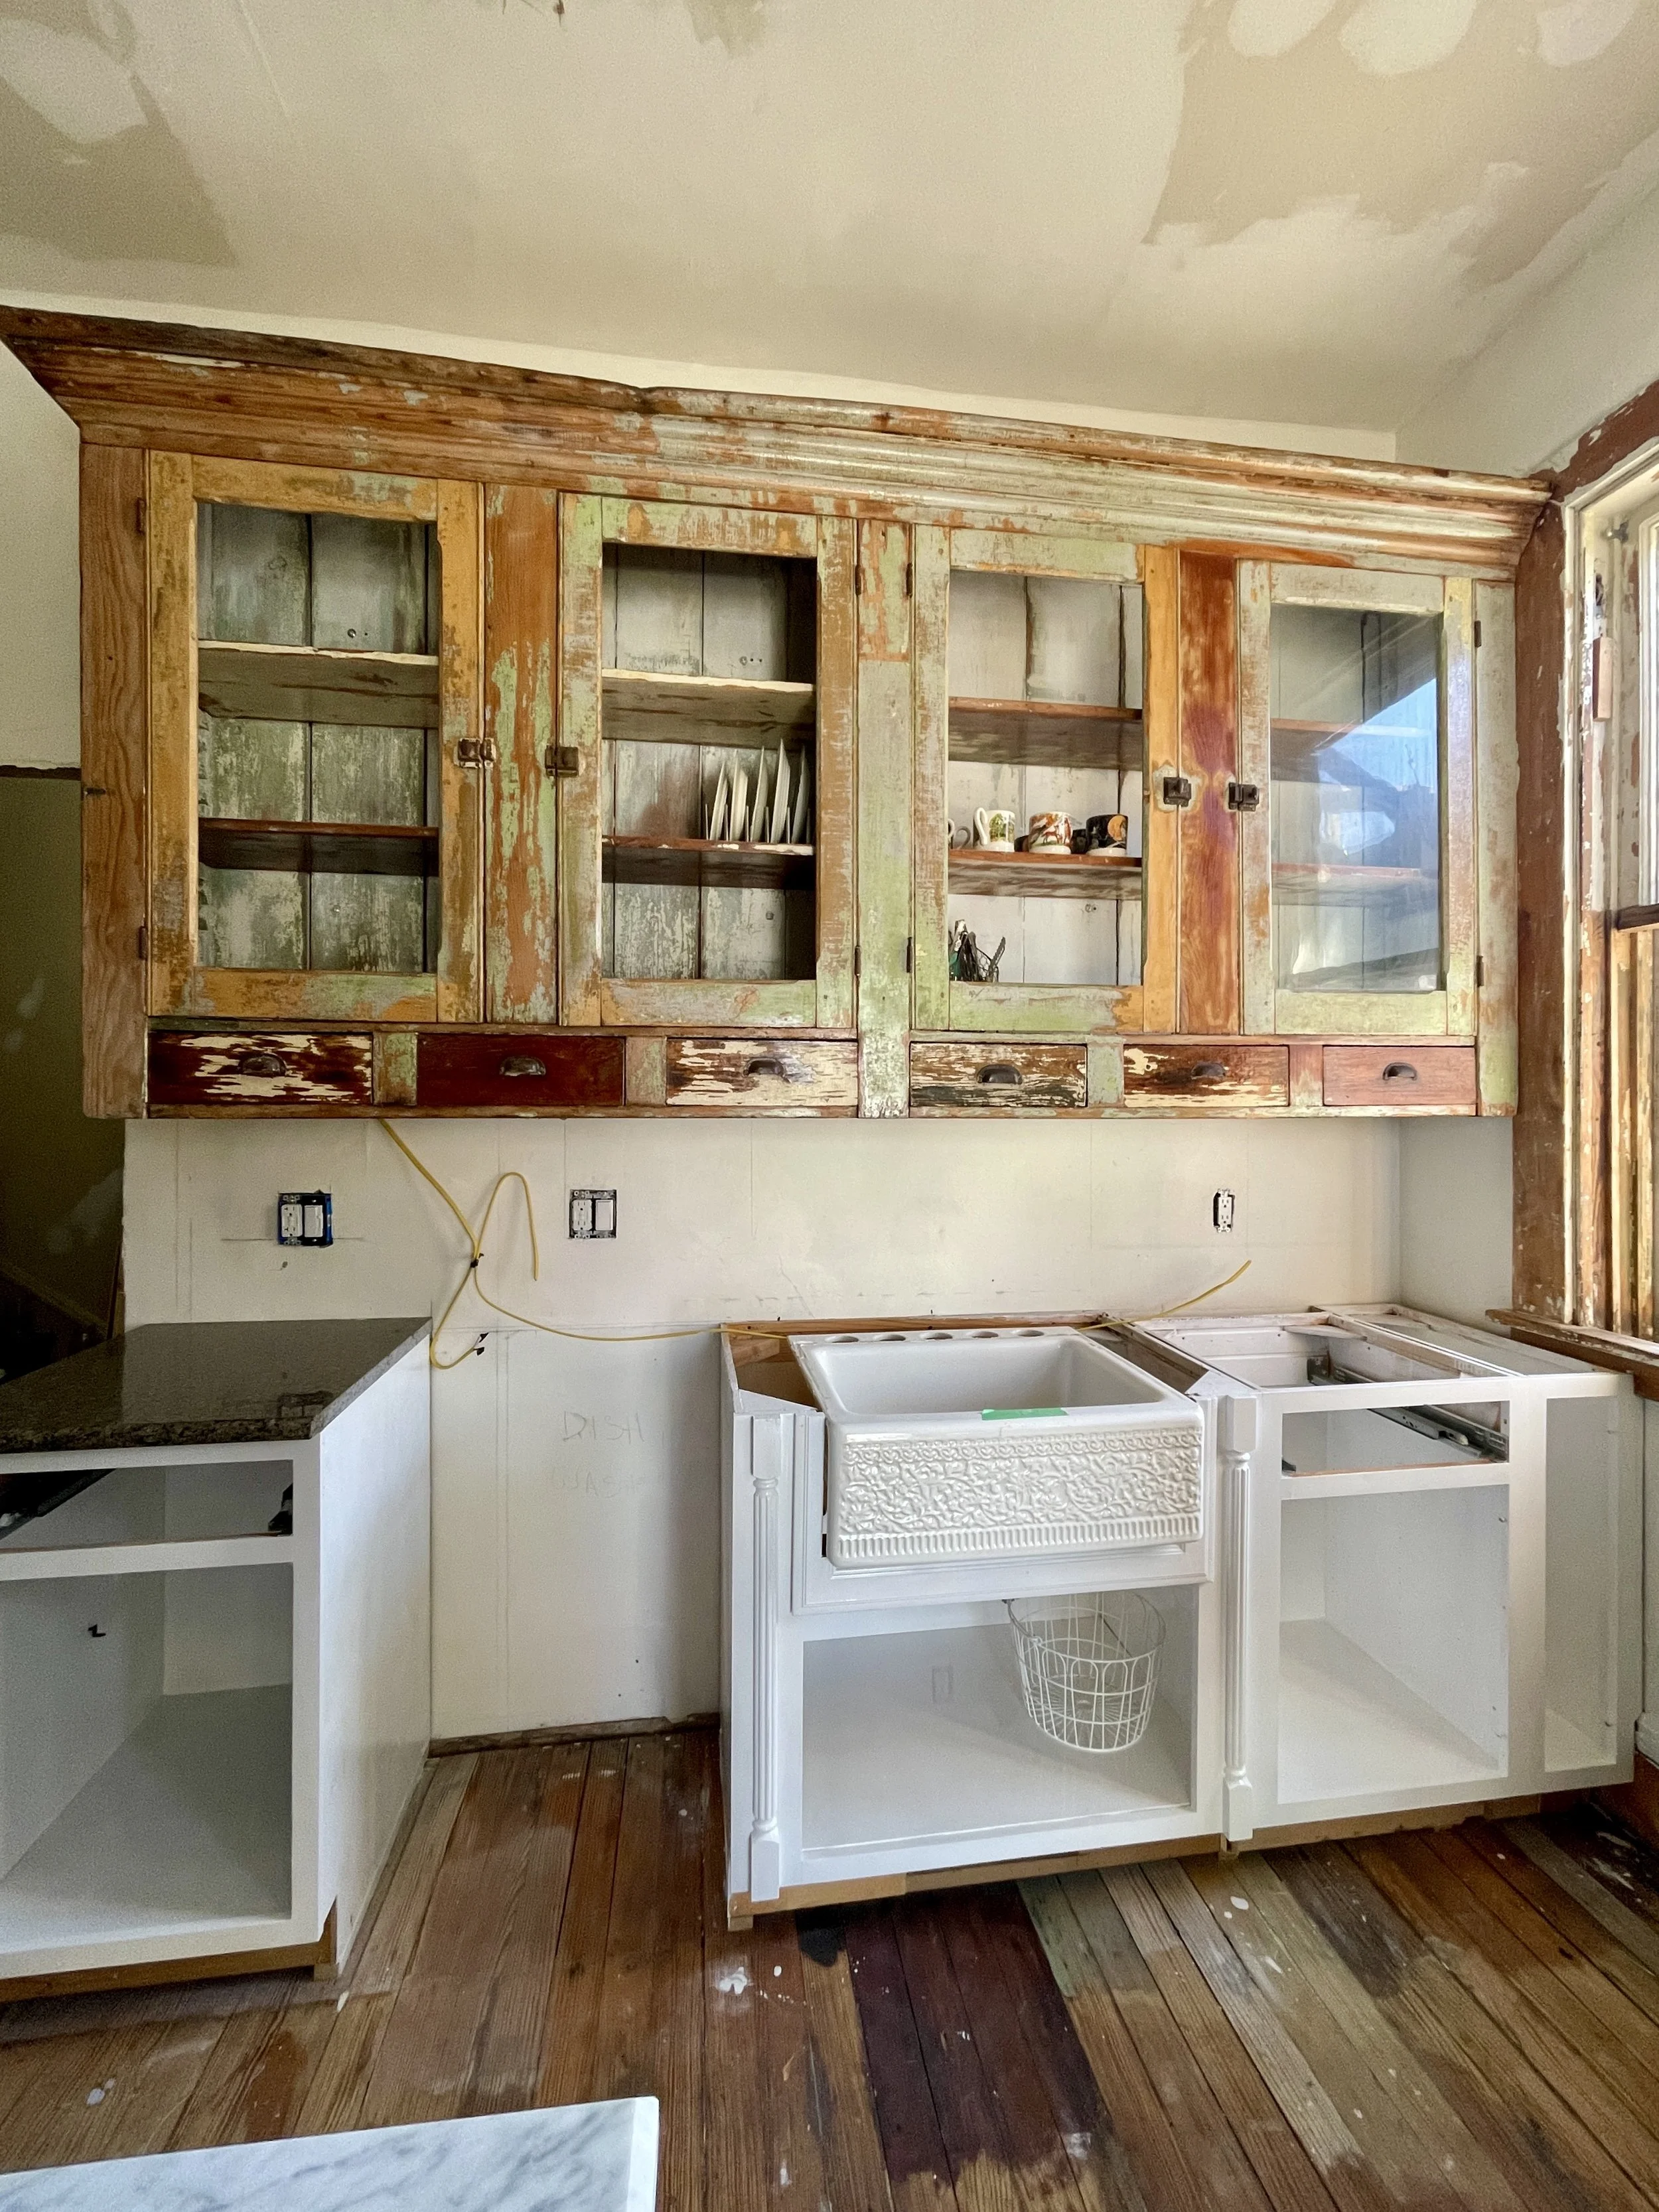
That is until this gigantic beauty appeared in my life. I dropped whatever I was doing and measured the kitchen wall space. This ancient giantess upper cabinet would just fit.
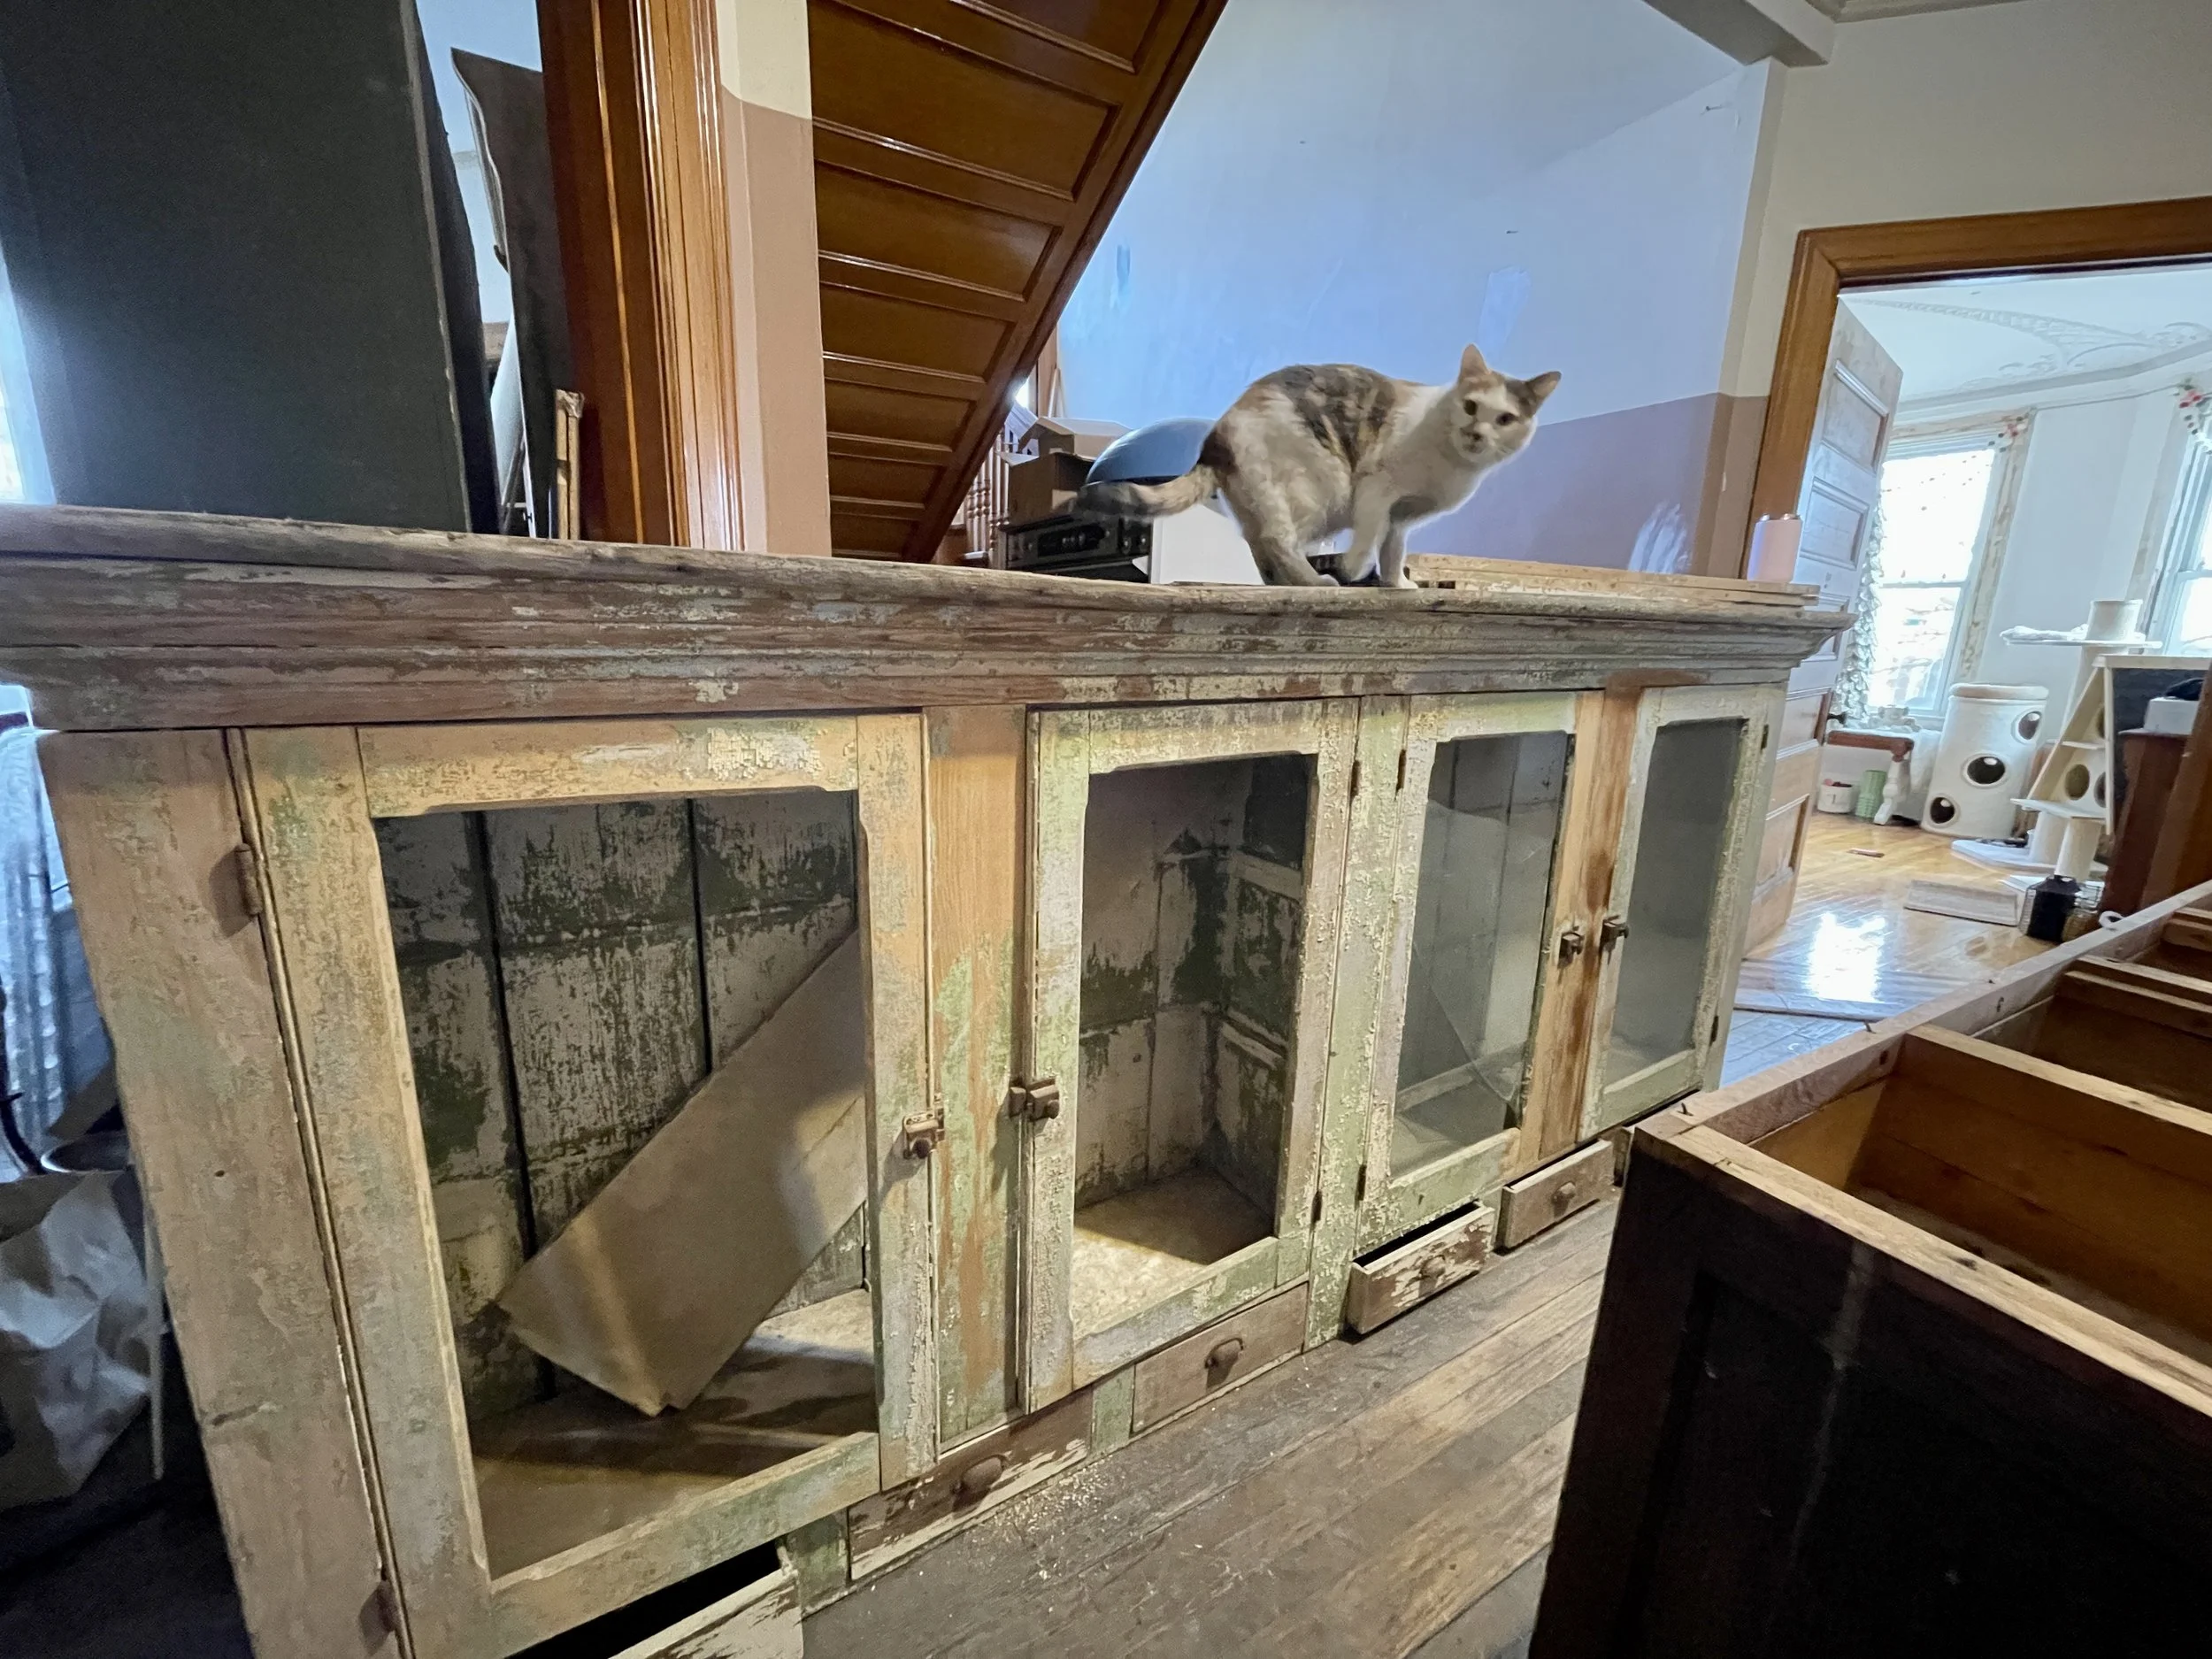
Here is the acquired giantess safely arrived in the entry hall. It was not easy to move her here. Queenie obviously supervised the entire affair. I did quite a lot of scraping and clean-up to the cabinet in the entry hall, but continued the restoration work in its new home mounted in the kitchen.
A closer look at how giantess looked when I first received her. All but one of the original glass in the cabinet doors were broken or missing.

I emptied out the lovely 8.5” cabinets and convinced Dad to help me take them down and put up the new gorgeous giantess.
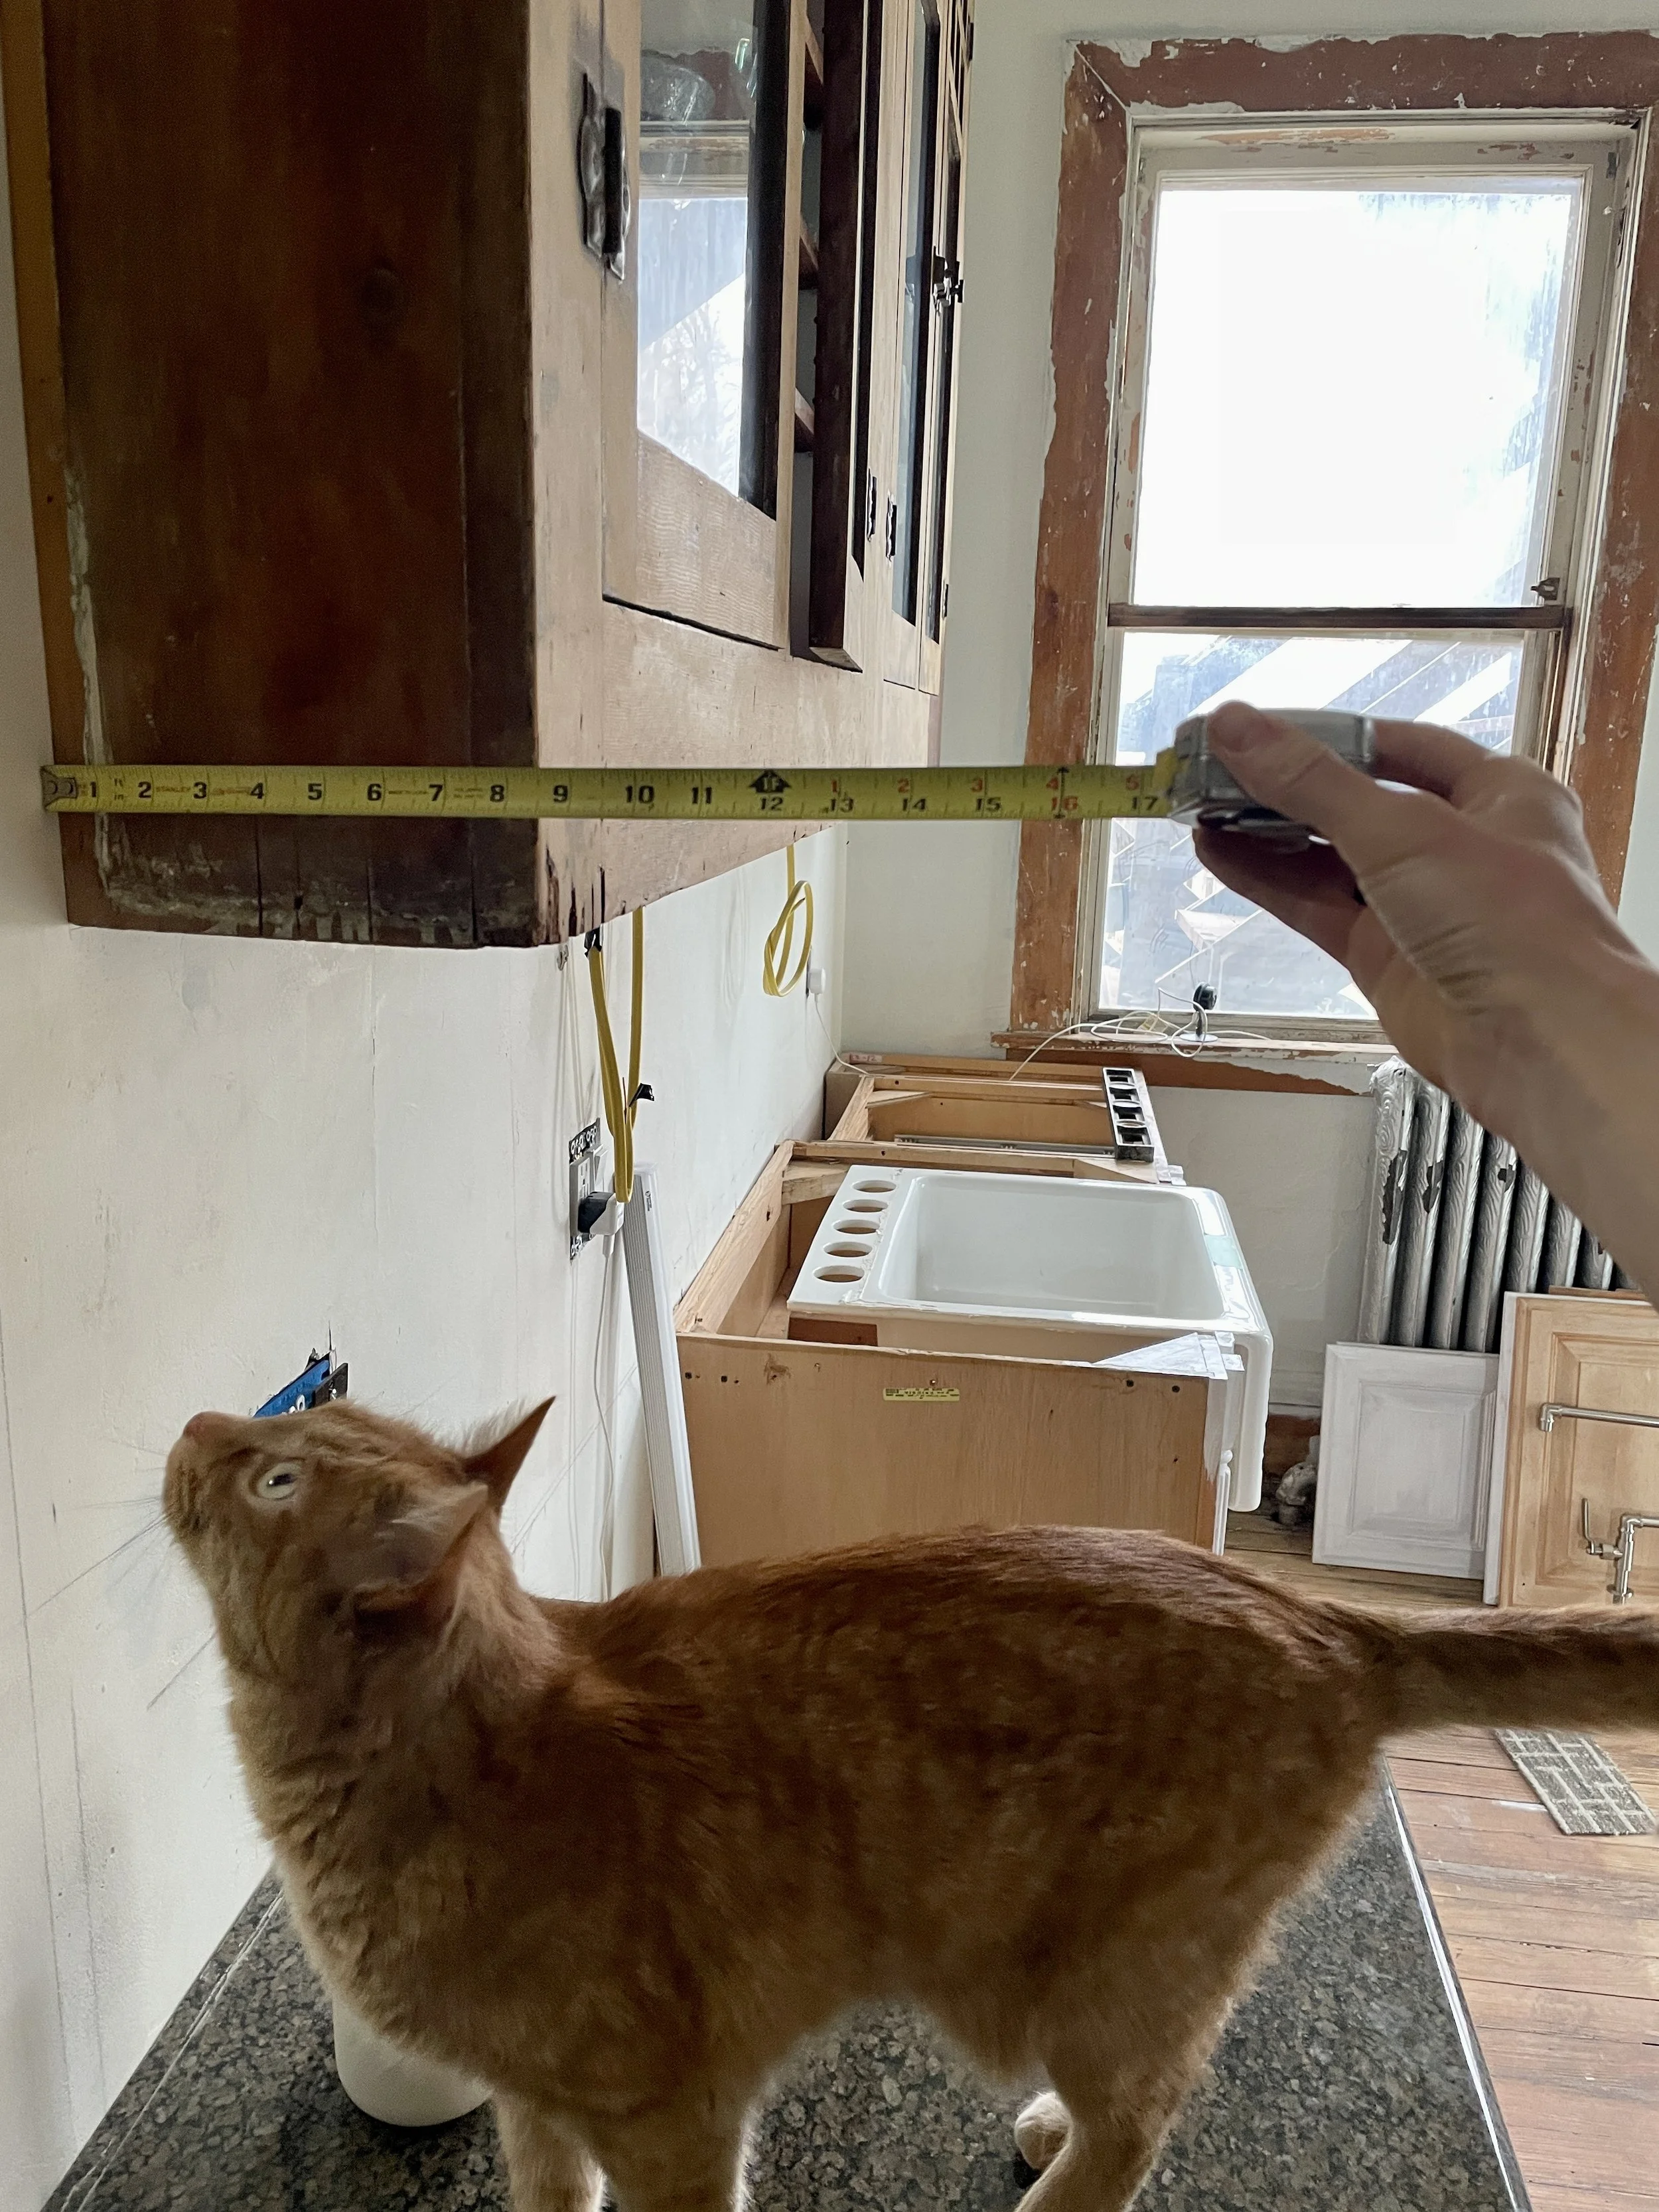
A glimpse back to the actual hanging of giantess. If you are wondering, yes, Dad and I moved and mounted the cabinet alone. We used wedges to level the cabinet and determine the perfect height for her to be mounted on the wall. We tried several different heights and held up the sink taps to aid in determining the perfect positioning.

Viktoriya helping.

Here she is (!)


The 30” opening is for the dishwasher. I am still collecting quotes for the countertops, which, has turned out to be a labourious and lengthy process.

One of the beautiful south facing windows that fill the kitchen with light. I currently have the sashes out to restore them. I have a new wood storm window that I had custom-made, but I still have to hang it and have the glass put in. The aluminum storm window pictured will be removed and replaced with the wood storm window. Many many projects all around…

Here is the west wall of the kitchen, where the 30” range will live. There is still quite a lot of work that must happen on this side of the kitchen, but here she is in her current state.

This little shelf cabinet I had custom built so that the range worktop area can continue around the soffit (which contains plumbing vents and electrical wiring). One of my goals with this kitchen design is to maximise the available wall-space as it is limited due to the number of doors, windows, radiators and other historic features that make the house unique, but also take up considerable wall-space. I believe this is why most people opt to tear out original features such as walls, windows, doors and radiators, but I prefer the challenge of working around and with them. :)
